Work Schedules | Defining time segments
Time segments are used to fully define each working day. Time segments must be consecutive, not overlapping, and must completely define the working day from start to end.
To define time segments:
-
Select the Working Days tab.
-
On the Working Days Home page, select the working day you want to define with time segments.
-
From the Time Segments related list and select New:
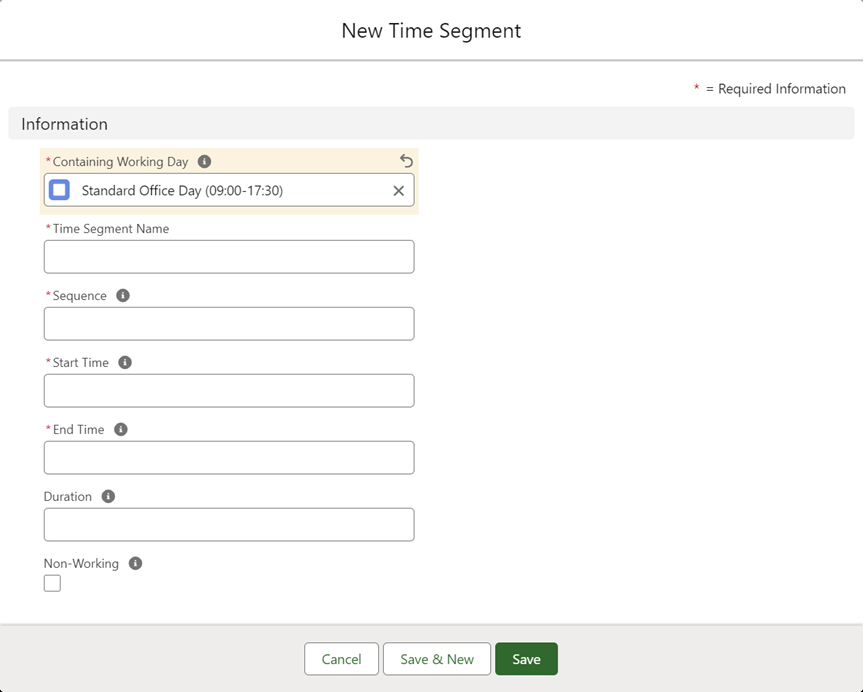
Sage People displays the New Time Segment page:
-
Complete the fields as follows:
Field Description Containing Working Day The name of the working day hosting this Time Segment.
Automatically completed with the name of the working day you selected at the start of this procedure. To choose a different working day, select Containing Working Day Lookup, find and select the day you want.
Time Segment Name A name for this time segment, such as Morning Shift, First Break, Afternoon.
Sequence An integer indicating the order of this time segment in the working day. Sequence numbers must start at 1 for each working day and must be consecutive.
You can define up to 9999 time segments in each working day.
Start Time The time of day on the 24 hour clock when this time segment starts.
End Time The time of day on the 24 hour clock when this time segment ends.
Duration Automatically calculated when you save this time segment definition. Leave blank.
Non-Working Checkbox. If checked, this time segment is treated as non-working, for example lunch or break time. If unchecked this time segment is treated as working time.
-
Select:
-
Save to save this time segment definition and display the Time Segment Detail page.
-
Save & New to save this time segment and display a new New Time Segment screen to define another.
-
Cancel to discard your changes and return to the Working Day Detail page.
-
-
Repeat the steps to define all the time segments making up the working day.
Time segments must be consecutive with no gaps. Check the value of the Config Status field to see if sequencing is wrong, or if the start and end times overlap.
The following table displays example time segments for a 7.5 hour working day and a non-working day:
| Working day name | Time segment name | Sequence | Start time | End time | Duration | Non-working |
|---|---|---|---|---|---|---|
| Standard 7.5 hours | Morning | 1 | 09:00 | 12:30 | Automatically calculated | Not checked |
| Standard 7.5 hours | Lunch | 2 | 12:30 | 13:30 | Automatically calculated | Checked |
| Standard 7.5 hours | Afternoon | 3 | 13:30 | 17:30 | Automatically calculated | Not checked |
| Non-working day | Non-working | 1 | 00:00 | 00:00 | Automatically calculated | Checked |
When you have defined the time segments making up the working days you are ready to create the work schedules to host them.

