Export with dataloader.io
-
Get the username and password for the org from which you want to export data.
-
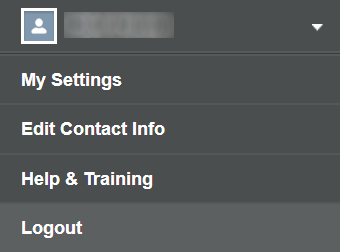
Log out of all other orgs other than the org from which you wish to export data. Ensure you log out of the orgs by going to your name in the top right corner and selecting Logout rather than just closing the browser:
 Warning
If you do not log out, Salesforce Dataloader.io can automatically log you in to the wrong org.
-
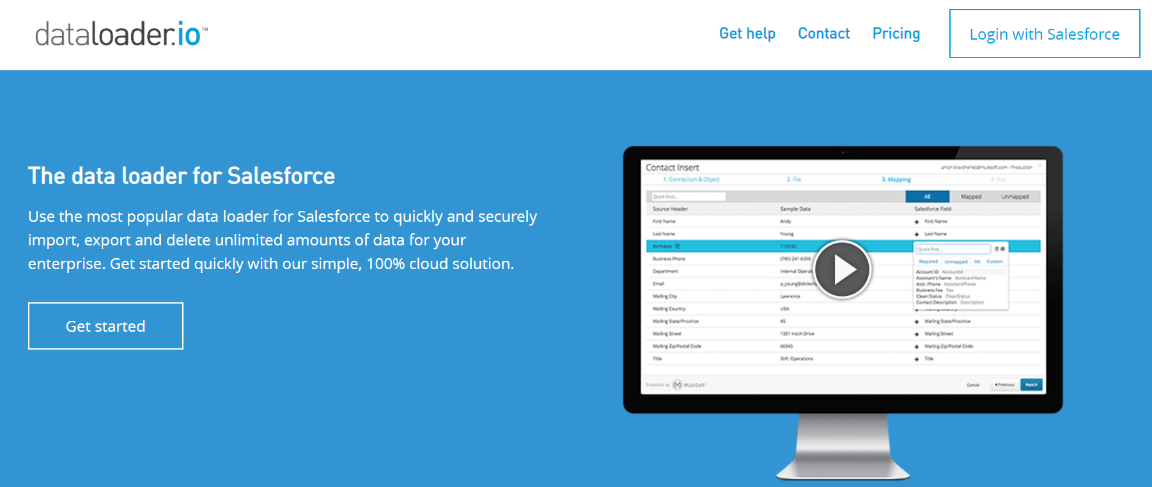
Open a new browser window and enter "dataloader.io" in the address bar.
-
From the top right corner, select Login with Salesforce:
-
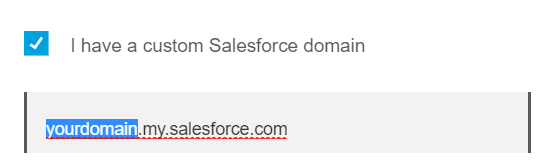
If the org from which you want to export has a custom Salesforce domain, select I have a custom domain, and enter the custom domain in the text field:
-
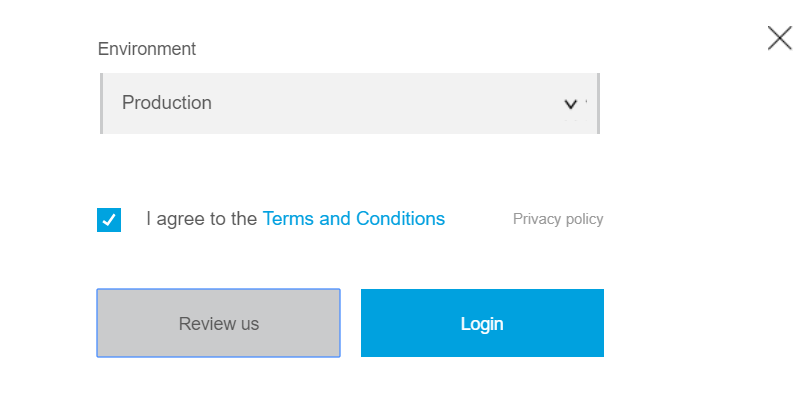
Select the environment as either Production or Sandbox, and then check the Terms and Conditions box.
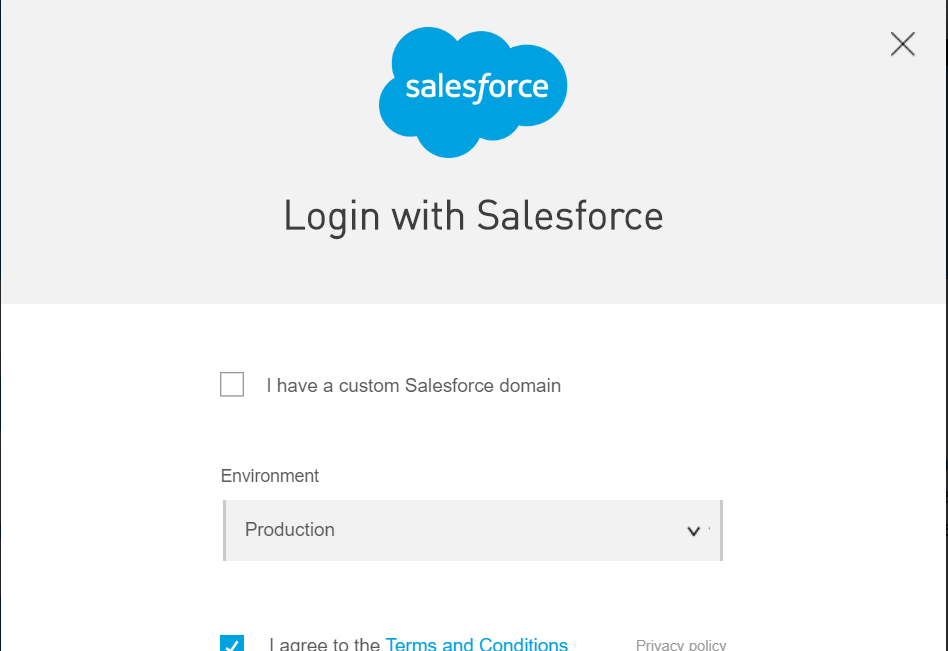
Select Login:
-
If you are not logged into any orgs, Dataloader.io prompts you to enter the username and password. After logging in, check the username in the top right corner to make sure you are logged into the correct org.
-
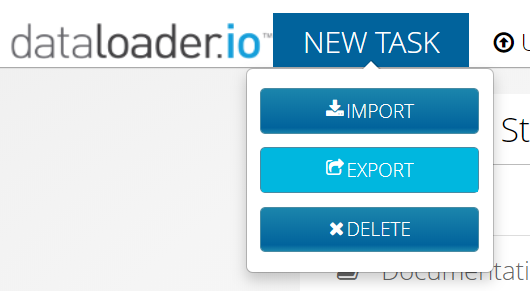
From the New Task menu select Export:
-
Select the object from which to export records. You can start typing the object name in the Quick find field to narrow the results and find the object quicker.
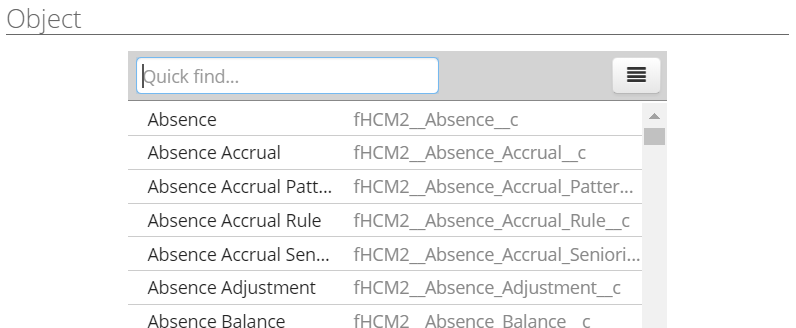
After selecting the object, select Next.
-
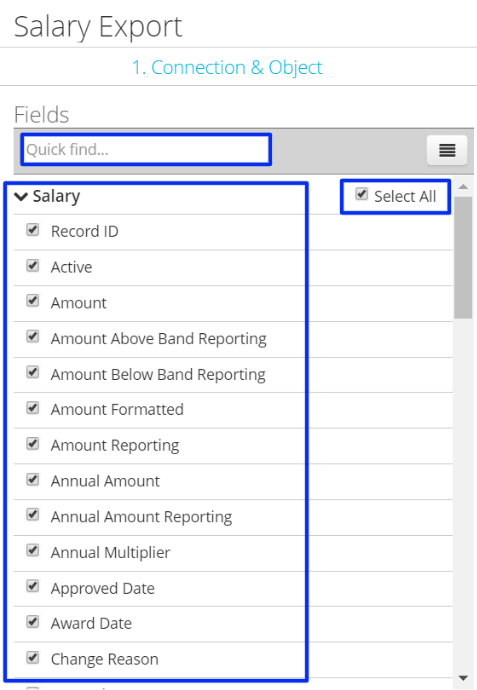
Select the fields you want to export by checking the checkboxes next to each field. You can use the Quick find to easily find fields or check Select All to export all fields in the object to have a data backup.
 Note
NoteIf you choose to export Employment Records, all employment records are exported regardless of whether they are current or in the past, unless you add a filter as detailed in Step 12.
-
In the Order By section, you can select the order in which your records are exported. Select an object, field and the order, which can be ascending or descending, as shown in the following screenshot:

-
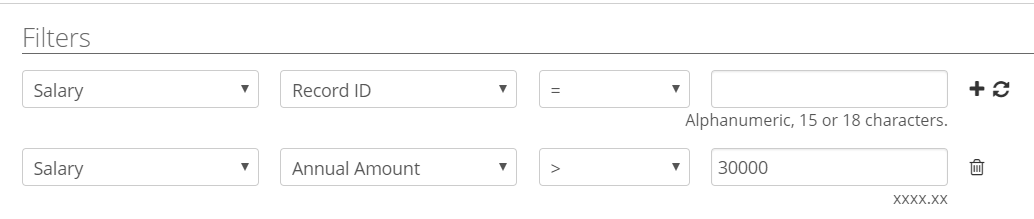
To filter the data you are exporting, in the Filters section, select:
-
the second picklist to select the field to filter on
-
the third picklist to select the operator
-
the field on the right to enter a value for the filter
Select the + plus sign at the end of the line to save the filter criteria.
For example, in the following screenshot, the saved filter specifies that only salary records with a Salary Amount greater than 30,000 should be exported. The line above it is where you can add another filter:
When you add more than one filter, the criteria are joined with AND logic. To change this to OR, so records exported have one criterion or the other true, expand the SOQL Query section. Find the filter at the end of the query, it starts with WHERE. For example, if another criterion has been added to the example in the previous screenshot, for Currency Code as USD, the text in the SOQL Query section would be:
WHERE fHCM2__Amount__c > 30000 AND fHCM2__Currency_Code__c = 'USD'.To use OR, change it to:
WHERE fHCM2__Amount__c > 30000 OR fHCM2__Currency_Code__c = 'USD'.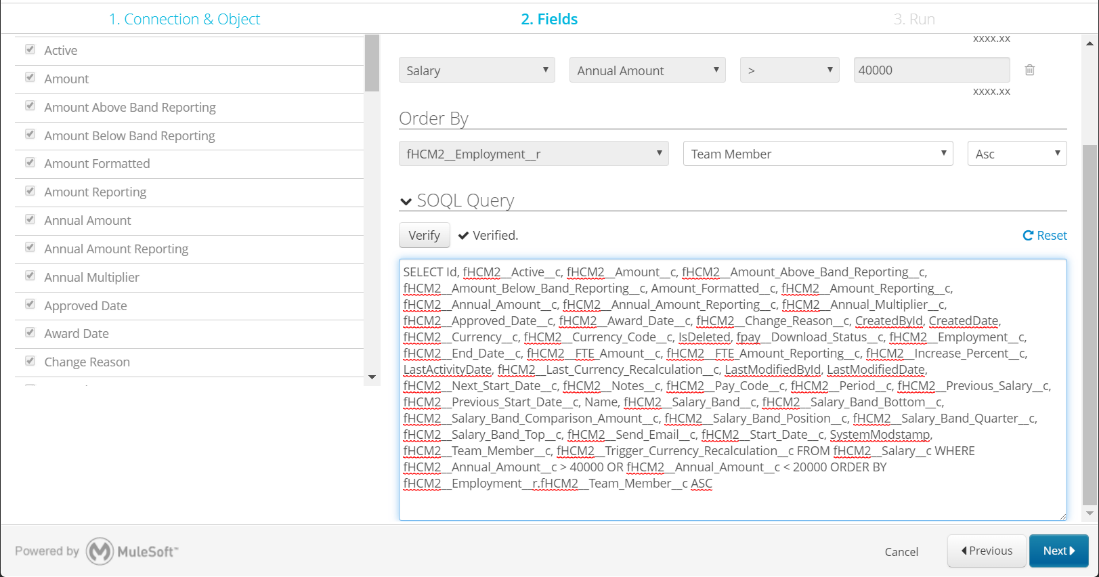 Note
NoteThe SOQL query must be changed last. If you create a custom SOQL query (such as by changing the logic) no other changes can be made – you cannot change the selection of fields, filters or the order for the export, and Dataloader.io displays the following warning message:
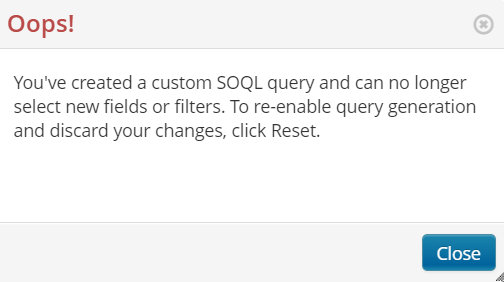
After you select Close, everything but the SOQL Query field will be grayed out.
-
-
Select Next to move to the next screen.
The Summary section displays how many records will be exported.
-
Select Advanced to set the Date Format for date fields in your export.
-
Select Save and Run. After the export has completed, a screen similar to the following screenshot is displayed:

Select the successes hyperlink to download the exported CSV file.
If the job does not complete quickly, refresh your screen.