-
Select the Edit icon on the right of the Tab bar:

The Edit icon only appears when using a Sage People Salesforce Lightning Experience App. If you do not see the Edit icon and want to customize your Lightning Experience Tab bar, contact your Administrator.
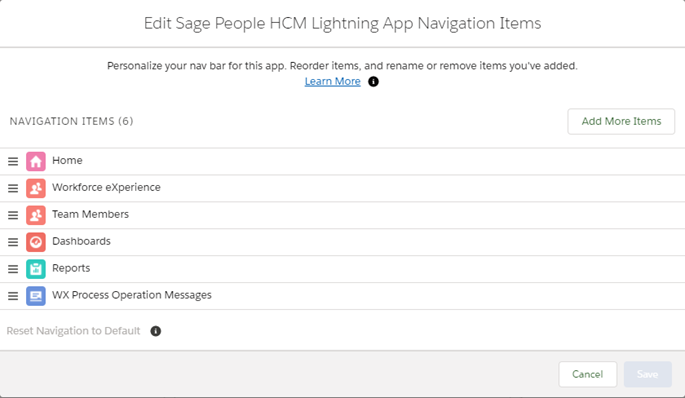
Sage People displays the Edit App Navigation Items page:

You can:
-
Add more Tabs
-
Reorder Tabs
-
Remove Tabs you have added. You cannot remove the App's default Tabs or those added by an administrator using Setup.
-
-
To add a Tab, select Add More Items.
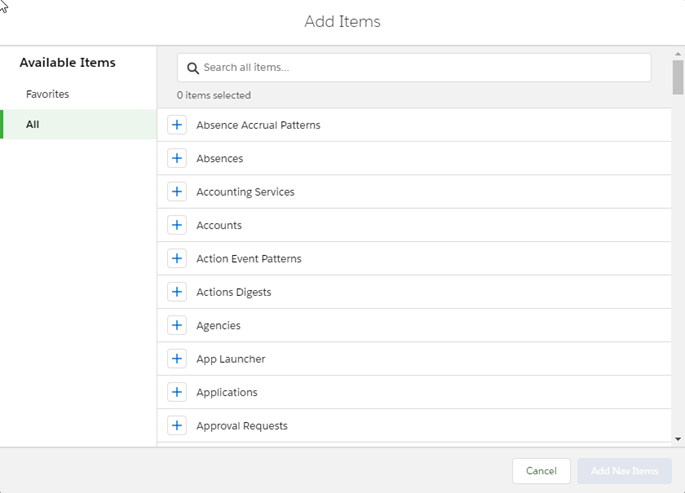
Sage People displays the Add Items window.
-
In the Available Items sidebar, select All.
Sage People displays a list of all tabs:

-
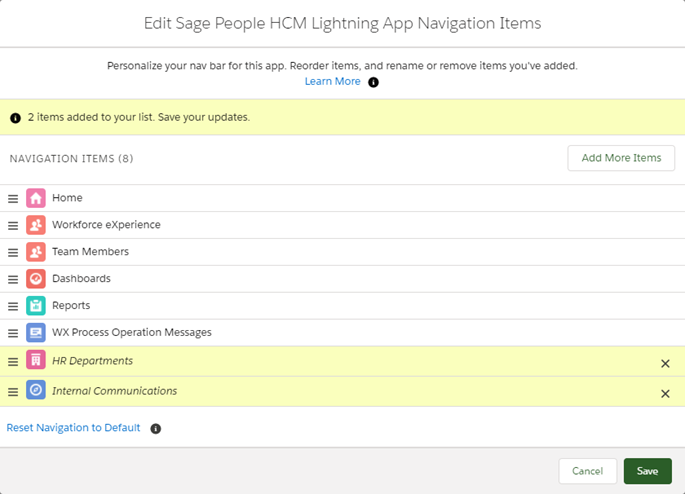
Select the + icon next to a Tab name to add it, and then select the Add Nav Items button. The button indicates how many items you are adding.

-
To reorder Tabs, drag and drop them into your desired order. Items on the top of the list are displayed on the left on the Tab bar.
-
To remove a Tab you have added, select the x icon next to it.
-
When you have finished your customizations, select Save.
Sage People displays your updated Tab bar.