New candidate portal authentication
We now have a new, more secure way for candidates to access the Sage People Recruit portal. Candidates will no longer use a shareable reference ID. They'll now authenticate using their email address and a onetime PIN sent straight to their inbox.
Configure the PIN email template
-
Got to Setup and select Classic Templates.
-
Locate PIN_Verification_Email_Templates in Sage People Recruit Text folder.
-
Click Edit on the template.
-
Customize the template with your company branding:
-
Company logo
-
Header/footer styling
-
-
Update the greeting and messaging (maintain the {!PIN} merge field).
-
Click Save.
-
When the system triggers the email, it populate the PIN code automatically.
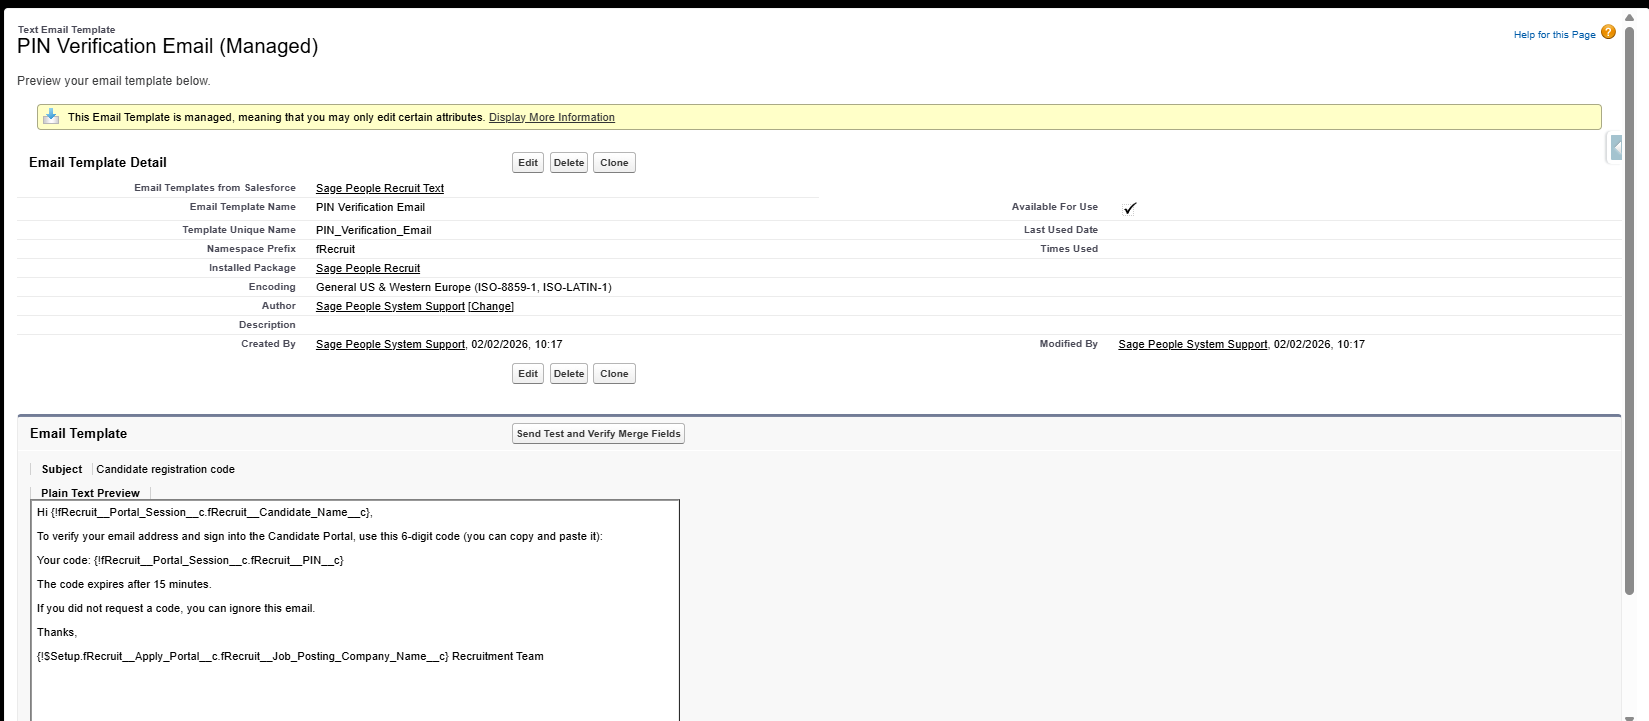
Each PIN is valid for 15 minutes from the time the system sends it. Candidates can request a maximum of three new PINs per hour. Candidates can only log in for one single session; if they open the portal on a second browser or device, this will invalidate the session.
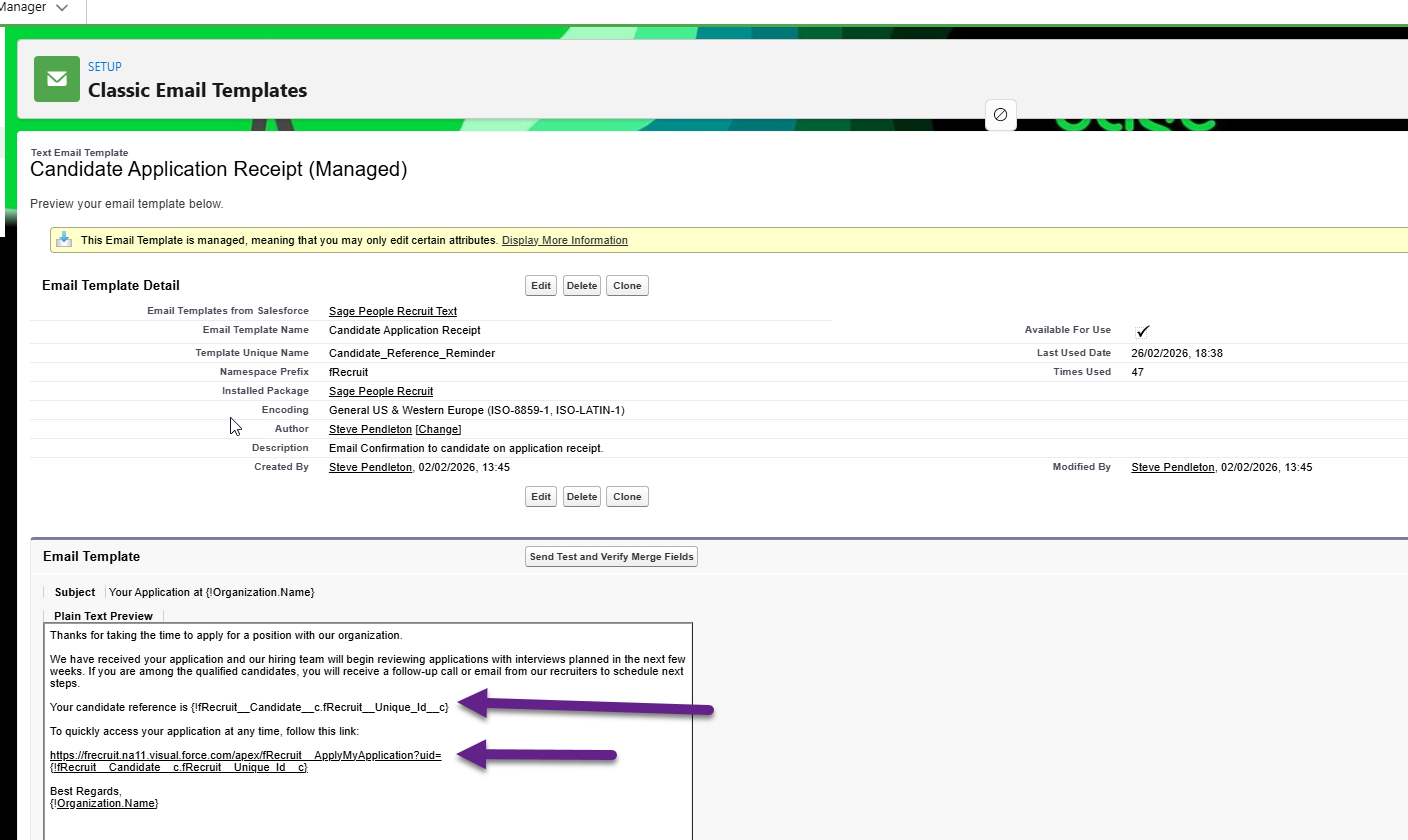
Update the Candidate Application Receipt email template
It's likely you'll need to amend the Candidate Application Receipt email template. This is because it references the old Candidate Reference ID that we no longer use.
-
Go to Setup and search for Classic Email Templates.
-
Find the Sage People Recruit Text folder and select the Candidate Application Receipt email template.
-
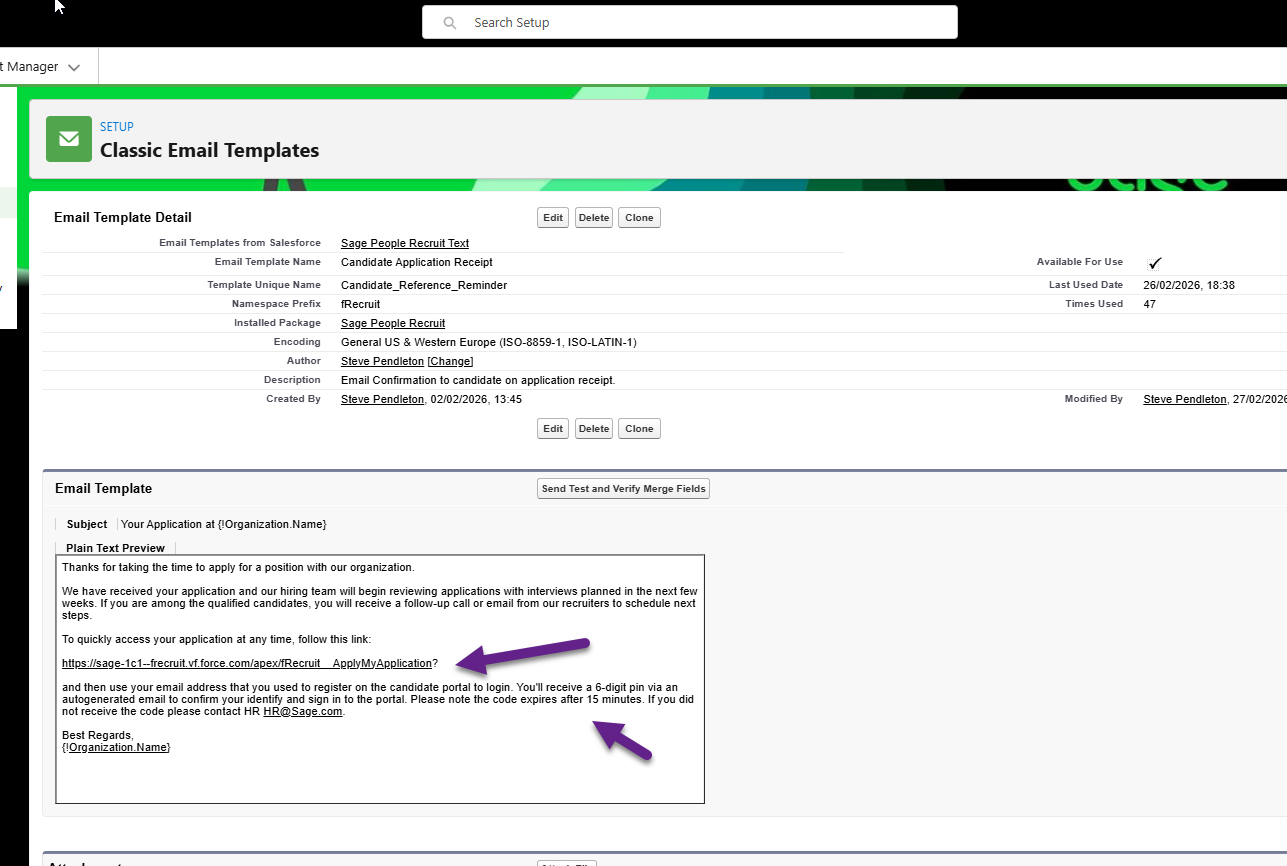
Remove the reference to the Candidate Recruit User ID. Amend the link to remove the Candidate User ID. For example:
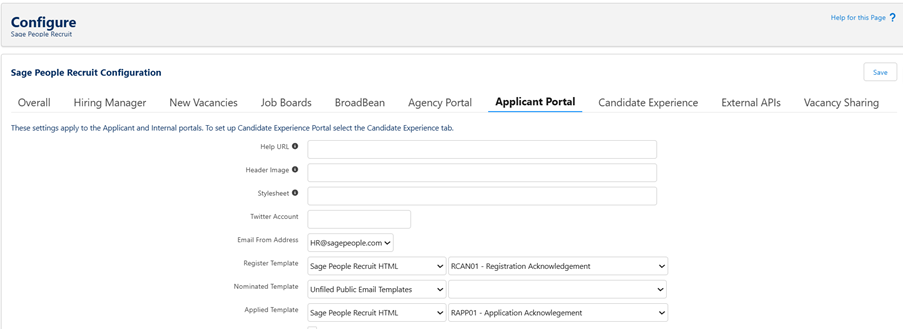
Configure candidate session record purging
Portal session records increase the storage use in your org. If you use Candidate Portals, we recommend you schedule the daily purge batch to delete expired records.
-
Go to Setup and select Installed Packages.
-
Select Sage People Recruit then select Configure.
-
Click the Applicant Portal tab and scroll down to the Portal Sessions section.
-
Set the time for the daily purge to run, and the retention period for session records (days).

-
Click Save.
If you don't use Candidate Portals, set Schedule Session Record Purge to Not Active. After you set the batch schedule, you can set the retention period (1-28 days) for Portal Session records. The default retention period is one day.
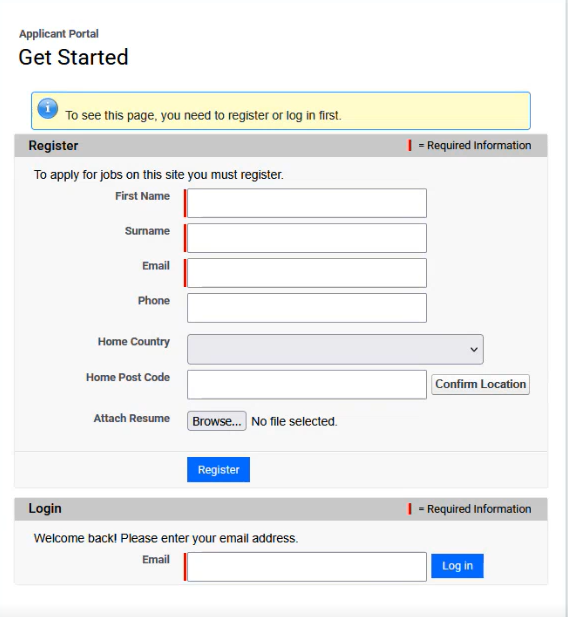
Candidate process
Step 1 - Register for the Candidate Portal
-
Go to the Candidate Portal.
-
Click Get started.
-
Enter the email address and complete the registration form.
Step 2 - Return to the Candidate Portal
-
Go to the Candidate Portal.
-
Enter the email address.
-
Check email for the six-digit PIN.
-
Enter this PIN into the portal.
-
If the candidate stops browsing for 15 minutes, the system finishes the session. It redirects the candidate to authenticate again.

Once logged in with the PIN, candidates can:
-
Browse available job opportunities
-
View and manage their applications
-
Update personal information
-
Withdraw applications
-
Express interest in positions
Step 1 - Create the permission set
-
Go to Setup.
-
In the Quick Find box, search for and select Permission Sets.
-
Click New.
-
Complete the details:
-
Label: Portal Session Access
-
API Name: auto-populates (don't change)
-
license: Leave as None
-
Description: grants access to the Portal Sessions object and all related fields
-
-
Click Save.
Step 2 - Grant Object access to Portal sessions
-
From the Portal Session Access permission set, select Object Settings.
-
Search for and click Portal Sessions.
-
Click Edit.
-
Enable the necessary Object Permissions:
-
Read
-
View All
-
-
Under Field Permissions, go to the bulk actions at the top:
-
Select Read Access for all fields
-
Select Edit Access for all fields if appropriate
-
-
Click Save.
Step 3 - Assign the permission set to users (option A)
-
Open the Portal Session Access permission set.
-
Click Manage Assignments then click Add Assignments.
-
Select one or more users.
-
Click Assign then click Save.
Step 3 - Assign the permission set to users (option B)
-
Go to Setup and select Users.
-
Open the user record.
-
Scroll down to Permission Set Assignments.
-
click Edit Assignments.
-
Add Portal Session Access and click Save.
Step 4 - Add Portal Sessions to Page Layout
-
Go to Setup and select Object Manager.
-
Click Candidate then click Page Layouts.
-
Click into the Candidate Layout.
-
Select Related List. Drag and drop Portal Sessions into the related list section.
-
Click Save.