Check your Recruit document folder for resume search
Configuring your Sage People Recruit system includes nominating a destination folder to hold resumes. Resume content is then included when running a talent pool text search for candidates to fill a vacancy. By default the folder is named Resumes or Shared Documents and is set to be accessible by all users. Sage People recommends ensuring that access to Resumes documents is restricted.
You can:
- Change folder accessibility.
-
Select an alternative, existing folder.
-
Create a new folder with the level of access you need.
Folder operations are carried out in Salesforce Classic. To switch from Salesforce Lightning Experience to Salesforce Classic:
-
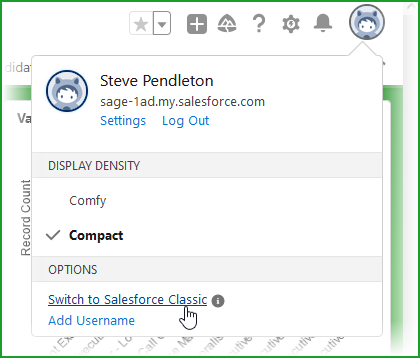
In your Sage People org select your profile and then select Switch to Salesforce Classic:
Find your current folder name
-
Go to Setup and in Quick Find enter Installed Packages.
-
Find Sage People Recruit in your list of installed packages and select Configure in the Action column.
-
On the Sage People Recruit Configure page select the Overall tab.
-
Scroll down to the Document Folder for Resume Search field. The field displays the currently assigned folder name.
-
If the current assigned folder for Resumes is Shared Documents, create a new folder for Resumes as below.
Create a new folder for Resumes
-
In Salesforce Classic from the Sage People home page select the Documents tab.
-
On the Documents Home page go to the Document Folders section and select Create New Folder:
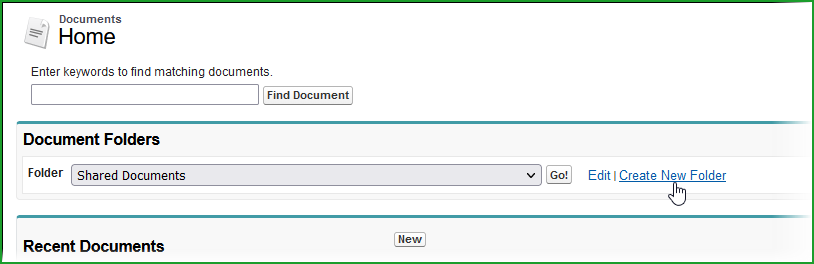
Sage People displays the Folder Edit page.
-
Enter Resumes as the label for the new folder. The label is displayed in the list of folders, so choose a meaningful name you can easily recognize.
-
Complete the remaining fields as described in Check or change folder accessibility.
-
Select Save.
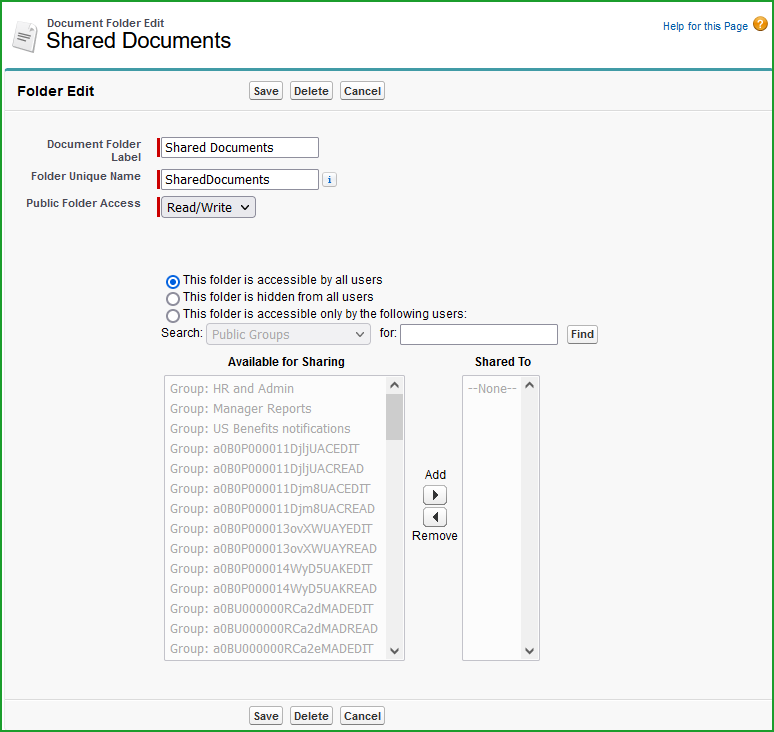
Check or change folder accessibility
-
In Salesforce Classic from the Sage People home page select the Documents tab.
-
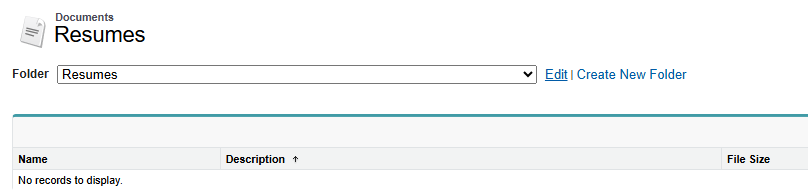
On the Documents Home page go to the Document Folders section and use the Folder picklist to find the folder.
-
Select Go:

Sage People displays the list of documents held in the folder.
-
Select Edit next to the folder name:
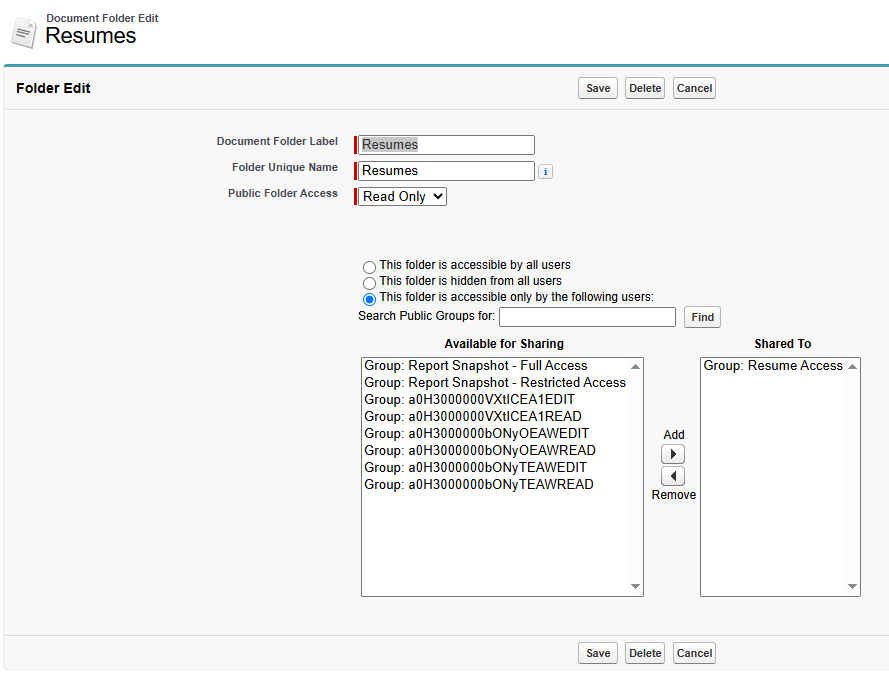
Sage People displays the edit page for the folder:
-
Use the fields to control the level of access you want to assign to the folder. It's recommended to add groups of Users who require access to Resumes (see Create a Public Group), then grant those groups access to Resumes folder.:
-
Public Folder Access
Select Read/Write or Read Only
-
Radio button: This folder is available to all users
The default. All users have access to resumes.
-
Radio button: This folder is hidden from all users
-
Radio button: This folder is accessible only to the following users
Select to activate Search:

You can then use search to find public groups, roles, or individual users you want to have access to the folder.
Use Add to move the target group or role from the Available for Sharing list to Shared To.
-
-
Select Save
Create a public group
If your org does not include a public group with the users you want to access the resume folder, you can create one:
-
Go to Setup and in Quick Find enter Public Groups.
-
On the Public Groups page select New.
-
On the New Group page:
-
Give the group a Label. The label is displayed in the list of groups, so choose a meaningful name you can easily recognize.
-
If you want to give folder access to the users you add to the group and to their managers, select Grant Access Using Hierarchies.
-
Use the Search picklist to select the users you want to add to the public group. You can add existing public groups, roles, or individual users. The list of Available Members changes to display the type of picklist item you have selected. Your new group can contain a mix of groups, roles, and users if necessary.
-
Choose from the Available Members list and select Add to move your choices to the Selected Members list.
-
When you have built your new public group select Save.
-
Your new group is now available to select.
Select an alternative existing folder
-
Go to Setup and in Quick Find enter Installed Packages.
-
Find Sage People Recruit in your list of installed packages and select Configure in the Action column.
-
On the Sage People Recruit Configure page select the Overall tab.
-
In Document Folder for Resume Search use the picklist to find and select the folder you want to use.
-
Select Save.