You can configure an opt-out option that allows team members to choose whether they want to appear in summary process results, for example those showing upcoming birthdays or anniversaries.
To do this, configure a Yes/No picklist field as part of the Team Member object, and reference the field as part of the Where Clause. Follow the steps outlined below.
Create an opt-out field
-
Go to Setup , and select the Team Member object (
fHCM2__Team_Member__c). -
Select Fields & Relationships.
-
Select New.
-
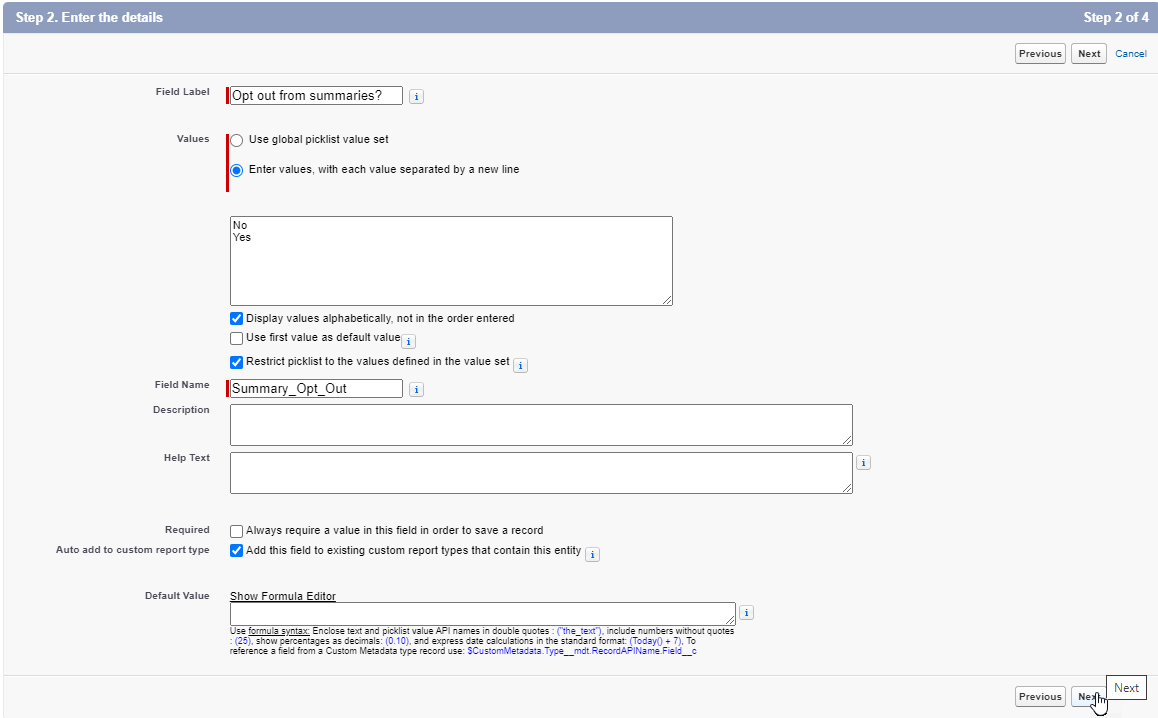
As the Data Type, select Picklist.
Warning Do not select the Checkbox option for this field. - Select Next.
-
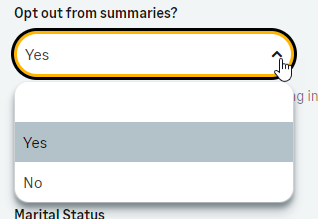
Give the field a label. This will be the label displayed to users in WX. For example, "Opt out from summaries?"
-
Beside the Values item, select Enter values...
Add the picklist values No and Yes on separate lines.
Select Use first value as default value. In this example, "No" is the default value. This will require users to opt out from appearing in summaries (they will be opted in by default). You can reverse this logic if you prefer.
- The field name is automatically generated from the label. Edit this name if you want. The field name will be used to reference the field in your Where Clause.
- Select Next.
- On the field-level security page, leave the values at their default settings unless you have reason to change them, and select Next.
- On the Add to page layouts page, leave the values at their default settings unless you have reason to change them, and select Save.
Add the field to a page layout
To update the WX Service page layout:
-
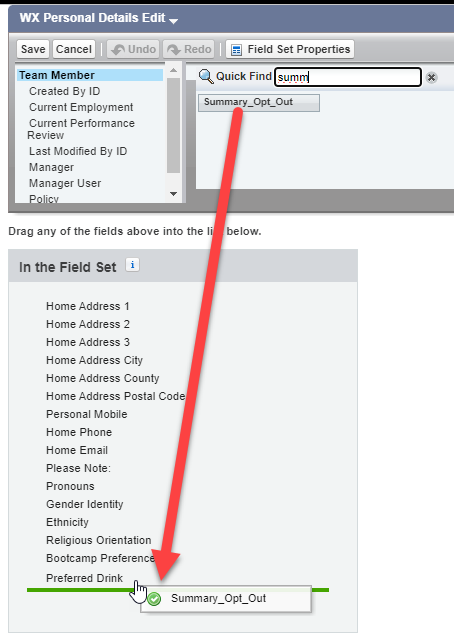
In the Team Member object, select Page Layouts.
-
Select the page layout you want to update. In this example, we are adding the picklist to the Personal Details Edit page layout.
-
Select the opt out field you created above from the panel at the top of the page, and drag it to the page layout.
-
Select Save.
For more information about updating page layouts, see Page layouts, search layouts, related lists.
Update the Where Clause
-
Open the summary process for which you want to apply the opt-out logic. See Edit a Summary process.
-
In the Where Clause field, add the following logic, being sure to update the name of the referenced field to match the field that you created above.
AND Summary_Opt_Out__c != 'Yes'In this example, we are using != 'Yes' (does not equal yes) to include only those team members that have NOT selected Yes to the opt-out question on their personal details page.
The example shown below uses this logic in the a birthday carousel summary. This logic displays current team members with a birthday in the next 7 days unless they have opted out:

-
Save the summary definition.
-
Repeat the process for any other summaries where you want to apply the opt-out logic.