The Approve Manager Notes checkbox on the Policy page enables Manager Notes and any associated files created by a manager to be approved by the Team Member's HR Manager before they are visible to the Team Member. The HR manager receives:
- An email with a link to Approve/Reject Request in the HR Manager Portal.
- An Action through WX.
The HR Manager can approve the Note through WX or the HR Manager Portal.
Approve Manager Notes must be supported by an active Approval Process. Without an active Approval Process, and with Approve Manager Notes checked on the Policy, WX displays a Submit button for Manager Notes newly created by a manager but selecting Submit has no effect.
The Approval Process uses two predefined Field Updates to automatically update the Submitted Date and Approved Date fields on the Manager Note record. Before you start to set up the Approval Process check the Field Updates exist:
- Go to Setup > App Setup > Create > Workflows & Approvals > Field Updates
-
On the list of All Workflow Field Updates sort by the Field to Update column and check for:
- Manager Note: Approved Date
- Manager Note: Submitted Date
- If the Field Updates are listed, continue to set up the Approval Process. If the Field Updates are not listed, add them.
To set up the Approval Process for Manager Notes:
- Go to Setup > App Setup > Create > Workflows & Approvals > Approval Processes.
- In the Manage Approval Processes For: picklist select Manager Note.
- Select Create New Approval Process and Use standard Setup Wizard.
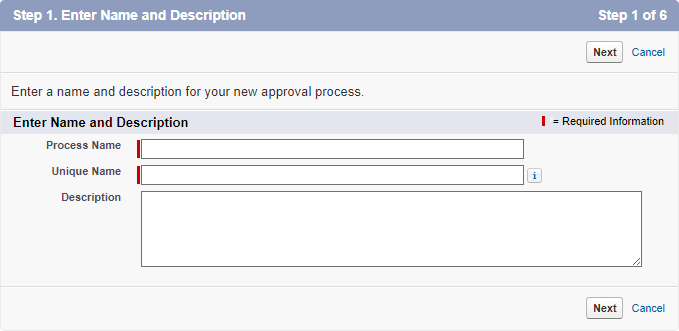
Sage People displays Step 1 of the New Approval Process wizard:
-
Complete the fields as follows:
Field What to enter Process Name
Enter Manager Notes
Unique Name
Automatically completed as Manager_Notes.
Leave as automatically completed.
Description
Enter a brief description of the purpose of the Approval Process:
Supports Manager Notes requiring HR Manager approval.
- Select Next.
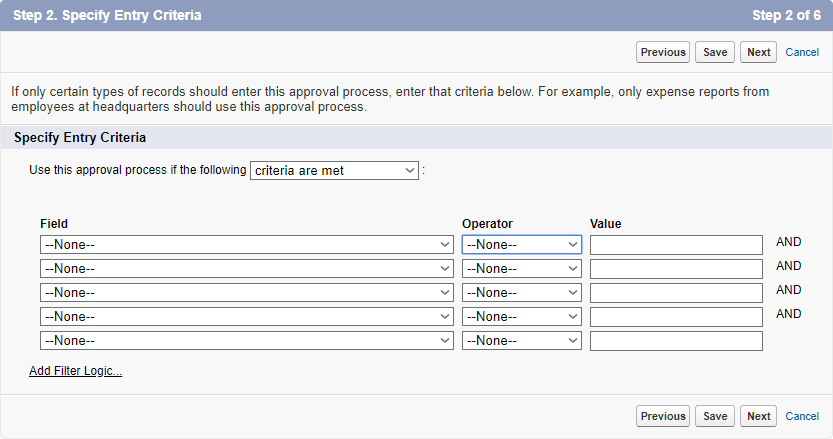
Sage People displays Step 2 of the New Approval Process wizard:
-
Complete the fields as follows:
Field What to enter Use this process if the following
Pickilist. Select criteria are met
Field
Picklist. Select Manager Notes: Manager Action
Operator
Picklist. Select equals
Value
Enter Submit
- Select Next.
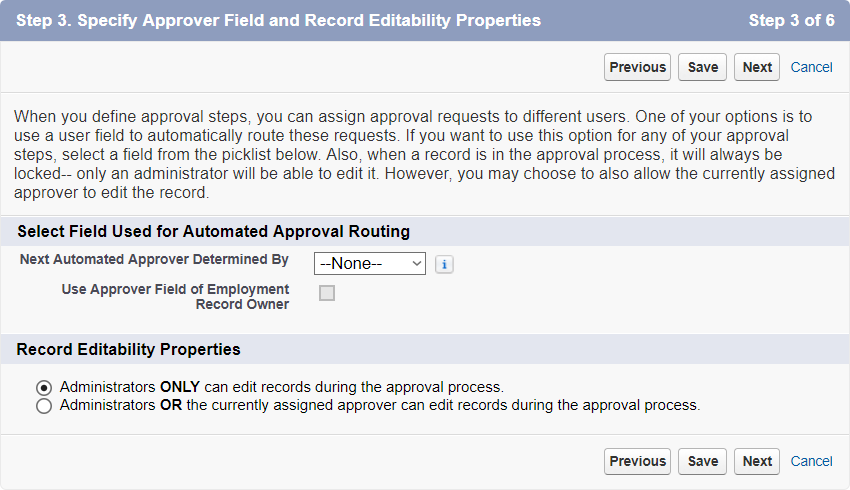
Sage People displays Step 3 of the New Approval Process wizard:
-
Complete the fields as follows:
Field What to enter Next Automated Approver Determined By
Picklist. Select None
Use Approver Field of Employment Record Owner
Checkbox. Leave unchecked.
Record Editability Properties
Radio buttons. Select Administrators ONLY can edit records during the approval process.
- Select Next.
Sage People displays Step 4 of the New Approval Process wizard:
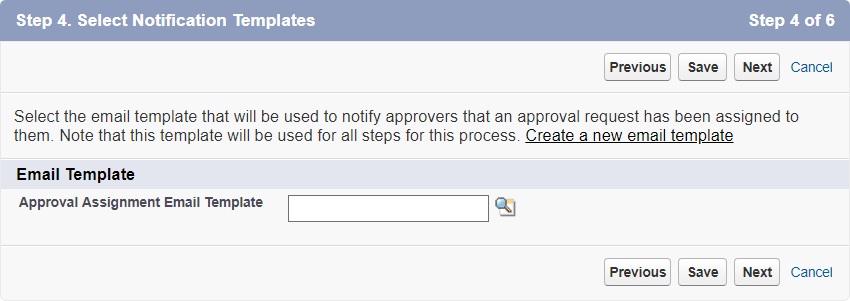
- Leave Approved Assignment Email Template blank and select Next.
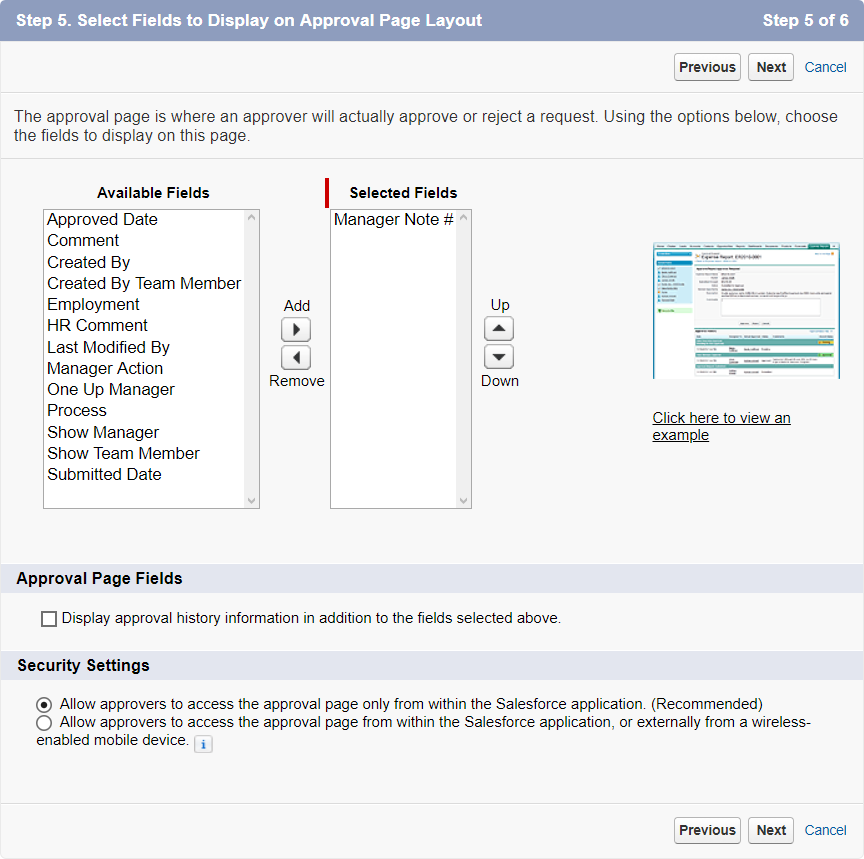
Sage People displays Step 5 of the New Approval Process wizard:
-
Complete the fields as follows:
Field What to enter Available Fields
Selected Fields
Choose the fields you want to display to the approver by selecting from the list of Available Fields then selecting Add
 to move them to the list of Selected Fields.
Use Up
 and Down
  to reorder the fields on the page displayed to the approver.
Approval Page Fields
Checkbox Display approval history information in addition to the fields selected above. Leave unchecked.
Security Settings
Radio buttons. Select Allow approvers to access the approval page only from within the Salesforce application.
- Select Next.
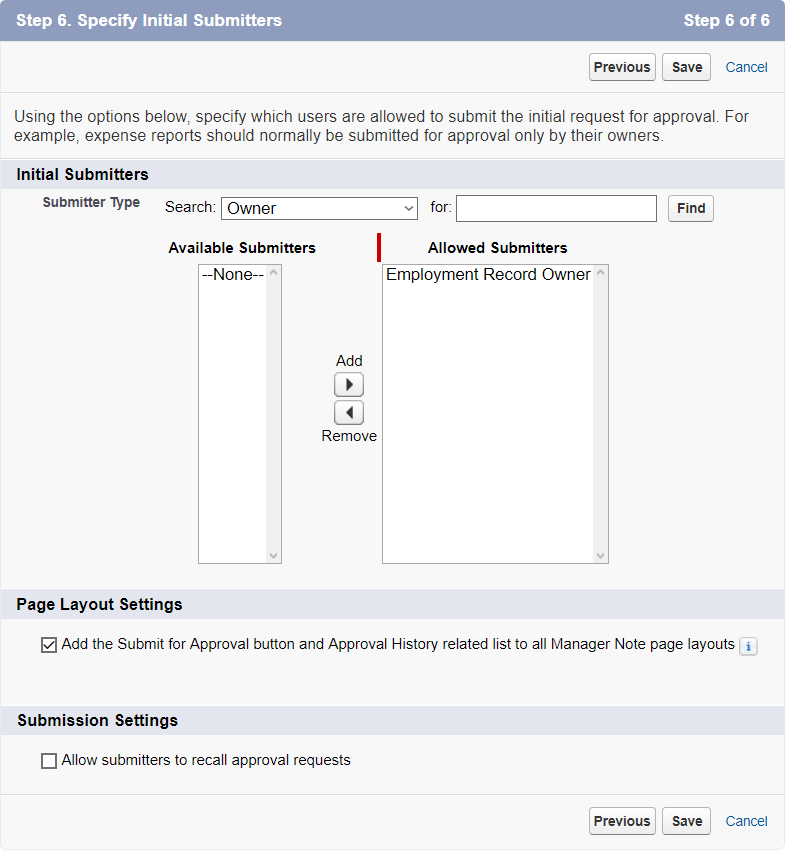
Sage People displays Step 6 of the New Approval Process wizard:
-
Complete the fields as follows:
Field What to enter Submitter Type
Leave the default value Owner unchanged.
Leave for: blank.
Available Submitters
Allowed Submitters
Leave the default Allowed Submitters as Employment Record Owner
Page Layout Settings
Checkbox Add the Submit for Approval button and Approval history related list to all Manager Note page layouts. Set checked.
Submission Settings
Checkbox Allow submitters to recall approval requests. Leave unchecked.
- Select Save.
Sage People displays What Would You Like To Do Now?
- Select Yes, I'd like to create an approval step now.
- Select Go!
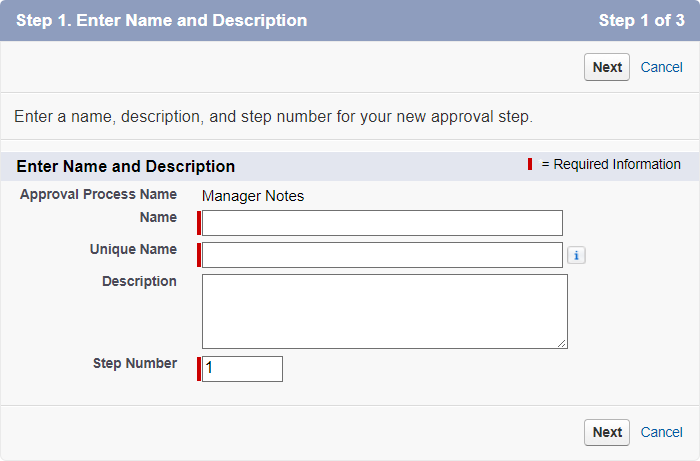
Sage People displays Step 1 of the New Approval Step wizard:
-
Complete the fields as follows:
Field What to enter Name
A text label for the step. For example Step 1
Unique Name
Automatically completed using the label you entered in Name. For example Step_1
Description
A brief description of the function of this Step. For example Assign approver
Step Number
Automatically completed. Change the value if you want to change the sequence for multiple approval steps.
- Select Next.
Sage People displays Step 2 of the New Approval Step wizard:
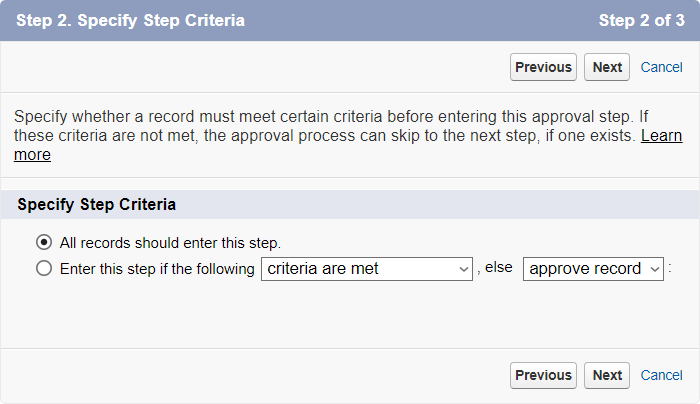
- Leave the default radio button selected All records should enter this step and select Next.
Sage People displays Step 3 of the New Approval Step wizard:
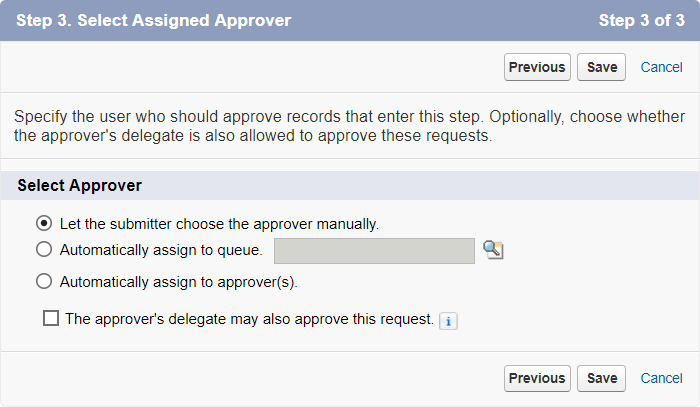
- In the Select Approver section select Automatically assign to approver(s).
The display expands:

-
In the expanded area:
- In the picklist select User and use Lookup
 to find the approver.
 - Select the radio button Approve or reject based on FIRST response.
- In the picklist select User and use Lookup
- Leave the checkbox The approver's delegate may also approve this request unchecked and select Save.
Sage People displays What Would You Like To Do Now?
- Select the radio button No, I'll do this later. Take me to the approval process detail page to review what I've just created.
- Select Go!
Sage People displays the Process Definition Detail page for the Manager Notes Approval Process.
- Go to the Approval Steps Related List and for the Step you just defined select Show Actions:

The display expands:
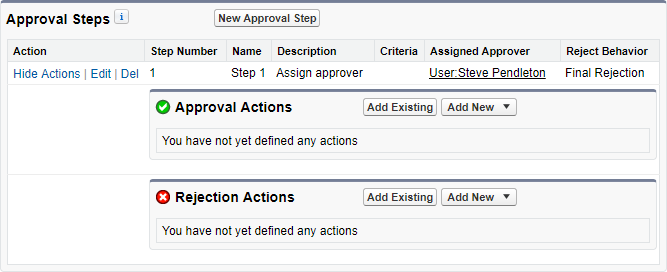
- In the Approval Actions section select Add Existing.
Sage People displays the Select Existing Actions page:
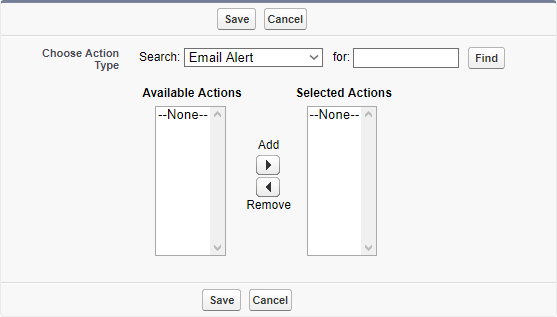
-
Complete the fields as follows:
Field What to enter Search
Picklist. Select Field Update
for:
Enter Submit and select Find
Available Actions is populated with Field Update: Submit Note:
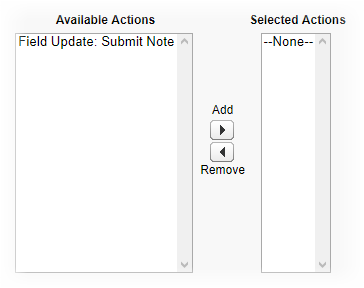
Available Actions
Selected Actions
Select Field Update: Submit Note and select Add
 to move it to Selected Actions.
 - Select Save.
- On the Process Definition Detail page for the Manager Notes Approval Process go to the Final Approval Actions Related List and select Add Existing.
Sage People displays the Select Existing Actions page:

-
Complete the fields as follows:
Field What to enter Search
Picklist. Select Field Update
for:
Enter Approved and select Find
Available Actions is populated with Field Update: Approved Date:
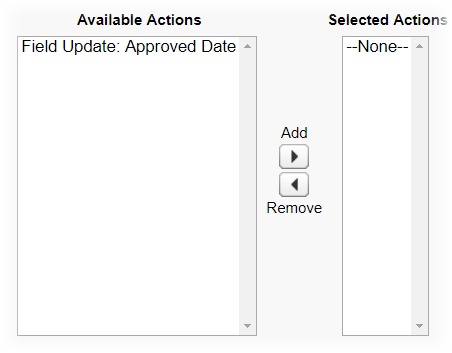
Available Actions
Selected Actions
Select Field Update: Approved Date and select Add
 to move it to Selected Actions.
 - Select Save.
- On the Process Definition Detail page for the Manager Notes Approval Process select Activate.
The Approval Process is now active. When Approve Manager Notes is checked on the Policy the Submit button displayed on all new Manager Notes created by managers is fully enabled.