Compact layouts display a record's key fields in Salesforce Lightning Experience. If we created your org after April 2022, we configured some frequently-used record pages as Lightning record pages. You can see a compact layout as the highlight panel header section of team member and employment record pages:


Compact layouts are object specific. You can include a maximum of 10 fields in the definition of a compact layout, but only up to the first 7 can be displayed on the layout. The exact number of fields displayed depends on the size of the screen on your device; smaller screens may display fewer fields. To make sure all displays include the important fields in a compact layout, ensure your layout definition lists the fields in priority order, with the most important at the top of the list. If a user does not have access to one of the fields in the compact layout, the next field is displayed.
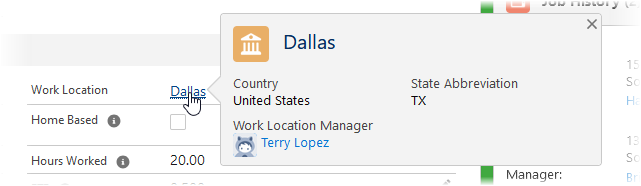
Compact layouts display at the top of an object home page and also wherever an object appears on a record detail page or a related list. For example, a compact layout defined for the Work Location object displays when you hover over a Work Location link on the Employment Record:
Many objects supplied as part of your Sage People system include a System Default compact layout. System default layouts typically contain a minimum number of fields and cannot be edited. You can clone the system default layout and edit the clone, or you can create your own compact layout.
To create a compact layout:
-
Go to Setup , and select the object where you want to add the compact layout.
-
From the sidebar, select Compact Layouts.
-
On the Compact Layouts page, select New.
-
Enter a label for the compact layout. The Name field is automatically completed based on the label you enter.
-
Select the fields you want to include from the Available Fields panel and select Add to move them to the Selected Fields panel.
-
When you have added and ordered the fields, select Save.
To use the new compact layout, you need to assign it:
-
On the Compact Layouts page, select Compact Layout Assignment.
-
On the Compact Layout Assignment page, select Edit Assignment.
You can assign a compact layout as primary, and then override it for specific record types, or use the primary compact layout wherever compact layout is displayed for this object.
-
To change the primary layout, select the Primary Compact Layout picklist and choose the compact layout you want to assign as primary.
-
To assign compact layouts for record types:
-
On the Compact Layout Detail page select Edit Assignment.
-
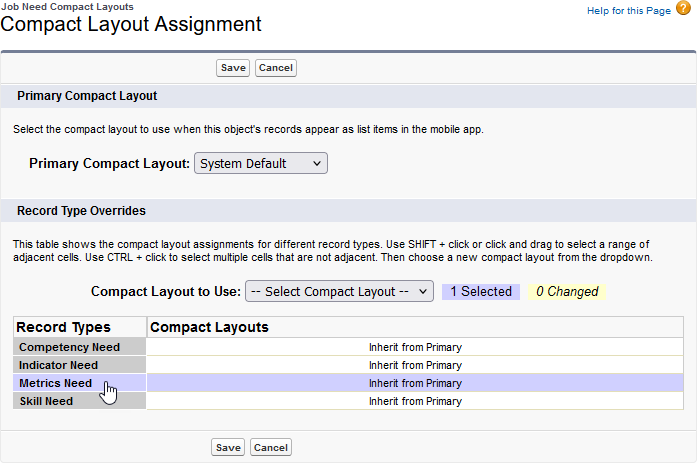
On the edit Compact Layout Assignment page, select the record type row in the table:
-
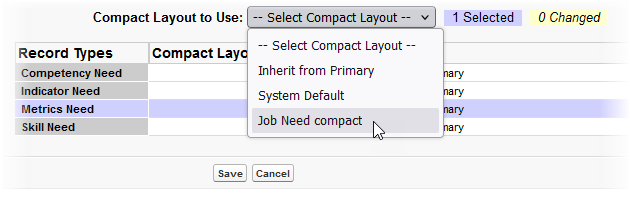
Select the Compact Layout to Use picklist and choose the layout you want for this record type:
-
Select Save
-
-
After you have made your selections, select Save.
To edit a compact layout:
-
Go to Setup , and select the object where you want to edit the compact layout.
-
From the sidebar, select Compact Layouts.
-
On the Compact Layouts page, select Edit for the compact layout you want to edit.
-
Make your changes.
-
When you have completed your changes, select Save.
For more information, see Salesforce help content on compact layouts.