Approval steps define who gets the approval request and any actions to perform when the request is approved or rejected. Approval steps execute when initial submission actions are complete.
You cannot add new steps to an approval process once it has been activated, even if you deactivate it. Once an approval process has been activated you can edit existing steps by changing the details and adding approval or rejection actions.
Approval steps for approving a performance review
All Reviews passing the Entry Criteria for the process enter this step:
-
Route the approval to a named User.
Approval steps for approving an HR Request
All requests passing the Entry Criteria for the process enter these steps:
-
Route the approval request to the One Up Manager. If One Up Manager is not defined:
-
Route the approval to a named User.
To edit approval steps for an approval process:
-
If the process is active, deactivate it.
-
In the Inactive Approval Processes related list select the Approval Process Name:

Sage People displays the Approval Processes Detail page for the process you selected.
-
Go to the Approval Steps related list section:

-
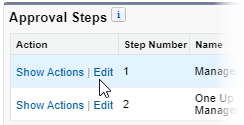
To edit the details of an existing step, select Edit next to the step name:
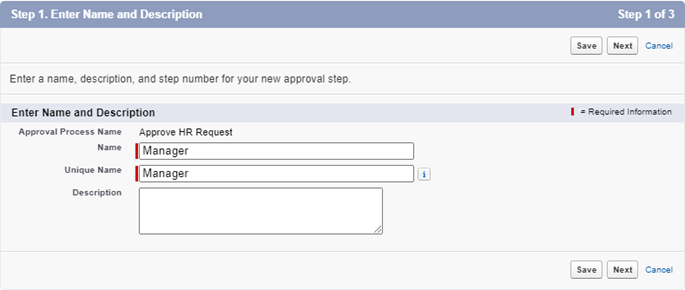
Sage People displays Step 1 of the Approval Step Edit process:
-
To change the Name and Description enter the new values. Ensure the Unique Name remains unique.
-
Select Save to save your changes and return to the Approval Process Detail page, or select Next to edit more details of the step.
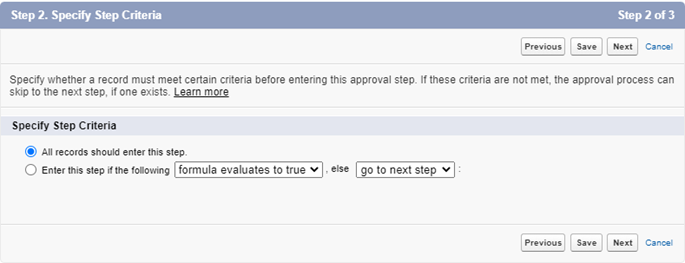
If you select Next, Sage People displays step 2 of the Approval Step Edit process:
-
To change the criteria which must be met before a record can enter this step, select the radio button Enter this step if the following.
Depending on the option selected for Enter this step if following, Sage People expands the display to add:
-
if criteria are met is selected, a number of Field, Operator, and Value fields
-
if formula evaluates to true is selected, a space to enter a formula
-
-
Complete the criteria or enter a formula.
-
To change the outcome if the step entry criteria are not met, select the picklist for else and select the outcome:

-
Select Next.
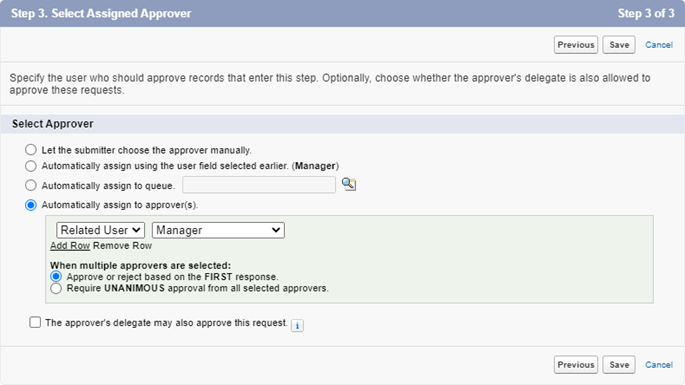
Sage People displays Step 3 of the Approval Step Edit process:
-
To change the approver for this step, select the radio button for the option you want:
-
Let submitter choose the approver manually
-
Automatically assign to queue.
Use lookup
 to find and select the queue you want to use.
 -
Automatically assign to approver(s)
Select the picklist and select the type of user:

Then select the second picklist and choose the user.
To add multiple approvers select Add Row for each new approver:

...and complete the fields to define the additional approver:
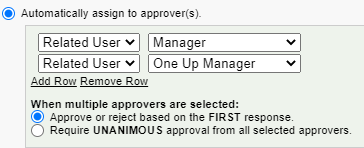
To allow the first response received to determine the outcome of the step, select Approve or reject based on the FIRST response.
To specify all approvers must agree on the outcome before the record can progress, select Require UNANIMOUS approval from all selected approvers.
-
-
Select Save.
Your changes are saved and Sage People displays the Approval Process Detail page.
-
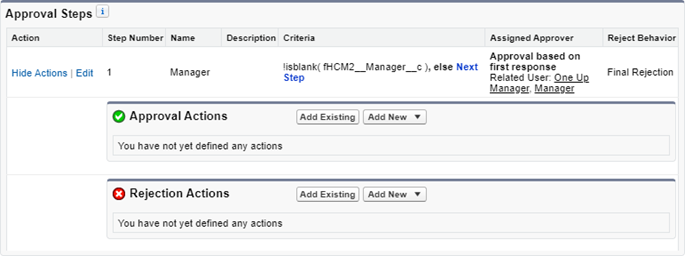
To edit the actions associated with an approval process step, in the Approval Steps related list section select Show Actions next to the step name:

Sage People displays the approval and rejection actions associated with this step:
-
To add a previously defined action to this step of the approval process, select Add Existing.
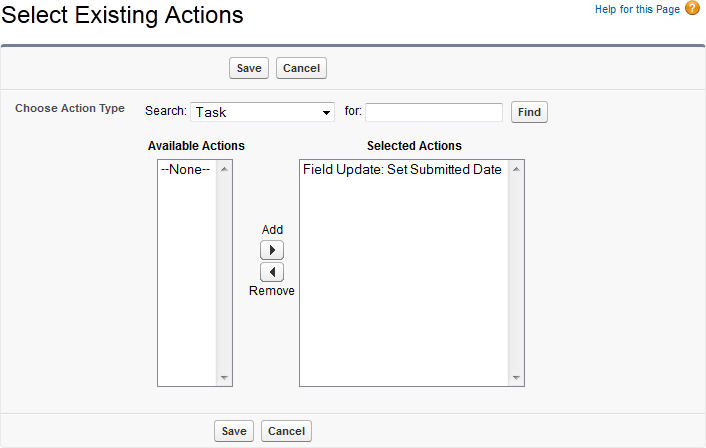
Sage People displays the Select Existing Actions page:
-
Select the Choose Action Type picklist and select the type of action:

Use the for: field and click Find to refine your search if the Action Type alone results in a long list.
-
Select an action in the list of Available Actions and select Add
 to choose it. You can select multiple actions if you want.
 -
Select Save to add the selected actions to this step of the approval process.
-
-
To add a new action to this step of the approval process select Add New and select the type of action to add.
Sage People displays the appropriate page:
-
New Task enables you to add a template to be used by approval processes or workflows when automatically assigning an action to a user.
Complete the fields to assign the task to a User, Role, or Owner, specify a due date, and select Save.
-
New Email Alert enables you to add an alert based on an email template for association with an approval process or workflow.
Complete the fields to select a template and recipients and select Save.
-
New Field Update enables you to define an object field to be updated as part of an approval process or workflow rule.
Select the field to change, set the value as blank or define a formula to set the value, and select Save.
-
New Outbound Message enables you to configure an outbound message to an endpoint you define, together with the fields you want to include.
Complete the fields to define the message and select Save.
-