PDF Templates | Using content editors
The toolbar in the Sage People PDF template content editor contains the following buttons. They display in the following screenshot.
-
Undo
-
Redo
-
Bold
-
Italic
-
Underline
-
Strikethrough
-
Link
-
Image
-
Bulleted list
-
Numbered list
-
Increase indent
-
Reduce indent

The formatting options available for PDF template content editor are based on the Salesforce Rich Text field type. They offer limited options for formatting content. This means you can't change the font family or font color.
The system doesn't carry text formatting options Bold and Italic through to the generated PDF. This is even if they display correctly in the preview. Strikethrough formatting applies but higher than the midpoint of a character. The Underline text formatting works as you expect.
You can copy and paste content you formatted in an external text editor into PDF template fields. However, formatting can be entirely or partly lost in the PDF processing. It won't be available in the final PDF.
Insert and manipulate an image
-
Some browsers, like Firefox, let you resize images directly in the PDF template generator. For other browsers, use image manipulation software to produce an image the size you need before inserting
-
To ensure images display in your PDFs, configure the remote site supporting the PDF template generator correctly. Use the required Profile settings
You can use images in the PDF template sections, in the header, and in the footer. If you use an image as a logo, the guideline for size is 200 pixels wide and 60 pixel high.
Use the following image file types: GIF, JPEG, PNG.
It's not possible to apply an image as a watermark over the PDF content.
Insert an image
-
Select Image
 on the toolbar.
Sage People displays the Insert Image dialog.

-
To load an image from a locally accessible location such as your desktop, select the Upload Image tab.
- Select Choose File to find and select an image.
- Add a Description for visually impaired users.
- Select Insert.
-
To load an image from a URL, select the Web Address tab.
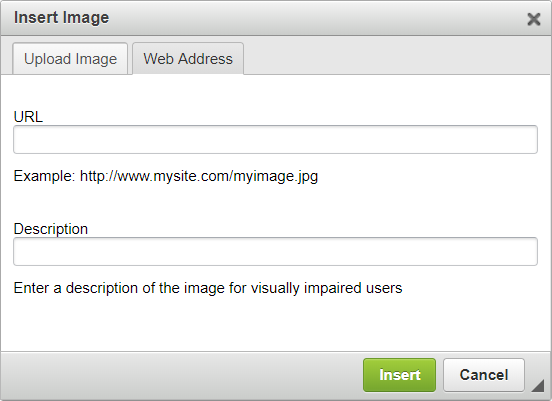
-
Enter the URL.
You can build a URL from a Static Resource.
-
Get your site URL for your PDF site. For example, https://<<domain>>.my.salesforce-sites.com/<<sitename>>
-
Get the Resource identifier of the resource YRL. For example, /resource/<<resourcenumber>>/<<StaticResourceName>>
-
Combine these two to build the URL. For example, https://<<domain>>.my.salesforce-sites.com/<<SiteName>>/resource/<<ResourceNumber>>/<<StaticResourceName>>
-
-
Add a Description for visually impaired users.
-
Select Insert.
To add an image to the Documents tab:-
Select your user icon and then select Switch to Salesforce Classic.
-
Go to the Documents tab. If it isn't on your tab bar, select + All tabs. Then select Documents.
-
On the Documents Home page, select the Folder where you want to upload the logo. Select Go!.
-
On the folder listing page, select New Document.
-
On the Upload New Document screen, complete the fields as follows:
Field What to enter Document Name Enter a name for the document. The name displays in the list of Documents. Document Unique Name Automatically completes based on the name. Indicate Document is Internal Checkbox. Check to add a flag to tell document viewers the document is for internal use only. And that they can't share with people outside the organization. Doesn't apply any security policy on the document. Externally Available Image Checkbox. Check to let users add images to documents that anyone can access. For example, in logos in email template letterheads.
Folder Picklist. Defaults to the folder where you selected New Document. Description Optional. Enter a description of the document Displays in the list of documents. Keywords Optional. Enter keywords that users can enter to search for this document. -
In the Select the File section, for File to upload, select Choose File. Follow your browser prompts to select a file from your computer.
-
Select Save.
-
When you're finished with the Documents tab, from the page header, select Switch to Lightning Experience.
-
Manipulate an image
-
Select the image.
- Use the alignment controls
 on the toolbar to position it left, center, or right on the page
 - Select the right-click menu for Cut, Copy, and Paste
- Use the alignment controls
-
Select off the image.
You can't copy images from Microsoft Word or other applications and paste them into the PDF template. You need to use the Image to insert all images.
Insert and edit a link
To insert a link:
-
Select the text you want to link. Text can be open or in a table cell.
You can also insert a link without selecting text. The link inserts as the URL text, for example www.sage.com.
-
Select Link
 .
.Sage People displays the Link dialog.

-
To specify the link, select the Link Info tab.
Field Description Link Type
Picklist. Select from:
-
URL
-
Link to anchor in the text
If your text contains anchors, use Link to anchor in the text. This provides a link to an anchor.
Protocol
Picklist. Select from:
-
http
-
https
-
ftp
-
other
If you select other, include the protocol prefix in the URL.
URL
The full URL, following the colon. For example: www.sage.com.
-
-
To specify a target frame or window to display the link you select, click the Target tab.

Field Description Target
Picklist. Select from:
- <frame>
- New Window
- Topmost Window
- Same Window
- Parent Window
-
If you don't specify a target frame or window, the link defaults to display in a new browser window.
- Select OK.
Links you insert in this way are clickable. Entering a URL as ordinary text renders it as ordinary text in the PDF. The system doesn't convert them to links automatically.
To edit a link you've inserted in the template:
- Double-click the link to re-open the Link dialog
To remove a link:
- Select the text providing the link, or the url if there's no associated text, and delete it. Retype the text if you want to retain it without the link
Working with tables
You can insert table content in a PDF template and then use basic text editing tools to modify table content. Use a word processing package such as Microsoft Word or Google Docs to create your tables. Then copy and paste into the template. You can insert tables into Header, Footer, or main content sections.
Pasted tables retain row and column layout, but can lose text formatting and background tints. For best results:
- Keep table formatting simple. Avoid a wide range of text sizes and styles
- Experiment with a small table including sample text sizes, styles, and background tints you plan to use. If the system preserves these in the pasted table, go ahead with the full table
To apply simple text edits to pasted table content, select the text you want to edit. Then right-click to access your browser editing tools. However:
-
If you don't want the table grid lines to display in the PDF output, hide them in Microsoft Word before copying
-
If you want to center align or right align the table, apply this formatting in Microsoft Word before copying
To delete a table from a PDF template, select the complete table. Then select Delete on your keyboard or Cut from the browser right-click menu.