Running an upload
To use Payflow to upload data from a source file into Sage People, the upload must be configured, the fields in the upload file mapped to Payflow Line, and the Payflow Lines mapped to HCM objects and fields.
To run an upload:
- Select the Payflow Services tab.
Sage People displays the Payflow Services Home page.
- Select the name of the Payflow Service hosting the upload you want to run.
Sage People displays the Payflow Service Console for the Service.
- Select Upload Payflow File:

Sage People displays the Upload page for you to select the file:
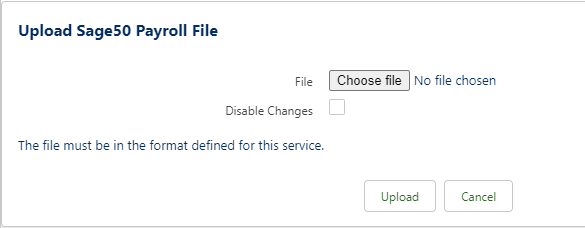
- Select Choose file find and select the file.
Sage People displays the file name next to the Browse button.
- To run a test upload without applying any changes to the data, check Disable Changes.
Use Disable Changes in combination with the Warn If Different field when mapping Payflow lines to HCM to include notification of changed fields in the upload confirmation email.
- Select Upload.
On completion of the upload, Payflow sends a confirmation email to the user named in Send Reports To when configuring the upload.
The Batch is added to the Payflow Batches section on the Payflow Service Console page:
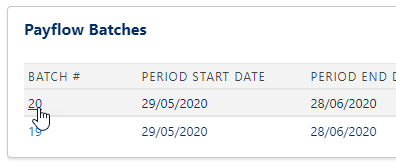
To display batch detail, select the Batch Number.