The Payroll Line object must contain fields for all the data you want to extract from the Payslips .csv file supplied by the payroll provider for mapping and display in Sage People.
If you are using the Payroll Line object for another purpose - not related to payslips - bear in mind that any data uploaded to Payroll Line becomes available to the Payslips process. To avoid exposing unwanted data through the Payslips process, make sure the Payroll Line object is used exclusively for payslips. For all other purposes use the Inbound Staging Line object.
The Payroll Line object contains a number of - check to see if the fields you need are present. If you need to add your own custom fields:
-
Go to Setup > App Setup > Create > Objects.
-
In the list of custom objects select the label for the Payroll Line object.
-
In the Custom Fields & Relationships related list, select New.
-
Use the wizard to define the field(s) you need to add.
-
Check the list of Custom Fields & Relationships to make sure each field has been added as you want it. If you need to make changes, select Edit in the Action column.
All fields in the Payroll Line object are listed for selection when you map the upload file to Payroll Line.
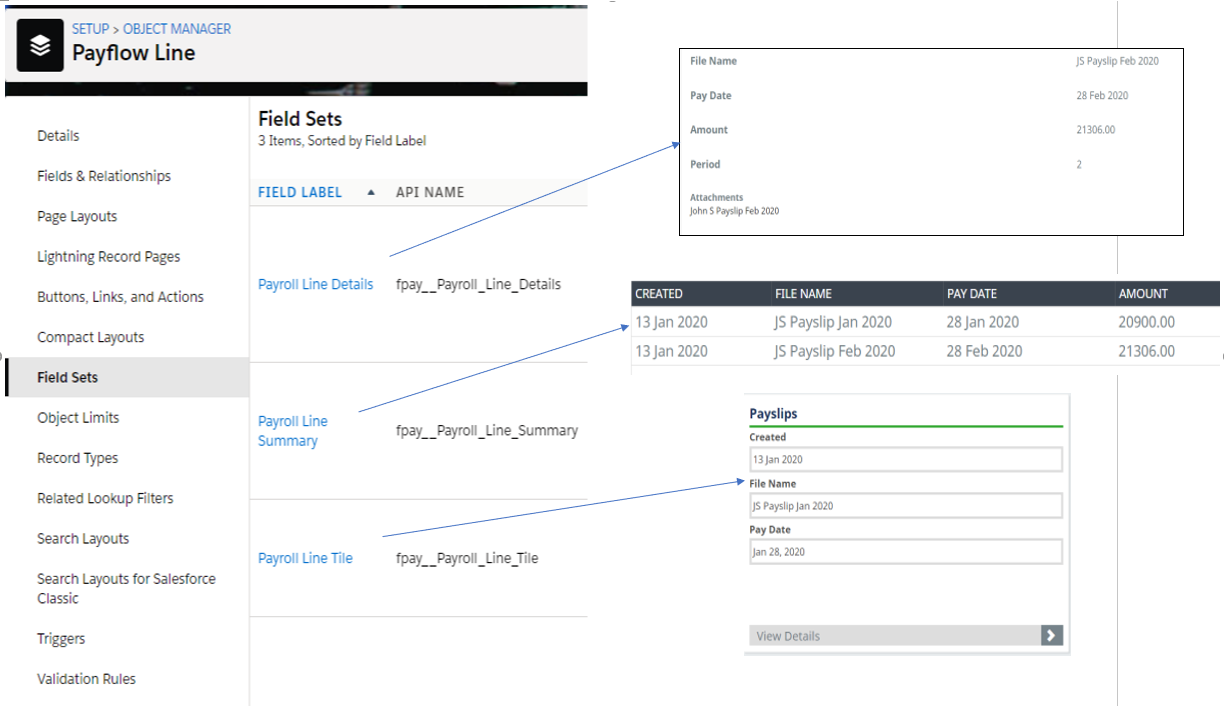
Now set up the Payroll Line field sets to display the data you want in WX.
|
Payroll Line object |
|
|---|---|
|
Field Set |
Purpose |
|
Payroll Line Details |
WX only. Fields displayed in the Payslips Detail View, individual payslip detail. |
|
Payroll Line Summary |
WX only. Fields displayed in the Payslips Detail view, summary table. |
|
Payroll Line Tile |
WX only. Fields displayed in the Payslips tile. |
-
Go to Setup > App Setup > Create > Objects.
-
In the list of custom objects select the Label for the Payroll Line object.
-
At the top of the custom object page, select Field Sets.
-
In the list of field sets select Edit for the field set you want to set up.
Sage People displays the configure page for the field set.
-
Drag the fields you want to display into the field set.
-
Select Save.