General Salesforce |
Resolve the Data Storage Exceeded issue
Each Sage People org has a Data Storage and a File Storage limit applied to it. The limits vary by customer based on the following:
-
Data Storage: A standard Enterprise org is allocated 10 GB plus 200 MB per user license.
-
File Storage: A standard Enterprise Org is allocated 10 GB plus 2 GB per user license.
One of the main reasons for exceeding data storage limits is not setting the Delete Batch After Days option according to the recommended settings for the frequency of processing for a Payflow Service. This causes the Sage People data area used for the deletion process to be overused and the deletion process fails, leaving the files to build up over time and exceed the storage limits available.
To check the data storage status for an org:
Go to Setup, and in Quick Find enter storage and select Storage Usage from the search results:
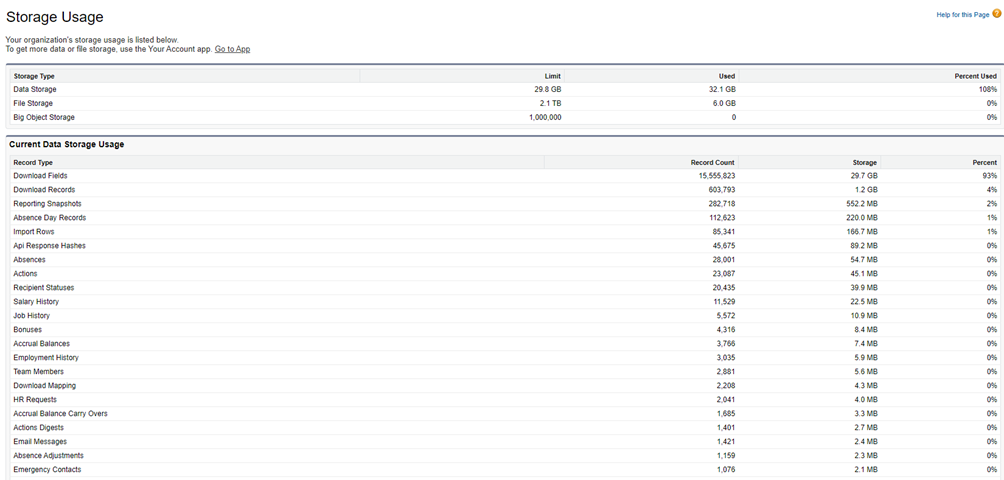
The top section of the Storage Usage page displays a summary of data and file storage limits, the amount in use, and the amount in use as a percentage of the limit.
The Current Data Storage Usage section displays a list of record types in the order of most storage used. In the previous screenshot, Download Files is at the top with 93%, followed by Download Records at 4%. Having Download Files towards the top of the list indicates the storage exceeded issue relates to Payflow.
If Percent Used in the top section of the Storage Usage page exceeds 100% the amount of storage needs to be reduced or additional storage will need to be purchased from Salesforce.
To avoid storage exceeded issues with Payflow, the recommendations for the number of days to be set for Delete Batch After Days are as follows:
| Payflow Service frequency | Recommended value |
|---|---|
| Daily | 7 days |
| Weekly | 30 days |
| Biweekly | 60 days |
| Monthly | 90 days |
When setting the value, consider the following points:
-
For changes-only Payflow files, consider a length of at least one pay period. This ensures comparisons with the last batch from the previous pay period (which might be up to 30 days ago if running monthly).
-
If the file is not a changes-only file, you can have the batch deleted as soon as possible, such as after 1 day.
-
Consider the connector period. If the period is set to a month, having more than 30 days for the delete batch is not necessary as only file is needed for comparison.
Review and update Delete Batch After Days
-
Select the Payflow Services tab.
-
Add the following fields to the ALL list view:
-
Delete Batch After Days
-
Connector Base Date
-
Connector Period
This helps to check and identify the Payflow Service that need to be updated:
-
-
Select a Payflow Service name, and then on the Payflow Service details page select Configure:
-
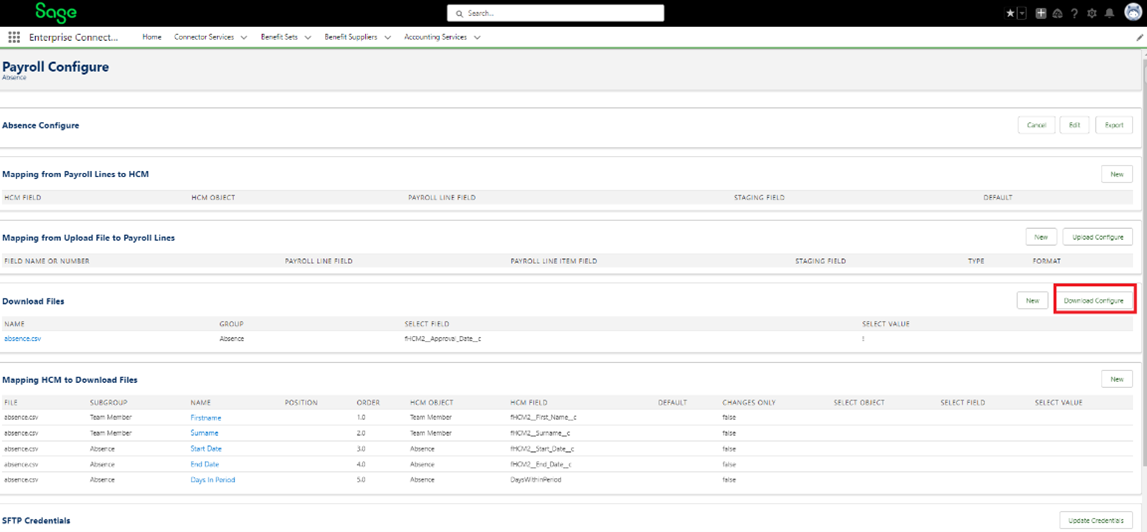
On the Payflow Configure page, Download Files section, select Download Configure:
-
In the Automatic Processing section, enter or change the value for Delete Batch After Days:
-
Select Save.
Identify Download Files to be deleted
To free up storage, you need to identify which records can be deleted. To help identify these records, Sage People recommends you create a report. Before you create the report, you need to create a new report type using Download Fields as the primary object.
To create the report type:
-
Go to Setup, and in Quick Find enter report and select Report Types from the search results.
-
On the All Custom Report Types page select New Custom Report Type.
-
For Primary Object select Download Fields and complete the details in the Identification section, set the Deployment Status as Deployed, and then select Next.
-
Select Save.
Add fields to Download Fields object
To help identify the records to be deleted Sage People recommends you add the Payflow Batch Number and Payflow Service name to the Download Fields object.
Create these new formula fields to display the Payflow Batch number and Payflow Service Name, using the following formulas:
-
Payflow Batch number for the Download Fields object:
fpay__Download_Record__r.fpay__Payroll_Batch__r.Name -
Payflow Service name for the Download Fields object:
fpay__Download_Record__r.fpay__Download_File__r.fpay__Payroll_Service__r.Name
For more information about adding formula fields, see Formulas | Create a formula field.
Create the report
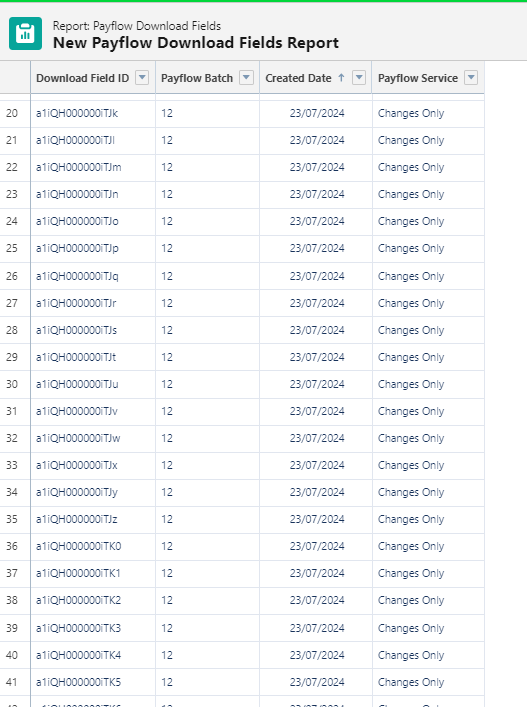
Using the custom report type for Download Fields create a report. Review the date ranges for Created Date ranges or use the Payflow Batch numbers to identify the oldest download field records for each Payflow Service.
Filtering by Payflow Service name and Payflow Batch number can be the most efficient way to group records for deletion.
1 million records can take approximately 1 hour to delete.
The following screenshot displays an example report:
When you are happy with the records included in the report, export the data as follows:
-
Select the down arrow next to Edit and select Export:
-
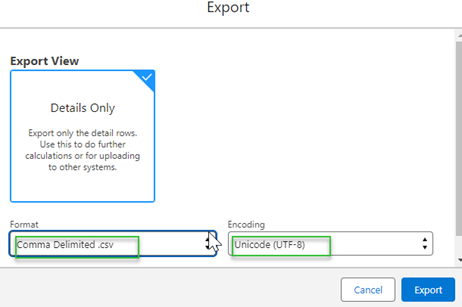
Select the format and encoding as follows:
-
Format: Comma Delimited .csv
-
Encoding: Unicode (UTF-8)
-
-
Select Export. Save the exported file to a location where you can find it.
Use Salesforce Data Loader to delete records
Sage People recommends you use Salesforce Data Loader to delete records because of the number of records requiring deletion. Salesforce Dataloader.io is not suitable for this task because of limits applied to the number of records that can be processed each month.
You can access the User Guide for and download Salesforce Data Loader in your org in Setup > Environments > Integrations > Data Loader:
To delete records:
-
Launch Salesforce Data Loader.
-
On the start screen Delete:
-
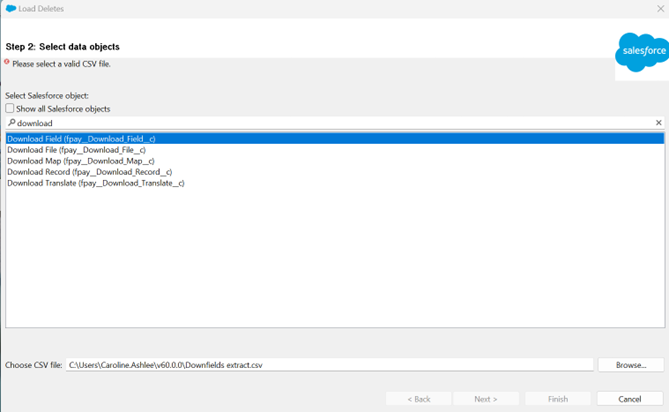
Search data objects and select Download Field (fpay_Download Field__c):
-
Select the CSV file from your computer.
-
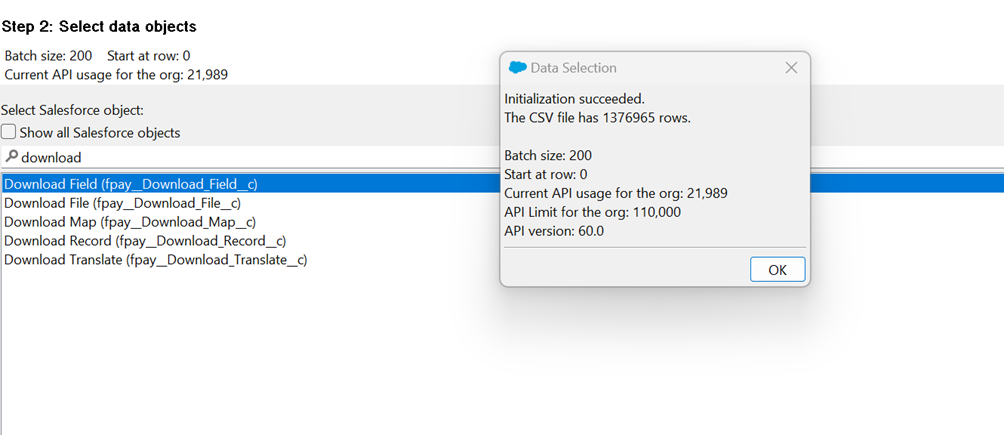
For the Data Selection dialog, select OK:
-
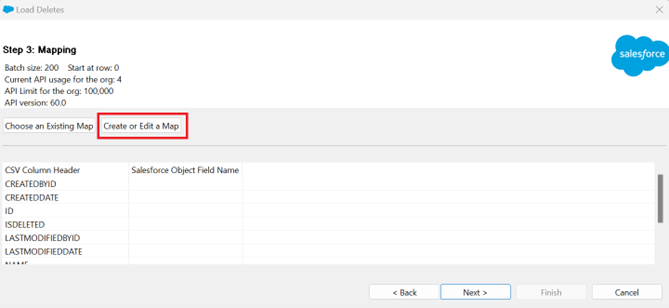
In Step 3: Mapping, select Create or Edit a Map:
-
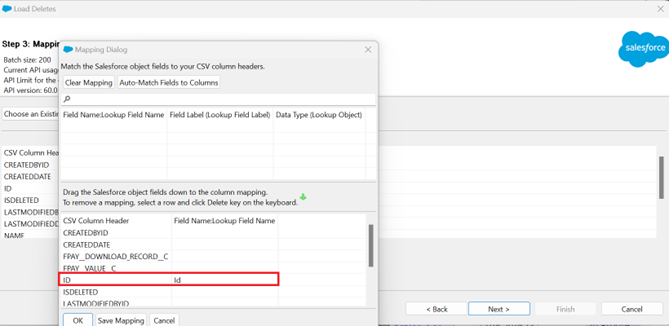
In the Mapping Dialog, select to match on the ID field:
-
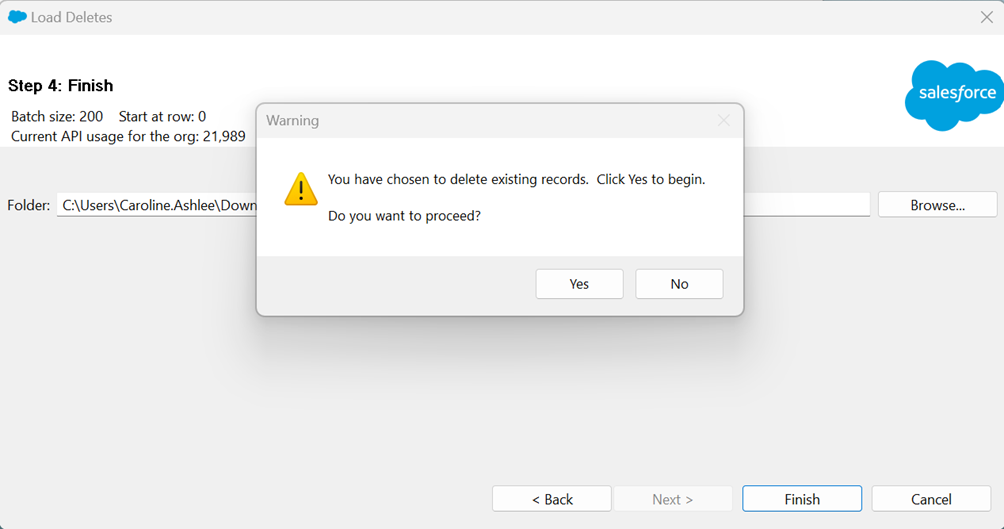
In Step 4: Finish, select Finish, and then Yes to the confirmation message:
When the task finishes, you will see the number of records successfully deleted. This will match the number of rows in CSV file used for the delete.
NoteDepending on the size of the file this process can take several hours to complete.
The Download files have now been deleted. Review the details on the Storage Usage page and continue this process until the percentage used is 100% or lower.
