Session settings for successful Longlist email operation
When using the Send Email option from the Longlist tab on the Vacancy page, the error reads:
<your org identifier>.vf.force.com refused to connect.
This is likely because of the session clickjack settings for your org. To fix the issue:
-
In your org, go to Setup and in Quick find, enter Session Settings.
-
On the Session Settings page, scroll down to the Clickjack Protection section:
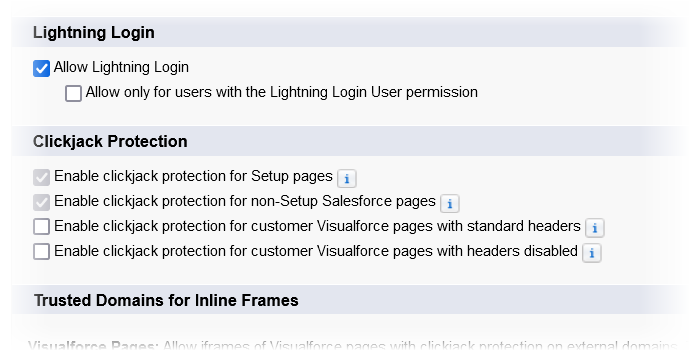
By default, the settings are as follows:
Field Default value Enable clickjack protection for Setup pages Selected Enable clickjack protection for non-Setup Salesforce pages Selected Enable clickjack protection for customer Visualforce pages with standard headers
Not selected Enable clickjack protection for customer Visualforce pages with headers disabled Not selected -
Check the clickjack protection settings in your org. Decide if they're appropriate for the security level you want to apply.
-
If:
-
Enable clickjack protection for customer Visualforce pages with standard headers
-
Enable clickjack protection for customer Visualforce pages with headers disabled
are already selected or you need to select them:
-
Scroll down to the Trusted Domains for Inline Frames section
-
Select Add Domain
-
Add the domain name:
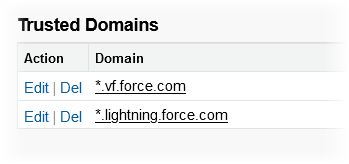
*.vf.force.com
-
Select Save & New
-
Add the domain name:
*.lightning.force.com
-
Select Save
-
Check the trusted domain list includes the two domains you added:
-
or
-
Now use the Longlist to select the candidates you want and select Send Email. The emails will send without error.