Set up custom metadata
Custom metadata is used to enable flexible mapping between the labels used to describe data and the underlying data values used by your Candidate Experience portal. To simplify configuration key metadata values can be set on the Candidate Portal Configure page, with additional values accessible through Setup.
To set key metadata values:
-
Go to App Launcher > Candidate Portal Configure.
-
Select Edit.
-
On the Candidate Portal Configure page complete the fields as follows:
Field What to enter Select experience site Select the picklist and choose the site you want to configure. Organization name Enter the name for your organization you want to use on email templates for emails sent to candidates. Response email address Select the picklist and choose the org wide email address to use on response emails. Candidate portal confirm email link Select the picklist and choose Candidate Portal new member welcome email Application submitted email template Select the picklist and choose Candidate Portal application submitted email Application rejected email template Select the picklist and choose Candidate Portal rejection email Immediate job alert email template Select the picklist and choose Candidate job alert immediate
Job alert created email template Select the picklist and choose Candidate job alert confirmation Regular job alert email template Select the picklist and choose Candidate job alert regular Job alert sender email address Select the picklist and choose the org wide email address to use on job alert emails. 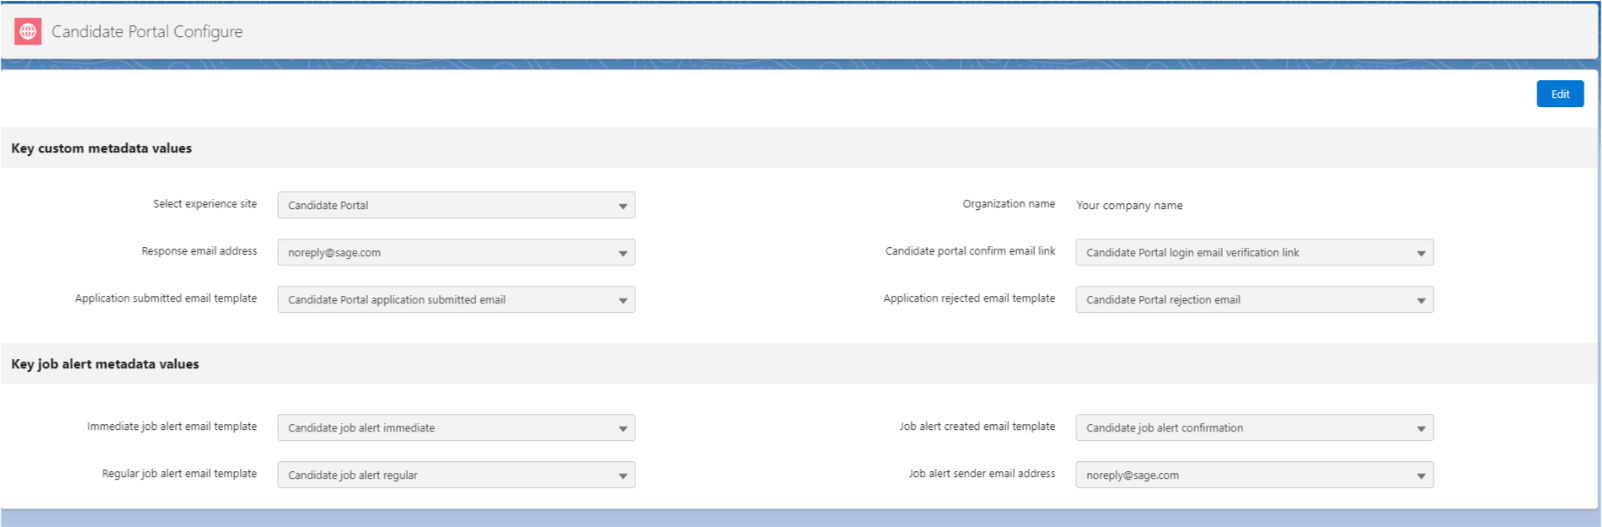
To access all metadata:
-
Go to Setup > Custom Code > Custom Metadata Types.
-
Select Manage Records for the metadata type you want to edit:
Label Contains Candidate Portal Job Alert Settings -
Job alert email template IDs
-
Labels for job alert frequencies
-
The maximum number of vacancies displayed in an alert
-
The sending address for job alert emails
-
A job alert encryption key
CandidatePortalCommunity -
The name of your organization as you want it to appear to external users. Typically used in signatures on emails to candidates.
-
The sending address for internal advice emails and candidate acknowledgements.
-
Email template IDs for the login email verification link email, application submitted email, and rejection email.
-
Default language and locale for portal
CandidatePortalIcon Icons displayed to represent vacancy fields. Defaults are standard Salesforce icons:
-
Location
Default: utility:checkin
-
Employment type
Default: utility:user_role
-
Salary
Default: utility:moneybag
-
Benefits
Defuult: utility:side_list
CandidatePortalSalaryFilterValue Values to be displayed for each of eight salary filters:
-
Minimum value
For example 50,000
-
Maximum value
For example 60,000
-
Label to be displayed, complete with currency symbols if required.
For example $50,000 - $60,000
-
The order in which to display the filter
-
-
On the view page for the type, select Edit for the item you want.
Sage People displays the edit page for the item.
-
Make the changes you want and select Save.