Follow these steps to set up Sage People for connecting to DocuSign:
-
Add DocuSign configuration details to your Sage People org. You can assign details to profiles and users in the combination you need to grant the DocuSign access required.
-
Update the list of DocSign templates available to Sage People.
-
Set up send and return objects for each template.
-
Set up recipient roles for the DocuSign forms.
-
Map DocuSign data to Sage People.
-
Activate templates.
Add DocuSign configuration details
-
Log in to Sage People HCM.
-
In the App Launcher select DocuSign Configuration.
-
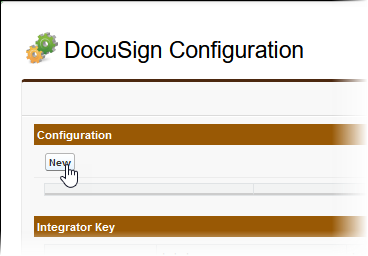
On the DocuSign Configuration page, Configuration section, select New:
-
Complete the fields as follows:
Field What to enter Location The profile or user you want to be able to use the DocuSign configuration details. Select the picklist and choose Profile or User, then use Lookup to find and select the profile or user you want.
-
Selecting Profile enables all employees assigned to the profile to use the DocuSign configuration you define.
-
Selecting User enables the user you select to use the DocuSign configuration you define.
DocuSign Account ID The 32 character GUID associated with your DocuSign account.
Paste the API Account ID copied when setting up DocuSign to connect to Sage People, or retrieve it from your DocuSign account:
Go to Settings > Integrations > Apps and keys to display your API Account ID.
DocuSign API Endpoint The URL for your DocuSign account. This must be in the form:
https://{server}/restapi/{apiVersion}/Ensure you enter the full URL including the scheme - https in the example.
You must use the URL associated with your DocuSign account. The URL includes a component for the regional DocuSign instance, for example:
-
https://eu.docusign.net/restapi/v2/login_information/
for the EU instance.
-
https://na1.docusign.net/restapi/v2/login_information/
for the North America instance.
-
https://demo.docusign.net/restapi/v2/login_information/
for a sandbox, developer, or trial DocuSign account
Username The User Name you use to sign in to your DocuSign account; typically an email address. Password The password associated with your DocuSign account. The password is not displayed in plain text when you enter it and is hidden after entry. The password is stored securely and preserved if you edit other fields on this DocuSign Configuration. Use Send On Behalf Of Checkbox. If checked, DocuSign documents are sent using the email of the DocuSign user selecting Send. Works for manually sent documents if the sender is a registered DocuSign user. It does not work for documents initiated by Action Events. -
-
Select Save.
Sage People displays the DocuSign Configuration page with the details you entered, excluding the password.
Repeat this procedure for each profile and user you want to set up to use the DocuSign account.
Test connection and update DocuSign template list
DocuSign templates are stored on, and load from the DocuSign system; they are not created in Sage People. Updating the list enables you to test the connection between Sage People and DocuSign.
-
In the App Launcher select DocuSign Templates.
-
On the DocuSign Templates Home page select a list view
-
Select Update Template List:
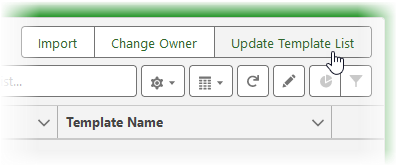
Update Template List extracts all active DocuSign templates you have defined on your DocuSign account and makes them available in Sage People. Update Template List overwrites the existing list, ensuring the latest versions of active templates are available.
Sage People displays a warning message:
 Note
NoteIf Sage People displays an error message:
Error: no protocol: nulllogin_information?api_password=false&include_account_id_guid=true&login_settings=none
check the DocuSign API Endpoint value entered on the DocuSign configuration page. This field must contain the full DocuSign API Endpoint url as supplied by DocuSign, for example:
https://eu.docusign.net/restapi/v2/login_information/
-
Select Update.
If all credentials are correct and connection is successful but there are no templates to update, Sage People displays an error message:

If there are templates to update Sage People populates the Template List:

At this stage, each new template is marked as Inactive, with Send from... and Return to... objects not defined.
Set up send and return objects
Sage People needs to know where to access the recipient's contact details and where to store data from the completed, returned form.
-
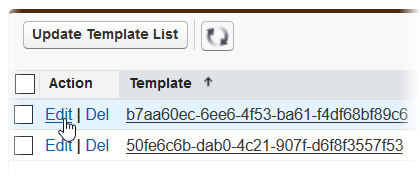
On the DocuSIgn Templates page work through the templates in turn to set up send from and return to objects. For the first template select Edit:
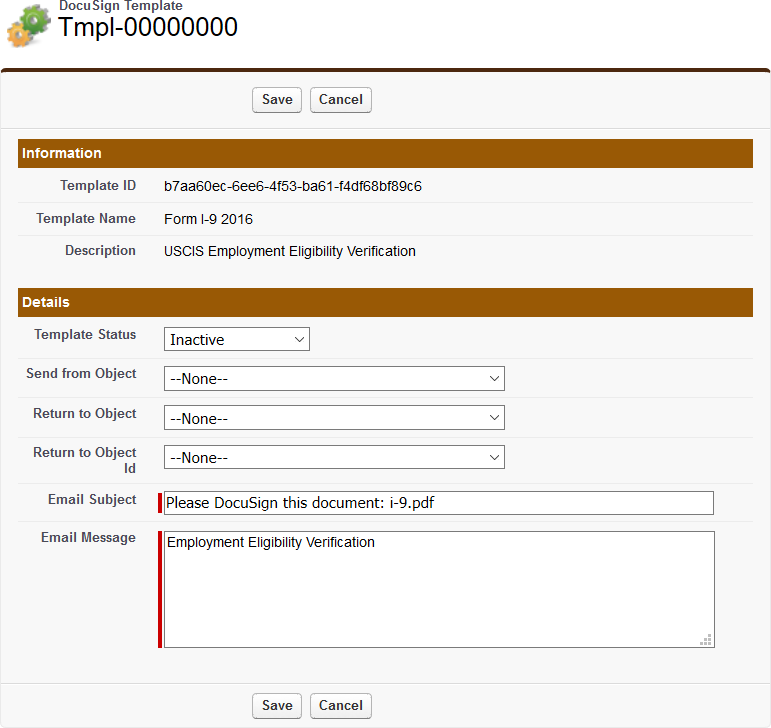
Sage People displays the DocuSign Template edit page for the template you selected:
-
Complete the fields as follows:
Field Description Template Status Picklist. Newly imported templates are set inactive by default. Complete template set up before activating a template.
-
Inactive
The template is listed but not currently available for use in Sage People.
-
Active
The template is available for use in Sage People.
Active Self serve is not currently supported.
Send from Object Picklist. The object to be used as the source for the recipient's email address and full name when using the DocuSign Send button from the employee's Team Member or Employment Record pages in the HR Manager portal. Select the picklist and choose from:
-
Employment
for the Employment Record
-
Team Member
for the Team Member record. You can also set up an Action Event to send a DocuSign form if the Send from object is set to Team Member.
Return to Object Picklist. The object to be to used to associate data returned from the DocuSign form, and to host the document status and completed PDFs. Return to Object Id Picklist. Automatically populated with all IDs available on the object when you select a Send from Object. Select the picklist and choose the correct Object Id depending on the Send from... and Return to... object combination you have chosen:
-
Send from Object: Team Member
Return to Object: Team Member
Return to Object Id: Id
-
Send from Object: Team Member
Return to Object: Employment
Return to Object Id: fHCM2__Current_Employment__r.Id
-
Send from Object: Employment
Return to Object: Employment
Return to Object Id: Id
-
Send from Object: Employment
Return to Object: Team Member
Return to Object Id: fHCM2__Team_Member__c
Email Subject As entered in DocuSign when defining the template. You can edit the Subject here, but bear in mind that any changes are overwritten when you next use the Update Template List button on the DocuSign Templates tab. To make your changes more permanent, edit the Email Subject for the template in DocuSign. Email Message As entered in DocuSign when defining the template. You can edit the Message here, but bear in mind that any changes are overwritten when you next use the Update Template List button on the DocuSign Templates tab. To make your changes more permanent, edit the Email Message for the template in DocuSign. -
-
Select Save.
Sage People saves your changes and displays the DocuSign Template Detail page.
You are now ready to define recipient roles for the DocuSign templates.
Define recipient roles
-
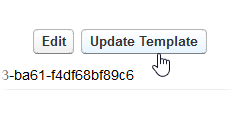
On the DocuSign Template Detail page select Update Template:
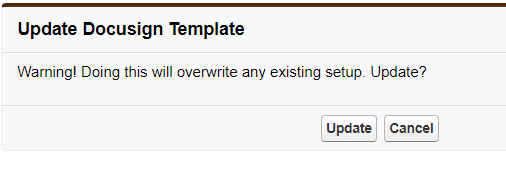
Sage People asks you to confirm:
-
Select Update
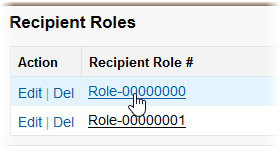
Sage People adds the Send from... and Return to... object detail to the DocuSign Template Detail page and populates the Recipient Roles Related List:

-
For each role define the recipient email address and name fields, and the field mapping. Select a Recipient Role number:
Sage People displays the Recipient Role Detail page.
-
Select Edit.
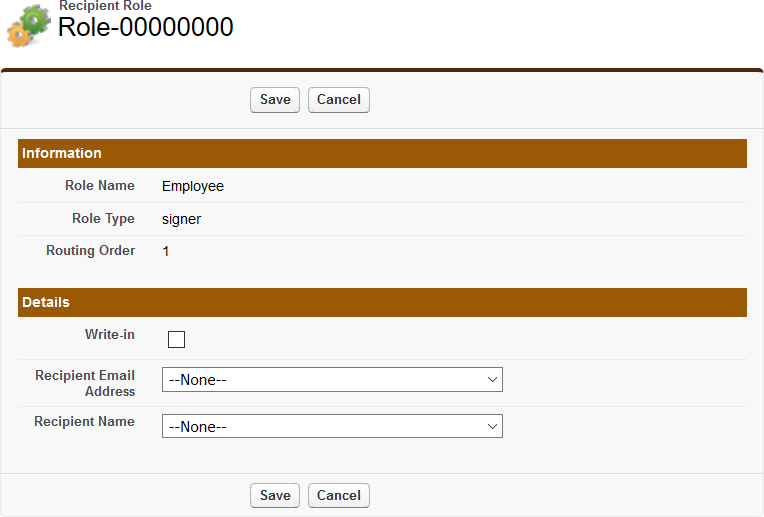
Sage People displays the Recipient Role edit page:
-
Complete the fields as follows:
Field Description Write-in Checkbox. Controls how you complete the Recipient Email Address and Recipient Name fields.
If checked, you can manually complete the Recipient Email Address and Recipient Name.
If unchecked, Recipient Email Address and Recipient Name display picklists for you to choose from.
Recipient Email Address The API name of the field on the parent (source) object used to supply the target email address for the DocuSign form.
Text field when Write-in is checked, enabling you to enter the API field name manually.
Picklist when Write-in is unchecked.
When using the picklist, select the picklist and choose the correct Recipient Email Address field name depending on the Send from... and Return to... object combination you have chosen:
-
Send from Object: Team Member
Return to Object: Team Member
Recipient Email Address: choose the API field name of the address you want to use on the Team Member record:
fHCM2__Email__c or fHCM2__Home_Email__c
-
Send from Object: Team Member
Return to Object: Employment
Recipient Email Address: choose the API field name of the address you want to use on the Team Member record:
fHCM2__Email__c or fHCM2__Home_Email__c
-
Send from Object: Employment
Return to Object: Employment
Recipient Email Address: choose the API field name of the address you want to use, including the path from the Employment Record to the Team Member record:
fHCM2__Team_Member__r.fHCM2__Email__c orfHCM2__Team_Member__r.fHCM2__Home_Email__c
-
Send from Object: Employment
Return to Object: Team Member
Recipient Email Address: choose the API field name of the address you want to use, including the path from the Employment Record to the Team Member record:
fHCM2__Team_Member__r.fHCM2__Email__c or
fHCM2__Team_Member__r.fHCM2__Home_Email__c
Recipient Name The API name of the field on the parent (source) object used to supply the name of the person receiving the DocuSign form.
Text field when Write-in is checked, enabling you to enter the API field name manually.
Picklist when Write-in is unchecked.
When using the picklist, select the picklist and choose the correct Recipient Name field name depending on the Send from... and Return to... object combination you have chosen:
-
Send from Object: Team Member
Return to Object: Team Member
Recipient Name: select the API field name on the Team Member record:
fHCM2__Name_Full__c
-
Send from Object: Team Member
Return to Object: Employment
Recipient Name: select the API field name on the Team Member record:
fHCM2__Name_Full__c
-
Send from Object: Employment
Return to Object: Employment
Recipient Name: select the API field name including the path from the Employment Record to the Team Member record:
fHCM2__Team_Member__r.fHCM2__Name_Full__c
-
Send from Object: Employment
Return to Object: Team Member
Recipient Name: select the API field name including the path from the Employment Record to the Team Member record:
fHCM2__Team_Member__r.fHCM2__Name_Full__c
-
-
Select Save.
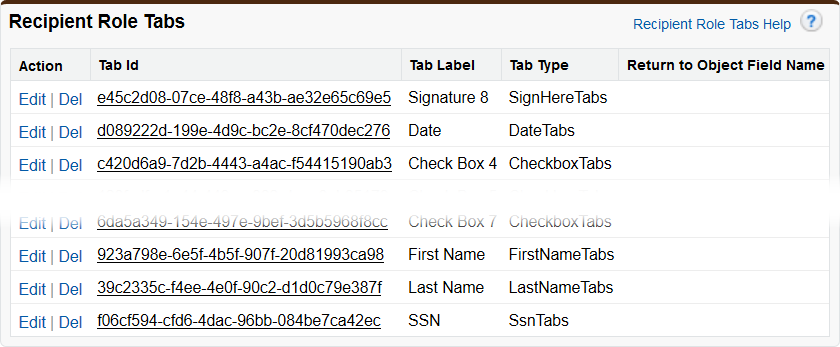
Sage People displays the Recipient Role Detail page with the Email Address and Name fields completed and the associated Recipient Role Tabs Related List:
 Note
NoteDocuSign Tags are also known as Tabs. Tags in the form within DocuSign become Tabs when returned to Sage People. The two terms are synonymous.
Map DocuSign data to Sage People
Use Recipient Role Tabs to map the data from the DocuSign form to the Sage People Return to Object.
There are some tab types you cannot use to source data for importing into Sage People:
-
Signature
-
Optional Signature
-
Digital Signature
-
Signer Attachment
-
Initial
-
Optional Initial
-
Full Name
-
First Name
-
Last Name
-
Email Address
-
Note
-
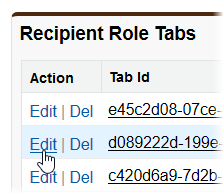
Work through the Tabs you want to map to Sage People fields. For each Tab select Edit:
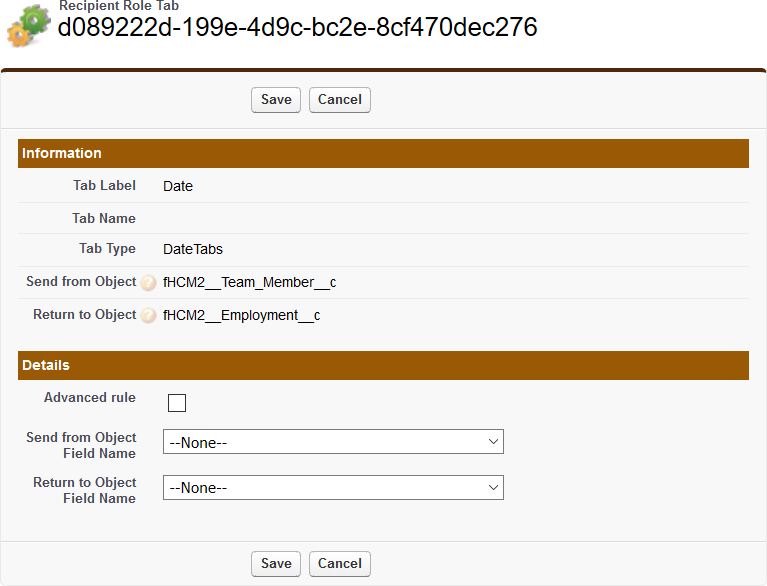
Sage People displays the Recipient Role Tab edit page:
-
Complete the fields as follows:
Field Description Advanced Rule Checkbox. Controls how you complete the Return to Object Field Name.
If checked, you can manually complete Return to Object Field Name.
If unchecked, Return to Object Field Name displays a picklist for you to choose from.
Send from Object Field Name The API name of the field on the Send from... object used to pre-populate fields on the DocuSign form.
Text field when Advanced rule is checked, enabling you to manually enter the API field name. Ensure you enter the full path if specifying a field on a related object.
Picklist when Advanced rule is unchecked. When using the picklist, select the picklist and choose the field.
Return to Object Field Name The API name of the field on the Return to... object used to receive DocuSign form data.
Text field when Advanced rule is checked, enabling you to manually enter the field name. Ensure you enter the full path if specifying a field on a related object.
Picklist when Advanced rule is unchecked. When using the picklist, select the picklist and choose the field.
When mapping fields from Sage People to DocuSign and from DocuSign to Sage People:
-
DocuSign tags must be compatible with Sage People field types.
-
If you try to map fields that cannot be sent from or returned to Sage People, such as Signature fields, Send from Object Field Name and Return to Object Field Name display the message:

-
DocuSign date format is mm/dd/yyyy. Conversion to and from Sage People date fields using a different format is automatic, and the Sage People format is preserved in Sage People. You do not need to manually change Sage People date formats to match DocuSign.
-
-
Select Save.
Sage People saves the mapping you have defined and redisplays the Recipient Role Tabs list.
Activate templates
Now that the DocuSign templates are fully defined, remember to activate the templates you want to use:
-
In the App Launcher select DocuSign Templates.
-
On the DocuSign Templates page select Edit for the template you want to activate.
-
On the Template Edit page set the Template Status field to Active.
-
Select Save.