Configuring a download
Sage People configures downloads as part of outbound Payflow Services. Each service has one set of configuration settings that you can apply to one or more download files.
Once you've configured it, you can run the download and use it to send data to any target system. You don't have to use the download for payroll data exclusively, or as part of a payroll service you've configured in full. You can also specify parameters to run the download to a pre-defined schedule automatically.
By default, we encode downloads as UTF-8 to allow inclusion of international character sets.
Resolution
- Select the Payflow Services tab. Sage People displays the Payflow Services Home page.
If you want to configure a download as part of an existing Payflow Service:
- Select a View that includes the service you want
- Select the Payflow Service Name:
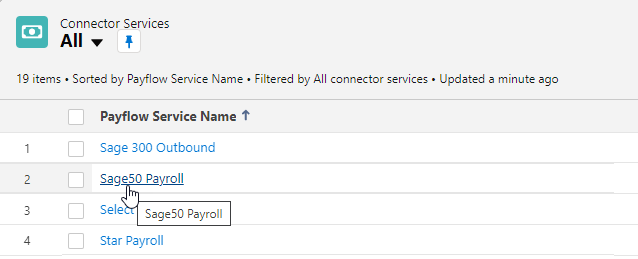
Sage People displays the Payflow Service Console for the Service
-
If you want to configure a download for use outside a Payflow service, or as part of a new service:
- Select New
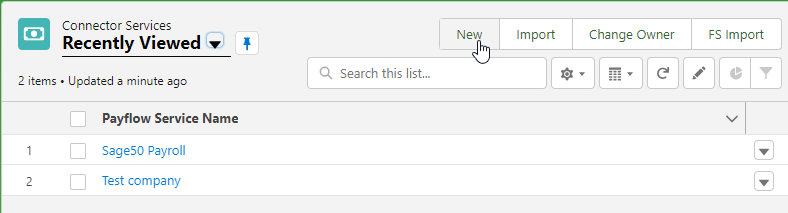
Sage People displays the New Payflow Service Edit page
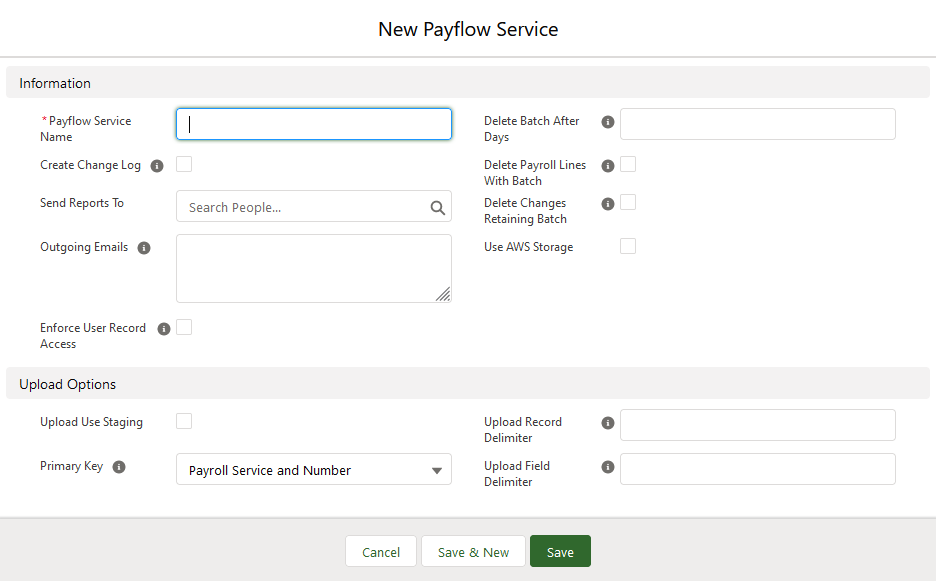
- In Payflow Service Name, enter a name for the Service
- Check Create Change Log to add a log file to the Note & Attachments Related List for each batch run by the Service
- In Send Reports To, enter the name of the Sage People user to receive download reports. Use Lookup if necessary
- Select Save
Sage People displays the Payflow Service console for the service.
- Select New
- On the Payflow Service Console, select Configure.
Sage People displays the Configure page for the Payflow Service.
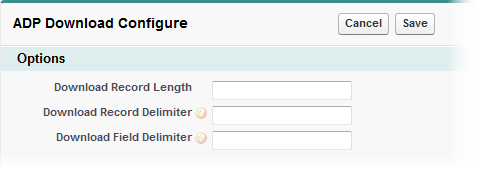
- In the Download Files section, select Download Configure:

Sage People displays the Download Configure page.
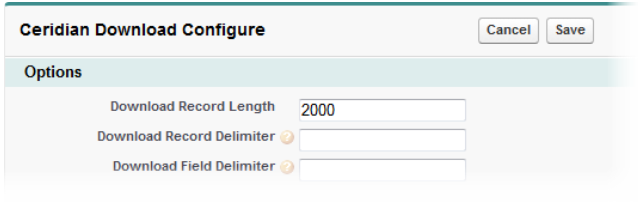
- Complete the fields in the Options section as follows:
Field Description Download Record Length
Number of bytes. If the file you donwload must be in records of fixed length, specify the length. Exclude file delimiters. For example, the record includes four fixed length fields which you specified as 12 characters each. The Download Record Length will be set to 48.
You can override the value you specify with a different value for an individual download file.
If you leave this field blank, files you download have variable-length records.
Download Record Delimiter
Characters representing a break between records. The characters are operating system specific. For operating systems using ASCII use:
- \r for return / carriage return
- \n for newline / line feed
If you leave this field blank, the record delimiter defaults to \r\n. This is the record delimiter we use for CSV (comma-separated value) files.
For XML record downloads, enter null as the download record delimiter.
If you're downloading records of fixed length, leave this field blank. Specify a value in Download Record Length.
Download Field Delimiter
Characters representing a break between fields within a record. If you leave this blank, the delimiter defaults to , (comma).
- For CSV (comma-separated value) files use ,(comma), or leave the field blank
Fields containing a comma as part of the data have those fields enclosed in double quotes (") automatically. For example, numbers using commas as thousands separators
For XML (extensible markup language) files, use null
- For TSV (tab-separated value) files use \t
If you leave this field blank, the field delimiter defaults to a comma.
-
Complete the fields in the Team Member Selection section as follows. These object-specific fields let you specify a base group of Team Members to supply data for download:
Field Description Team Member Select Field
Picklist. The field from the Team Member object you want to use to select Team Member data. This is to include in the download. You can specify any text or formula field, including custom fields you've added to your org. If you need to use complex logic, create a new formula field on the Team Member object to hold the logic. Then select the new field here.
Use Team Member Select Field together with Team Member Select Value to filter the data. You can use this as the basis for the download.
Team Member Select Value
The value of Team Member Select Field for data you want to use as the basis for the download.
-
If you specify a value that doesn't exist for the field you've chosen, the download fails
-
If blank, the system includes data in the download only if the value of the field you select is blank
-
For logical NOT, use !
For example, to filter team members in a given location, you can use
fHCM2__Country__cas the Team Member Select Field. Then use one of the following values:- France specifies all Team Members with the value "France" in the Country field
- !France specifies all Team Members with any value other than "France" in the Country field
- ! on its own specifies all Team Members with any non-blank value in the Country field
- A blank field specifies all Team Members with no value in the Country field
Job History Select Field
Picklist. The field from the Job History object you want to use to select Team Member data. This is to include in the download. Use Job History Select Value to specify the value the field must match to qualify Team Member data for download.
Select the picklist and choose the field.
Use this for identifying Team Members who have changed reporting country since the last batch you ran.
Job History Select Value
The value of the field chosen in Job History Select Field for data you want to use for the download.
Team Member Select Dates
Checkbox. Lets you select Team Members employed by your organization for the whole of the download (Payroll) period.
If you check this, the system selects Team Member records for the Payroll period you specified if:
- The Employment Record Start Date is before the Payroll period
AND
- There's no Employment Record End Date. Or the Employment Record End Date specifies a date after the end of the Payroll period
If you don't check this, the system doesn't select Team Member records based on their Employment Record start and end dates. To include all Team Member records, leave unchecked.
Salary Select Dates
Checkbox. Lets you select salary records for Team Members with salary start dates before or during the download (Payroll) period. The system doesn't include Team Member salary records that start after the end of the Payroll period.
If you check this, the system selects Team Member salary records for the specified Payroll period. This is if the Salary Record Start Date is before or during the Payroll period. The system doesn't select Salary records that start in the future.
If you don't check this, the system includes the most recent Team Member salary records. It does this regardless of the salary record start date.
Team Member Include Period Back
Checkbox. Lets you select Team Member records from the previous download (Payroll) period and the current download period.
If you check this, the system downloads Team Member records from the previous download period. For example, to retain access to Team Members who are terminating and not active in the current download period.
If you don't check this, the system only downloads Team Member records active in the current download period.
-
-
Complete the fields in the Bonus Selection section as follows:
Field Description Bonus Select Dates
Checkbox. Lets you select Bonus records for Team members with bonus-paid dates within the download (Payroll) period.
If you check this, the system includes Team Member Bonus records in the download. It does this only if the bonus-paid date falls within the Payroll period.
If you don't check this, the system includes the most recent Bonus records in the download. It does this regardless of the date you paid the bonus.
Bonus Include Period Back
Checkbox. Lets you select Bonus records for Team Members with bonus-paid dates in the previous download (Payroll) period and the current download period.
If you check this, the system includes Bonus records with paid dates in the previous download period in the download.
If you don't check this, the system only includes the most recent Bonus records in the download.
Include Post Employment Bonus
Checkbox. Lets you select Bonus records for Team Members who have terminated. For example, a contractual bonus an employee earned during their employment, who has since left your organization.
If you check this, the system includes active Bonus records for Team Members who have terminated in the download.
If you don't check this, the system doesn't include Bonus records for Team Members who have terminated in the download.
-
Complete the fields in the Benefits Selection section as follows:
Field Description Benefit Include Period Back
Checkbox. Lets you select Benefit records from the previous download period and the current download period.
If you check this, the system includes Benefit records from the previous download period in the download.
If you don't check this, the system only includes Benefit records active in the current download period in the download.
Include Post Employment Benefits
Checkbox. Lets you select Benefit records that apply to Team Members who have terminated. For example, benefits that remain due to ex-employees due to US COBRA legislation.
If you check this, the system includes active Benefit records for Team Members who have terminated in the download.
If you don't check this, the system doesn't include Benefit records for Team Members who have terminated in the download.
Benefit Select Active
Checkbox.
If you check this, the system only includes Benefit records you marked as active in the download. It includes all Benefit records active in all or part of the download period.
If you don't check this, the system ignores the status of the active flag. it includes all Benefit records in the download.
Deduction Select Dates
Checkbox.
If you check this, the system includes Benefit records in the download only if you're currently making deductions for the benefit:
- Deduction Start Date is before or during the download period, or null
AND
- Deduction End Date is during or after the download period, or null. When you specify Deduction Start Date and Deduction End Date is blank, the system takes Deduction End Date as an unspecified future date
If you don't check this, the system ignores Deduction start and end dates when selecting Benefit records.
Deduction Start and End dates can be different from Benefit Start and End dates.
- Deduction Start Date is before or during the download period, or null
-
Complete the fields in the Absence Selection section as follows:
Field Description Absence Select Dates
Checkbox.
If you check this, the system includes Absence records in the download only if they fall within the download period.
If you don't check this, the system ignores Absence record dates when selecting Absence records for the download.
Absence Include Period Back
Checkbox.
If you check this, the system includes Absence records from the previous download period in the download.
If you don't check this, the system includes Absence records for the current download period only.
Absence Include Deleted
Checkbox.
If you check this, the system includes deleted Absence records in the download. Deleted Absence records have the IsDeleted field set TRUE. You can use Payflow batch logic to select output content based on this setting.
If you don't check this, the system includes Absence records in the download only if you haven't deleted them.
-
Complete the fields in the Timesheets Selection section as follows:
Field Description Timesheet Select Dates
Checkbox.
If you check this, the system includes Timesheets in the download only if they fall within the download period.
If you don't check this, the system ignores Timesheet dates when selecting Timesheet records for the download.
Timesheet Select Approved Dates
Checkbox.
If you check this, the system includes Timesheets in the download if you approved them during the download period.
If you don't check this, the system ignores Timesheet approval dates when selecting Timesheet records for the download.
Timesheet Select Paid Dates
Checkbox.
If you check this, the system includes Timesheets in the download if you paid them during the download period.
If you don't check this, the system ignores Timesheet paid dates when selecting Timesheet records for the download.
Timesheet Include Period Back
Checkbox.
If you check this, the system includes Timesheet records from the previous download period in the download.
If you don't check this, the system includes Timesheet records for the current download period only.
-
Complete the fields in the Start Date and End Date of Period section as follows:
Field Description Payroll Base Date
Date. The date you use as the starting date for calculating payroll (download) run dates. The system adds multiples of the Payroll Period to the Payroll Base Date. This is to determine the next payroll (download) run date.
Enter a date, or click the field to display a calendar so you can select a date. To use today's date, click today's date on the right of the field:

Payroll Period
Picklist. The interval between payroll (download) runs. By applying multiples of the Payroll Period to the Payroll Base Date, Sage People calculates the date of the next payroll (download) run.
Select the picklist and choose from:
- Monthly
On the same day of every month
- Semi-monthly
Twice a month. The Payroll Base Date must be the first or the last day of the month. The system then makes payroll runs on that day of every month and on the mid-day of the month. this is typically the 15th
- Biweekly
Every two weeks
- Weekly
On the same day of every week
Previous period Selecting this field will include data from the previous period and the current period. It will only include data from the previous period if you didn't include it in the previous batch. For example, new starters you added after the previous batch ran.
Days Back For Start Date
To set a start date in the past that doesn't tie to a Payroll Period. Payflow uses the value you specify if you set the Payroll Period to None. Use this field if you don't complete Payroll Base Date and Payroll Period.
Days Back For Start Date lets you set the download batch to run for a sliding window of days. This is rather than the fixed dates of a payroll period.
Enter the number of days in the past from which you want the download data to start. Enter numbers as positive integers.
Use with Days Future For End Date to specify an end date other than today. If you don't set Days Future For End Date, or you set it to zero, the end date sets to today.
Days Future For End Date
To set an end date in the future that doesn't tie to a Payroll Period. Payflow use the value you specify if you set the Payroll Period to None. Use this field if you don't complete Payroll Base Date and Payroll Period.
Days Future For End Date lets you set the download batch to run for a sliding window of days. This is rather than the fixed dates of a payroll period.
Enter the number of days in the future you want the download data to end. Enter numbers as positive integers.
Use with Days Back For Start Date to specify a start date other than today. If you don't set Days Back For Start Date, or you set it to zero, the start date sets to today.
- Monthly
-
Complete the fields in the Automatic Processing section as follows.
When scheduling multiple batches, set start times at least 10 minutes apart. Running multiple batches simultaneously can result in conflicts if another service has locked a record the system needs.
Field Description Batch Start Cron Command
Enables the Payflow batch to run according to a schedule.
Cron is a standard expression format we use to specify the time sequence to follow for downloads. For example:
-
Every day at 1pm: 0 0 13 * * ?
-
Every Friday at 5pm: 0 0 17 ? * FRI
-
The last Thursday of every month at 22:00: 0 0 22 ? * 5L
The expression must be of the form:
[sec] [min] [hr] [day_of_month] [month] [day_of_week] [year]Where:
-
[sec] is the time in seconds, from 0 to 59. You can't use any special characters
-
[min] is the time in minutes, from 0 to 59. You can't use any special characters
-
[hr] is the time in hours using the 24-hour clock, from 0 to 23. Special characters: , (comma) - (hyphen) * (asterisk) / (forward slash)
-
[day_of_month] is the date in the month, from 1 to 31. Special characters: , (comma) - (hyphen) * (asterisk) ? (question mark) / (forward slash) L W
-
[month] is the number of the month from 1 to 12, or a three letter abbreviation for the month: JAN FEB MAR APR MAY JUN JUL AUG SEP OCT NOV DEC Special characters: , (comma) - (hyphen) * (asterisk) / (forward slash)
-
[day_of_week] is the number of the day in the week from 1 to 7 starting with Sunday. Or a three letter abbreviation for the day: SUN MON TUE WED THU FRI SAT Special characters: , (comma) - (hyphen) * (asterisk) ? (question mark) / (forward slash) L # (hash
-
[year] is optional and if used is a year from 1970 to 2099. Special characters: , (comma) - (hyphen) * (asterisk) / (forward slash)
See below for special characters and further examples.
Special characters:-
(comma)
A value delimiter when specifying more than one value for a parameter
For example JAN, MAR, JUN to specify more than one month
-
- (hyphen)
A value separator when specifying a range of values for a parameter
For example, JAN-JUN to specify a range of months
-
* (asterisk)
All values for a parameter.
For example * in the day_of_week parameter position specifies all days and the download runs every day
-
? (question mark)
No specific value. Used for day_of_month or day_of_week when specifying one and not the other
-
/ (forward slash)
A value separator when specifying increments. The value before the slash specifies the starting value. The value after the slash is the amount of the increment
For example 1/5 for day_of_month specifies to run the download every fifth day of the month starting from the first of the month
-
L
Last value in the range. Available for:
-
day_of_month where it means the last day of the specified month
-
day_of_week when you use it by itself it means Saturday. When you use it with another day_of_week value, it means the last day of that value in the month. For example, 6L means the last Friday in the month
-
-
W
Available for day_of_month together with a day value to specify the nearest weekday within the month.
For example, 20W, when the 20th is a Saturday, runs the download on Friday 19th. 1W, when the 1st is a Saturday, runs the download on Monday 3rd, the nearest weekday within the month
-
# (hash)
A value separator when specifying the nth day_of_week in the month. For example, the 3rd Wednesday of the month. Use for day_of_week. The value before the hash specifies the day_of_week, the value after the hash specifies the ordinal
For example, FRI#2 and 6#2 both specify the second Friday in the month. 2#3 and MON#3 both specify the third Monday in the month
Example expressions-
0 0 13 * * ?
The download runs every day at 13:00hrs (1pm)
- 0 30 22 ? * 6L
The download runs on the last Friday of every month at 22:30. (10:30pm).
-
0 0 15 W * L
The download runs on the last weekday of every month at 15:00 (3pm).
-
0 45 17 ? * MON-FRI
The download runs Monday through Friday at 17:45 (5:45pm).
- 0 0 2 ? * MON#3
The download runs on the third Monday of every month at 02:00 (2am).
Delete Batch After Days Number of days after which the system deletes Payflow batches. For example, if you set it to 0, the system deletes all previous batches for this service after the current one runs. The system only keeps the latest batch. If you set it to 7, the system deletes all batches for this service over a week old.
Useful for constraining the amount of data held. Particularly managing changes only download data, which can accumulate quickly.
Delete Payroll Lines With Batch Checkbox. If you check this, the system deletes Payroll Lines you linked to a batch when you delete the batch. If you don't check this, deleting a batch doesn't delete associated Payroll Lines. NoteWhen you delete Payflow batches, the system deletes the related child records for the Payflow batch first. Then it deletes the Payflow batch itself. In an org with large volumes of records, it's possible to delete child records. However, deletion of the batch fails because the child records are still in the org's recycle bin. The deletion of the batch itself will keep failing until you remove the deleted child records from the org's recycle bin. After you remove the child records from the recycle bin, the system deletes the batch itself successfully.
-
-
Complete the fields in the Managed File Transfer section if you're downloading using managed file transfer as follows:
Field Description Outgoing Emails One or more email addresses to receive the download files. Enter each address on a separate line. Outgoing Server The fully qualified domain name of the SFTP service that will receive the download file. For example:
-
https://sftpgo.eu.sagepeople.com/
-
https://sftp.fairsail.com
Also add the user credentials for the SFTP service on the Payflow Configure page.
You can prevent unwanted data transfer. When cloning a Payflow service with an outgoing server you defined, blank this field on the copy. do this until you’re ready to test the data connection.
Outgoing Path Enter the folder path on the SFTP server that you'll use to store the download file. This folder path must be unique per Payflow service.
You don't need a leading or trailing slash (/).
You can't deliver files to the root folder in the file transfer platform. So this field must have a value.
You need to configure your third-party payroll processing system to retrieve files from this folder. Or you can forward files to the third-party system using file forwarding.
-
-
Select Save.
Sage People displays the Configure page for the Payflow service.
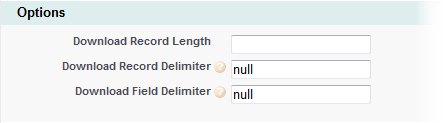
Example options configuration
In the Options section, leave all fields blank:
In the Options section, set Download Record Delimiter and Download Field Delimiter to null:
In the Options section, complete the Download Record Length as the number of bytes the download record must contain: