You can use the Reports tab in Sage People to create your own reports. You can do this when the information you need to report on doesn't exist in a pre-defined report.
Resolution
-
Go to the Reports tab.
-
Select New Report.
-
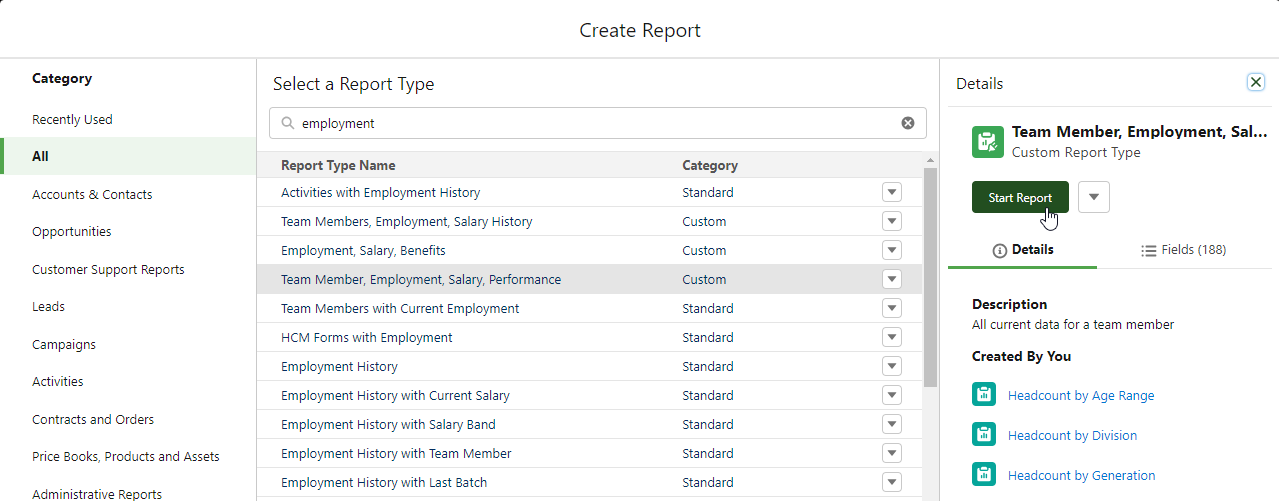
Select the Report Type. Report types act as a template for the report. They define which Sage People objects to include in the report, and therefore which fields are available to report on.
For a detailed introduction to report types and how to use them, see Report Types: Overview.
-
Select Start Report.
-
Add fields to the report in the Columns section. Select Add column to scroll through the list of fields available, or begin typing to search.
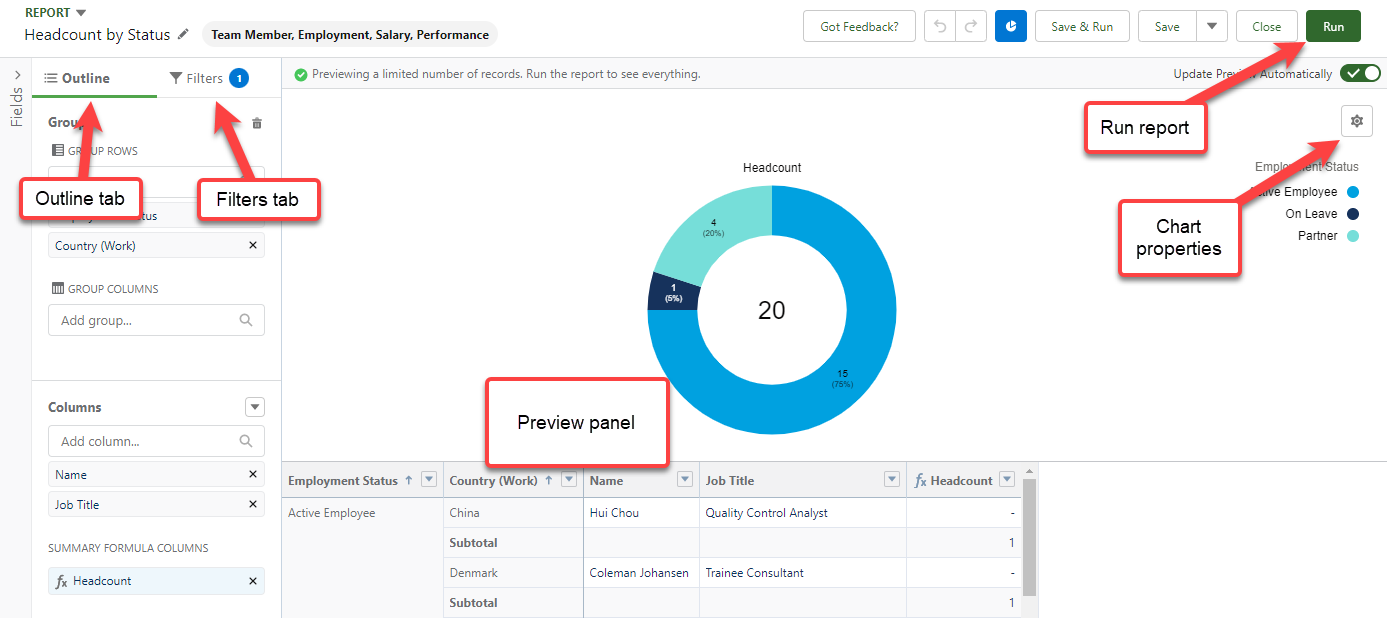
Use the Outline tab to change the fields you want to include in the report. Group information by rows or columns.
Use the Filters tab to add or remove filters, and set the default value of filters. You can also define filter logic, and add cross filters to apply filters across related objects.
The preview panel displays a view of the report as you make changes. Use the Run button to preview the report using your organization's live data.
Add further fields to the report using Add Columns.
Use Group Rows to group records in the report by matching values in the Group Rows field you select.
For more information about the available options when creating or editing a report, see Editing a pre-defined report.
-
When you'e finished, select Save. Give the report a name, optional description, and select a folder.
The system generates the Report Unique Name automatically. Reference this unique name if you want to display the report in WX. See Create a WX Report entry.
- Select Save.
The new report is available in the report folder you selected.
Learn more
See our worked example and related topics for practical walk-throughs of report creation in specific areas.

-
A free online learning course is available here: Reporting & Analytics: Introduction at Sage University
-
For more information about the way Sage People organizes your data, see the online learning module. The Data Model for Reports and Analytics at Sage University