You can choose which fields are displayed in a Related List to match your requirements:
-
Go to the page that displays the Related List you want to change.
-
Select Setup, then select Edit Object.
-
On the object detail page, select Page Layouts and then the layout where you want to make the changes.
Sage People displays the Layout Builder for the page.
-
Select Related Lists:

Sage People scrolls the display to show the Related Lists included on the page.
-
Find the Related List you want to change and select Properties
 :
:
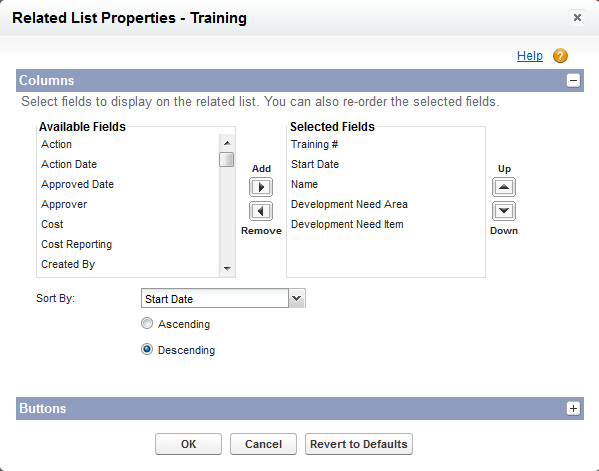
Sage People displays the Related List Properties dialog:

-
Move lists between Available Fields and Selected Fields to define the page content you want:
-
To add columns: select an Available Field and Add
 to move it to Selected Fields.
 -
To remove columns: select a Selected Field and Remove
 to move it to Available Fields.
 -
To select multiple items, use Ctrl + select.
-
-
Define the order you want to use to display items in the Related List:
-
In Sort By: choose the field you want to use to sort the list. Choose any field in the display.
-
Select Ascending or Descending to control the order.
An ascending date column lists the oldest item at the top.
An ascending text column lists the item starting with the letter nearest A at the top.
-
-
Select:
-
OK to apply the changes.
-
Cancel to discard your changes.
-
Revert to Defaults to remove all customizations.
Sage People displays the Layout Builder.
-
-
Select:
-
Save to apply the changes you have made.
-
Cancel to discard your changes.
-
Sage People displays the page holding the Related Lists you have changed.