This release introduces the following new WX features:
-
Homepage updates (beta) - Time off overview and External links
-
A New Service Type setting to support profile and homepage services
Homepage updates (beta)
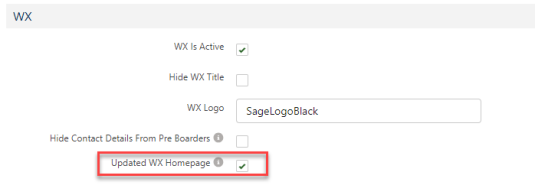
The new homepage design for WX is currently disabled by default, and must be manually enabled using the Updated WX Homepage setting on the HCM Configure page.
Enable the new WX homepage widgets using the Updated WX Homepage setting at either the organization or policy level. This setting enables a modernized look for processes displayed on the homepage and service pages. This only applies to users of the updated WX, when the Updated WX Navigation setting is enabled for the organization or by policy.
Organization-level setting
To enable the new look WX homepage and service page for all users in the organization:
-
Go to Setup > Apps > Packaging > Installed Packages and select Configure.
-
Select the Updated WX Homepage option.

-
Select Save. The new homepage and service page will be enabled for all users of the updated WX navigation.
Policy-level setting
To enable the new WX homepage layout for users in a specific policy:
-
In the HR Manager portal, open the Policies tab.
-
Select the policy you want to edit.
-
Select Edit.
-
In the WX section, select Updated WX Homepage.
-
Select Save.
Enabling the setting at the policy level means that the updated homepage layout will be available to users in this policy regardless of whether it is enabled or disabled at the organization level. If the organization-level setting is off, you can enable it here for users in this policy. For this setting to take effect, the Updated WX Navigation setting must be enabled, either at the organization or policy level.
Time off overview
A new Time off overview component has been added to the updated homepage. The component displays a summary of the next public holiday date, upcoming time off, and the remaining balance for the default vacation type. The component also includes a link to the team member's time off process.

This component will appear on your WX homepages if:
-
The Updated WX Navigation and Updated WX Homepage settings are both enabled
-
The homepage service is designated as a Homepage in the Service Type setting. See New Service Type setting.
External links
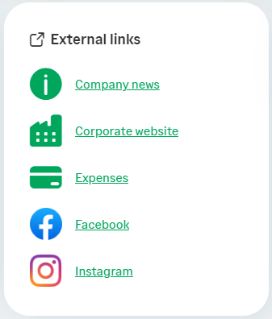
A new External links component has been added to the updated homepage. The component displays your external links alongside icons in a new section of the WX homepage. External links are displayed in the component according to the Order setting of the processes you add, using a link icon that you can select.
This component will appear on your WX homepages if:
-
The Updated WX Navigation and Updated WX Homepage settings are both enabled
-
You have Internal Communications processes assigned to the service that use the new Quick Link tile type. See How to add the Quick Link tile type.
Sage People has provided a comprehensive set of generic icons to use, as well as many common brand icons for third-party services such as Microsoft 365 and Google tools, ADP, Slack, Instagram, Facebook, and so on. Generic icons are displayed in your WX base color.
To support the external links component, a new Internal Communication tile type has been created.
Before you can add external links, you must add the new tile type as a pick list value to the Internal Communication object.
To add the Quick Link picklist value:
-
Go to Setup > Object Manager, and select the Internal Communication object (
fHCM2__Corporate_Notice__c):
-
Select Fields & Relationships.
-
In Quick Find, enter "Tile Type". Select the Tile Type field label.
-
Scroll to the Values section, and select New.

-
Enter the text "
Quick Link" (without quotation marks) and select Save. -
Select Edit beside the value you just added, and edit the Label field to read "External Link". This is the name of the tile type as it will be displayed in the HR Manager portal. You can choose any name you like, or leave it as "Quick Link" if you prefer.
Note"External links" is the default name of the component as it appears on WX homepages.
-
Select Save.
To add a link to the external links component:
-
In the HR Manager portal, go to WX Services.
-
Select the service to which you want to add your external link.
-
Select New WX Process.
-
Give the process a Label and Order in the usual way:
-
The Label is the name of the link as it appears to users in the external links component. Use the process label to describe the link.
-
The Order defines the order in which the link appears in the component, relative to other external links.
-
The Preferred Number of Columns setting is not used.
See Creating a new WX Process for more information about the settings on this page.
-
-
Set the process type to Internal Communication.
-
Under WX Internal Communication Settings, select New beside WX Internal Communication.
 Note
NoteIf you have already created an Internal Communication for the link, find it using Lookup
 .
. -
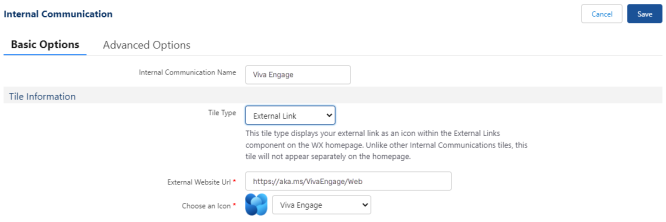
Give the Internal Communication a descriptive name.
-
Select External Link as the tile type. This is the name of the picklist value you have added.
The Detail Information section disappears. External links do not have a detail page.
NoteUnlike other Internal Communications tiles, this tile type does not appear separately on the homepage. External link "tiles" only appear in the external links component.
-
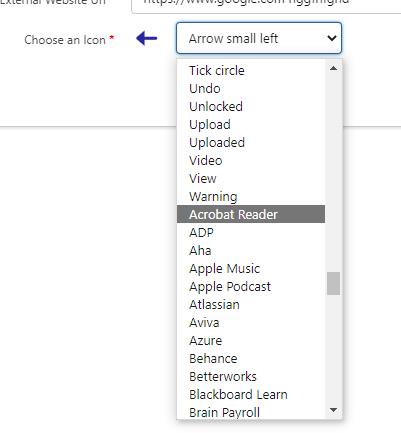
Choose an icon for the link using the drop-down menu. A preview is displayed beside the menu. Available icons are sorted in the list as follows:
-
Generic icons are displayed at the top of the list
-
Brand icons are displayed at the bottom of the list. (Brand icons are icons for popular tools from Microsoft, Google, ADP, and many other large companies).
TipTo scroll through the available icons displaying a preview for each one, select an item from the drop-down menu, then use the Up and Down keys on your keyboard to scroll through the list. The preview icon updates each time.
-
-
Select Save.
For further information about creating an Internal Communication, see Creating a new Internal Communication.
New Service Type setting
To support the new profile page feature, a new Service Type setting has been added to the New WX Service dialog:
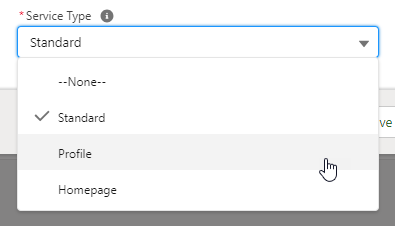
This setting determines the type of service you want to create:
-
A Standard service appears as a menu item in WX and is used to host WX processes. This is the default setting.
-
A Profile service is used to host supported WX processes for the team member's profile page. Profile services always appear directly beneath the Actions menu item. If you have more than one service set as a Profile, only the first ordered service is used as a profile. Further profile services appear as standard services.
-
A Homepage service is used to create a landing page that hosts homepage components such as the Internal Communications carousel, time off summary, external links, and summary processes. Other types of process are not shown. We recommend you set your Homepage to appear as the first item in the navigation menu by setting its order to "1". If no service is set as a Homepage, the first standard service by order is used as the default WX homepage. If you have more than one service set as a Homepage, further homepage services appear later in the menu, beneath Actions, Profile, and My Team, according to their priority order.
Existing services will be set to None until you edit them. A service with a Service Type setting of None behaves as a Standard service. The default behavior of existing pages has not been changed.
My Profile page (beta)
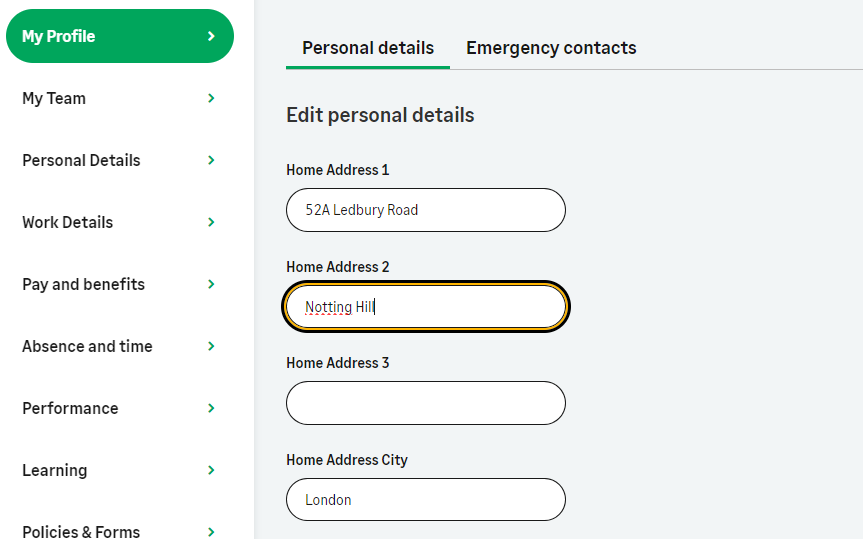
The My Profile page is designed to enable team members to access their personal information quickly, and to switch between their processes to easily view, add, or update information. Designate one of your services as a Profile service, and add supported processes. Processes appear in the secondary side menu for the profile service, and are shown as a tabbed menu on the team member's profile page, along with the team member's photo and job title.
If you have more than one service set as a profile, only the first ordered profile service page is used as a profile. Further profile services pages will appear as standard services.
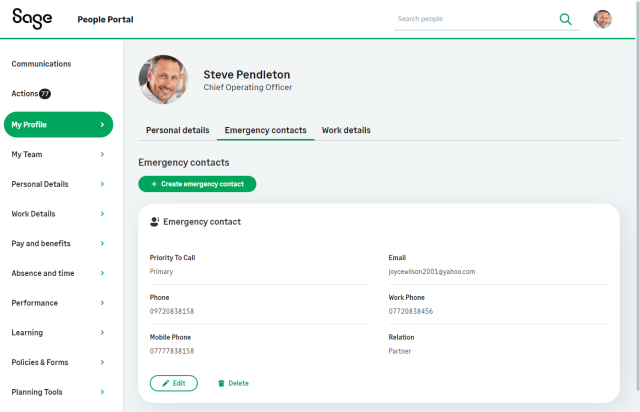
The following processes are currently supported for use with a profile service. Additional processes will be supported in future releases.
-
Personal Details
-
Emergency Contacts
-
Work Details
-
Work history/experience
-
Education history
-
Dependants
-
Passports
These processes have also been updated to enable inline editing within the page, without opening a secondary edit dialog. Select Edit details to make changes.
We encourage organizations that have a small number of personal information processes to try the My Profile page beta and provide feedback. The profile page will be further developed in 2024, when additional updated processes will become available.
In the updated Work Details process introduced as part of Y23.4, it is not possible for team members to change their profile photo. An intuitive profile photo uploader will be added in the next release.
Custom label translations are not yet supported for processes under the My Profile menu.
