Set up the home page
Set the Hero image
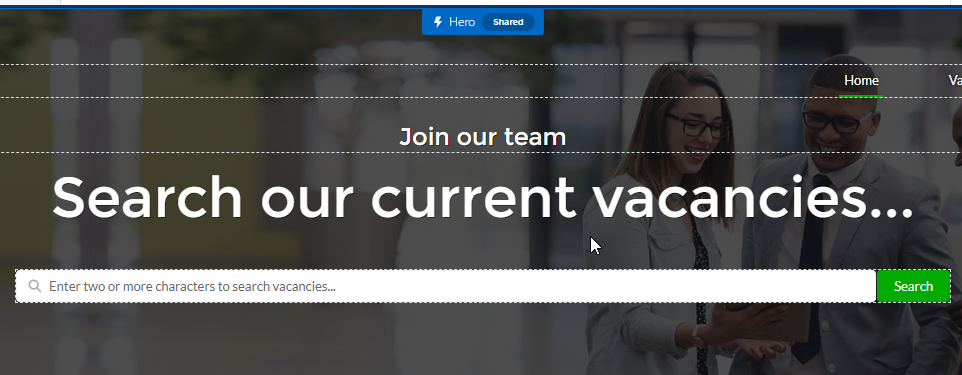
The "hero" banner image appears at the top of the home page. You can upload your own image files to the asset library and select one to use as the hero image on the home page. To learn how to upload an image to the asset library, see Upload asset files.
The Hero menu also enables you to change the layout of the top section of the page, to display a search bar or call to action links, and adjust the wording and layout.
To set up the Hero image and layout:
-
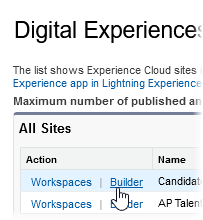
Go to Setup > Feature Settings > Digital Experiences > All Sites.
-
For the Candidate Experience Portal site select Builder:
-
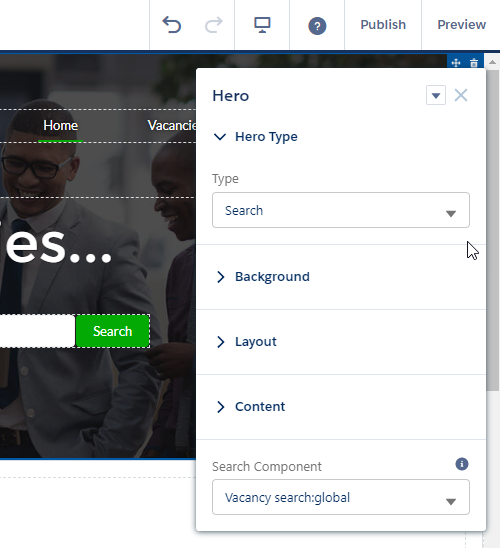
Select the area of the page with the hero image. The Hero menu is shown.
-
Under Hero Type, set the home page to default display type:
-
Search: displays a search bar allowing candidates to search across vacancies.
-
Call to Action: displays an optional primary and secondary buttons allowing you to link to specific pages. Use the Primary Button and Secondary Button menus to configure the behavior and appearance of these buttons.
-
-
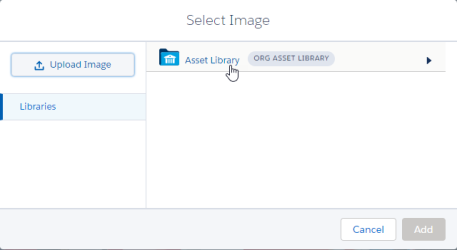
Under Background, select the image to choose a different resource.
-
Select Upload Image to add an image from your local machine to the Asset Library and set it as the Hero image.
-
To choose an existing resource, select Asset Library, and select the image you have uploaded.
-
When you have selected the image, select Add.
-
Use the Layout section of the Hero menu to adjust the size and layout of the Hero section.
-
Use the Content section to change the wording of the caption and title.
Create a tile menu
Tile menus display a set of image tiles with links to different pages or sites. The tile menus provided as part of the default template are coded in HTML. You can change these custom tile menus by editing HTML directly, or you can create your own tile menu components.
To edit the HTML for a default tile menu (advanced):
-
In the Builder, select the HTML component, then select Edit Markup in the HTML Editor panel.
-
The HTML Editor is shown.
-
Update the HTML by changing text, asset names, and other elements as required.
Note Editing HTML is for advanced users only. -
When you have finished editing, select Save.
To create your own custom tile menu component:
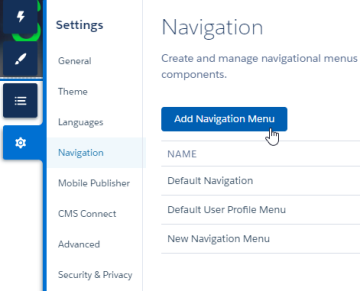
- In the Builder, select the Settings icon.
-
Select Navigation, then Add Navigation Menu.
-
Create your tiles using the menu editor. Enter a Menu Name for the tile menu element, then select + Add Menu Item to add each tile.

-
For each tile, complete the fields:
Field What to enter Name Enter a name for the tile menu component. Type Select the action associated with choosing this tile menu item. For example, to link to a specific external URL, select External URL. To link to another page within the Candidate Experience Portal, select Site Page.
Configure the appropriate settings depending on the action type you have selected, for example by defining a URL or selecting a Candidate Experience Portal page.
Publicly available Select this if the tile is to be visible to users who aren't logged in. Optional > Image Select the image to upload an image or select an image from the Asset Library. -
Drag menu items in the list to reorder them if required.
- Select Save Menu.
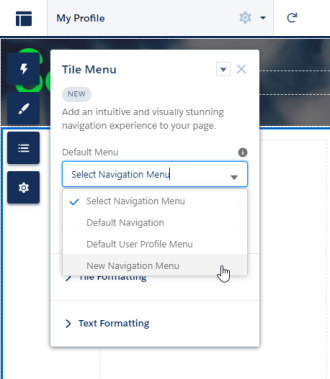
- Open the Components menu, and drag the Tile Menu component to your page.
- In the Tile Menu panel, select the Default Menu you have created.
Make the home page public
-
Go to Setup > Feature Settings > Digital Experiences > All Sites.
-
For the Candidate Experience Portal site select Builder:
-
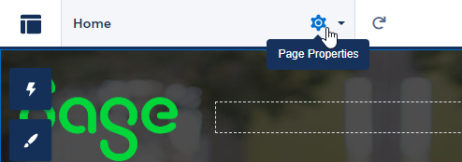
Select the Page Properties icon beside the Home menu item:
-
Set the Page Access setting to Public.
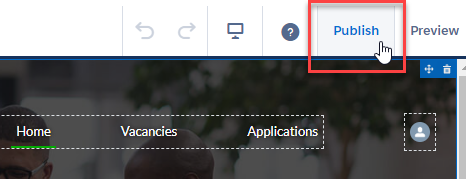
Make the page live
To make your changes live after editing a page in the Builder, select Publish at the top right of the screen.