Set up approval process
Sage People is typically configured with an approval process for Performance Reviews, called Performance Review HR Approval.
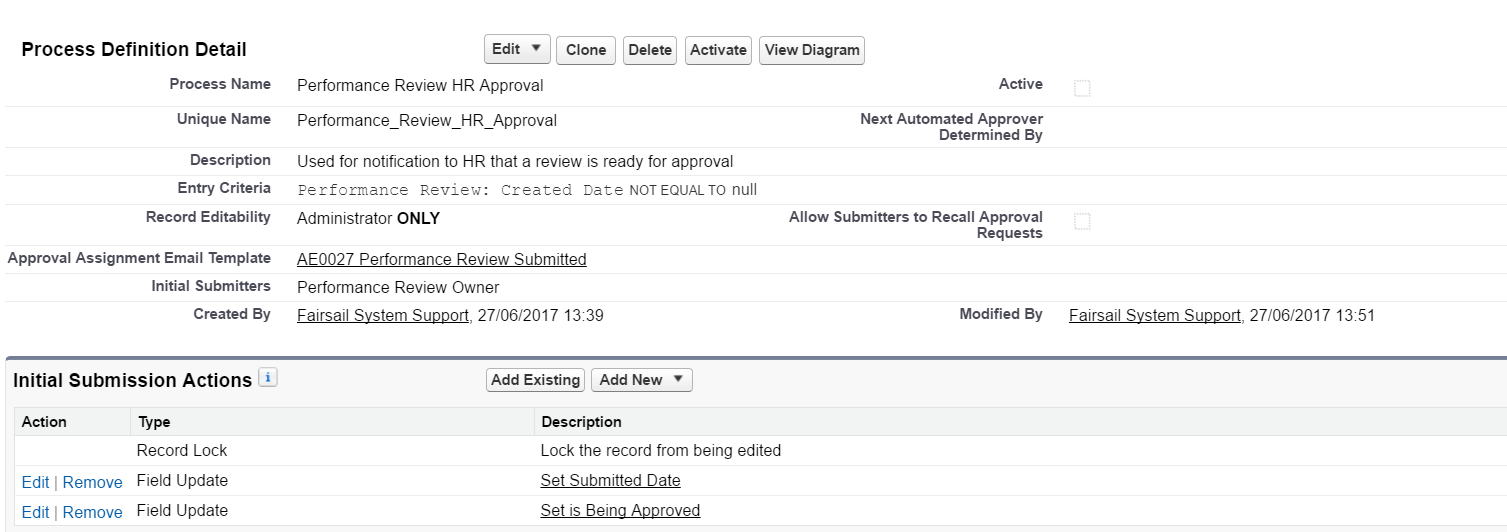
The following screenshot displays the definition detail for the standard approval process:
| Field | Standard value |
|---|---|
| Process Name | Performance Review HR Approval |
| Unique Name | Performance_Review_HR_Approval |
| Description | Used for notification to HR that a review is ready for approval |
| Entry criteria | Performance Review: Created Date NOT EQUAL TO null |
| Record Editability | Administrator Only |
| Approval Assignment Email Template | SF Performance Review Submitted |
| Initial Submitters | Performance Review Owner, Group: All Internal Users |
| Active | Not selected |
| Next Automated Approver Determined By | -- no value -- |
| Allow Submitters to Recall Approval Requests | Not selected |
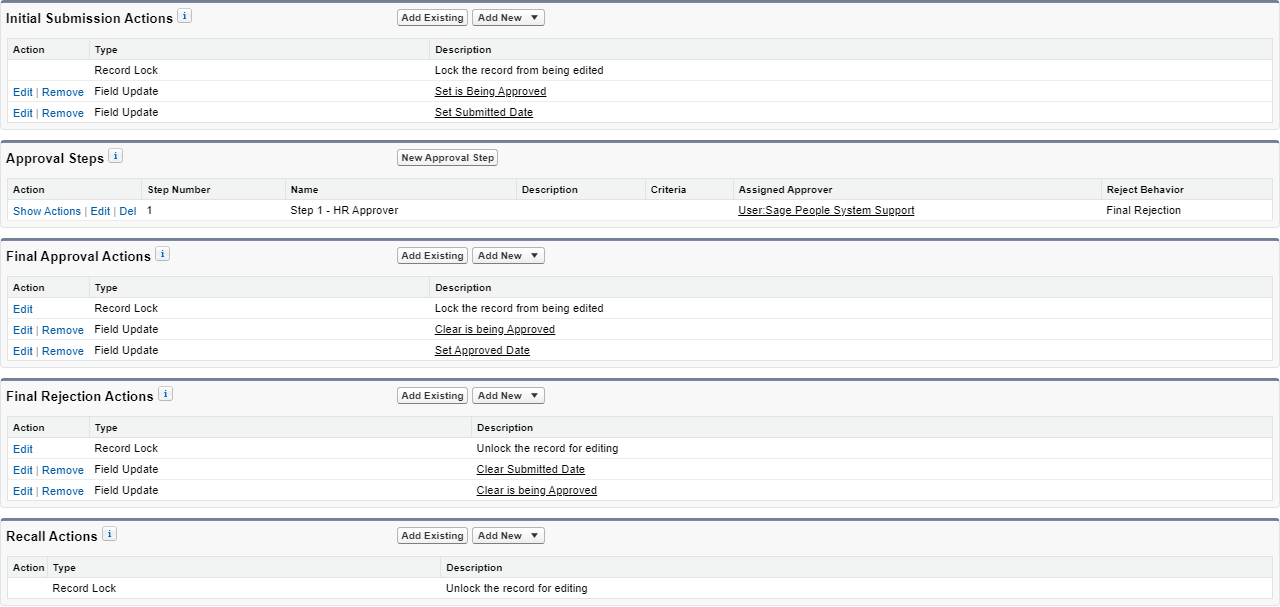
The following screenshot displays the approval actions and approval steps:
In summary:
-
Initial submission actions:
Action type Description Record Lock Lock the record from being edited Field Update Set the value of Is Being Approved Field Update Set the value of Submitted Date -
Approval steps
Step number Step name Assigned Approver Reject Behavior 1 Step 1 - HR Approver User: Sage People System Support Final Rejection -
Final approval actions:
Action type Description Record Lock Lock the record from being edited Field Update Clear the value of Is Being Approved Field Update Set the value of Approved Date -
Final rejection actions:
Action type Description Record Lock Lock the record from being edited Field Update Clear the value of Submitted Date Field Update Clear the value of Is Being Approved
Edit the standard Performance Review approval process
If you want to use the standard Performance Review approval process, you need to change the Assigned Approver from the Sage People System Support to a user responsible for these approvals.
-
Go to Setup, and in Quick Find enter approval and select Approval Processes from the search results.
-
In the Manage Approval Processes For: picklist, select Performance Review.
-
In the list of Inactive Approval Processes select Performance Review HR Approval from the Approval Process Name column.
If the Performance Review HR Approval is on the list of Active Approval Processes, first select Deactivate, and then select the approval process from the list of Inactive Approval Processes.
Sage People displays the Approval Processes Detail page for the Performance Review HR Approval process.
-
Go to the Approval Steps related list section:
-
Select Edit next to Step Number 1.
Sage People displays Step 1 of the Approval Step Edit process.
-
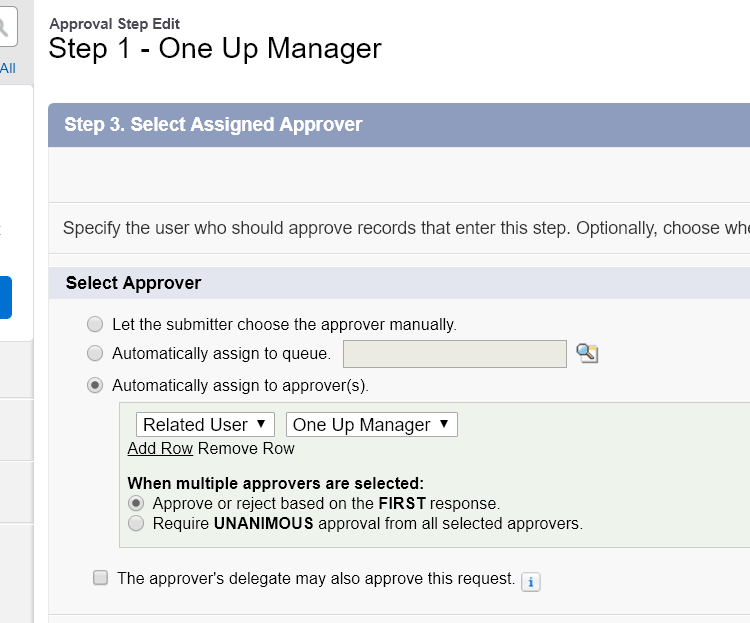
Select Next until you are viewing Step 3 of the Approval Step Edit process.
-
In the Select Approver section, select Automatically assign to approver(s).
Use lookup to find and select the User who is responsible for final approval.
-
Select Save.
-
Review the Process Definition Detail section and verify the Initial Submitters selected. This is typically set to Performance Review Owner and the All Internal Users public group. If you do not see the All Internal Users group, it is a good idea to add it to ensure the approval process works well in all situations:
-
In the Process Definition Detail section, select Edit and then select Initial Submitters.
-
Select the Submitter Type picklist and then select Public Groups from the picklist.
-
In the Available Submitters panel, select Group: All Internal Users and then select Add to move to the Allowed Submitters panel.
-
Select Save.
-
-
On the Process Definition Detail page, select Activate.
Sage People displays a confirmation screen. Select OK.
Edit the email template used in the approval template
The standard approval process for performance review HR approval is configured to send an email when the approval action is assigned to the approver.
-
To amend the email template:
-
Go to Go to Setup, and in Quick Find enter email, and select Classic Email Templates from the search results.
-
Select Folder and choose HCM General from the picklist.
-
Select Edit for the email template, typically SF Performance Review Submitted.
-
-
Select HCM General from the Folder list.
-
Make the changes you want, and then select Save. For more information about email templates, see Creating an email template.
For other events related to Performance Reviews, actions are created on WX as they become due and will be noted in the Action Digest.
Configure the approval process for one up manager approvals
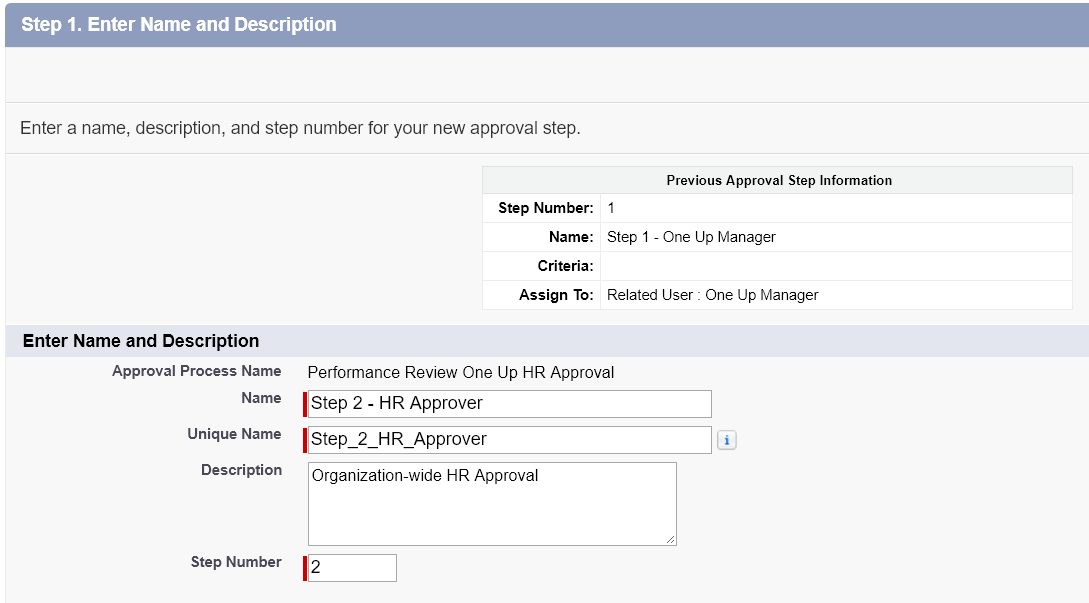
To configure the approval process for one up manager approvals:


