When you have added a language to the list of Displayed Languages, you can add that language to your org so that you can support it with translations.
-
Go to Translation Language Settings:
-
in Salesforce Lightning Experience, go to Setup > Platform Tools > User Interface > Translation Workbench > Translation Language Settings
-
in Salesforce Classic interface, go to Setup > Administration Setup > Translation Workbench > Translation Language Settings
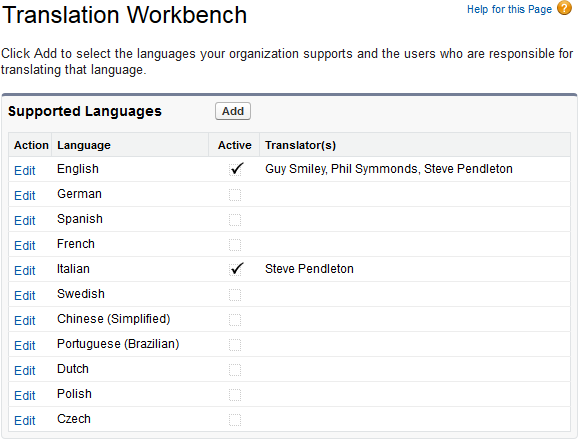
Sage People displays the list of Supported Languages for your organization:

The default list of Supported Languages includes all those supplied with the Sage People managed packages to which you subscribe, and may therefore be different for different organizations.
If a language is listed here, you can customize it by adding a user as a translator, and then getting that user to log in and make the changes you want.
-
-
Select Add.
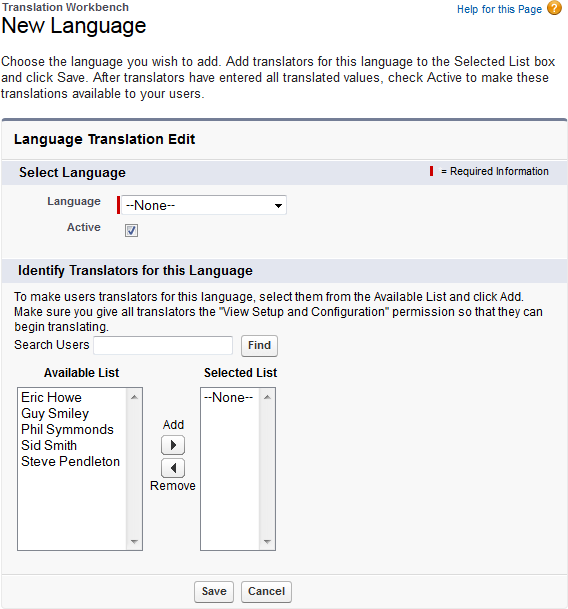
Sage People displays the New Language page:

-
Select the Language picklist and select the language you want to add.
Languages in the picklist are all those:
- In the table of Available Languages on the Language Settings page.
AND
- In the table of Displayed Languages on the Language Settings page.
EXCEPT
- The languages already selected as Supported Languages.
- In the Identify Translators for this Language section select one or more displayed users from the Available List or use Search Users to find one, then select Add to move them to the Selected List.
-
Select Save.
-
Make sure all translators have the View Setup and Configuration permission, either through their:
- Profiles, Administrative Permissions
OR
- Permission Sets, System Permissions