Role: HR Administrator
To create a new Email Template for Performance Management action emails:
-
Go to:
-
In Salesforce Classic interface: Setup > Administration Setup > Communication Templates > Classic: Email Templates.
-
In Salesforce Lightning Experience: Setup > Administration > Email > Classic Email Templates.
-
-
Select New Template.
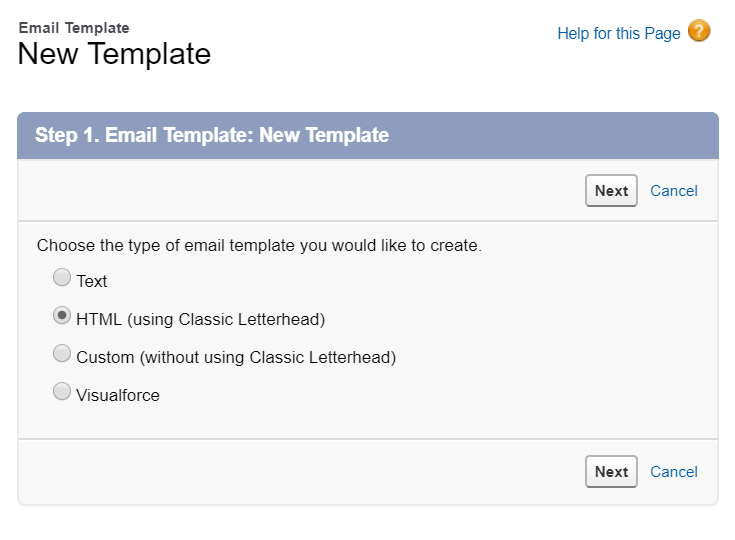
Sage People displays Step 1 of the New Template wizard:
-
Select the type of Email Template you want to create:
-
Text
The simplest form of email template.
-
HTML (using Classic: Letterhead)
An HTML template based on a predefined letterhead. You must have an active Letterhead to create this type of Email Template.
-
Custom (without using Classic: Letterhead)
An HTML template created from HTML code without using a predefined letterhead.
-
Visualforce
Suitable for more complex email templates requiring advanced merging with a recipient's data and information from multiple records. You need to be familiar with Visualforce, the user interface framework for the Salesforce platform.
The pages displayed after this point depend on the selection you make. This procedure covers creating a Template in HTML (using Classic: Letterhead).
-
-
Select Next.
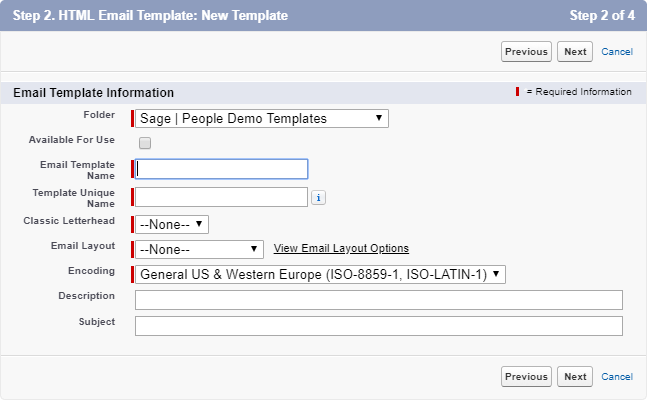
Sage People displays Step 2 of the New Template wizard:
-
Complete the fields as follows:
Field Description Folder
Picklist. Select the picklist and choose the folder you want to store the template. The folder must be accessible to all users you intend to use the template.
Available For Use
Checkbox. If checked, the Email Template can be selected for use as the basis for an email.
Email Template Name
Text. A meaningful short name for the template. If you have several templates, use a name making the template easy to identify. Use Description to expand on the Template Name and clarify its purpose.
Template Unique Name Text. Automatically created by Sage People when you enter the Email Template Name. The Template Unique Name is used to refer to the template through the API and prevents naming conflicts on package installation.
You should not need to change this value, but if you do, ensure the name:
-
Is unique within your Salesforce organization.
-
Begins with a letter.
-
Contains only alphanumeric characters and underscores, and does not include spaces or two consecutive underscores.
-
Does not end with an underscore.
Classic Letterhead
Picklist. The pre-defined Letterheads you have available. Select the picklist and choose the Letterhead you want to use with this Template.
Email Layout
Picklist. The overall design you want to use to lay out the content of the email template. Select the picklist and choose the layout you want. To view simplified previews, select View Email Layout Options beside the input field.
Encoding
Picklist. The character set to be used by the template. Do not change this unless you have a good reason for doing so.
Description
Text. The purpose of the template. Enter a description other users will find helpful to correctly identify the template.
Subject
Text. The subject line you want to use for emails based on this template. Enter text summarizing the email and helping ensure it is noticed and read by recipients.
You can also enter merge fields in Subject.
-
-
Select Next.
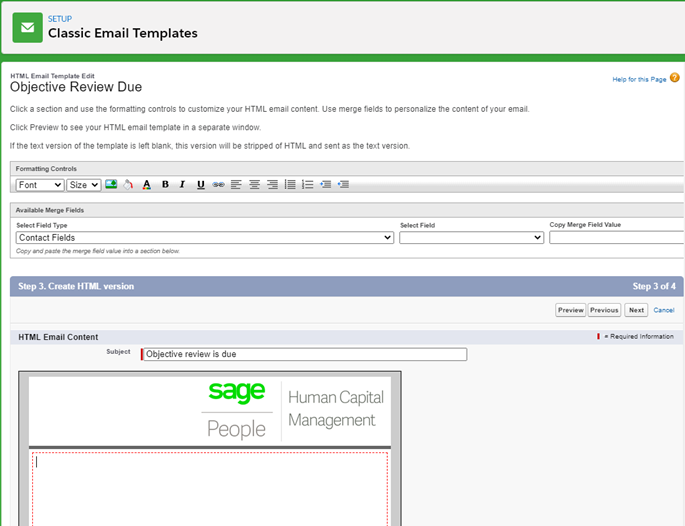
Sage People displays Step 3 of the New Template wizard using the options you selected in Step 2 of the Wizard:
-
Build the content of the Email Template:
-
Select a section on the layout and use the formatting controls above to configure your content:

-
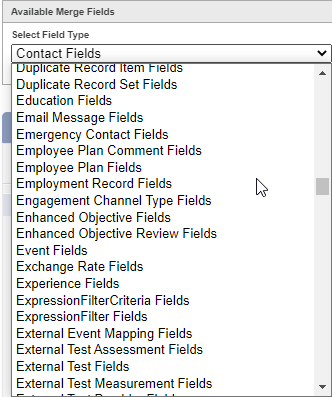
To insert Merge Fields into your Template use the Merge Field selector:

-
Select the Object hosting the Field you want to merge:
-
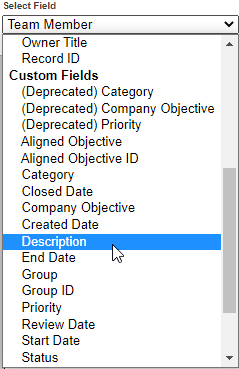
Select the Field:
-
Copy the Merge Field Value:

-
Paste the Merge Field value into the Template:
 Note
NoteTo access fields in the Feedback Request object, you need to start from the Feedback Provider object. For example, if you want to add the Due Date field into an email template, use the following syntax for the merge field value:
{!spperfmgmt__Feedback_Provider_v2__c.spperfmgmt__Feedback_Request__r.spperfmgmt__Due_Date__c}
-
In addition to Merge Fields, Performance Management provides a number of shortcut variables for substitution:
Variable Description Related Action Events {!authoredBy} The name of the person giving feedback, either a colleague in the organization or an external contact.
Feedback: Received Send to Manager
Feedback: Received Send to Team Member
{!commentUrl}
The URL to the comment in the Conversation.
Comment: Added Send to Manager
Comment: Added Send to Team Member
{!feedbackRequestUrl} The URL to the feedback request for a recipient in your organization. Feedback Request: Incoming {!objectiveReviewUrl} The URL to the Objective review. Enhanced Objective: Review Date
Enhanced Objective: Reviewed Send to Manager
Enhanced Objective: Reviewed Send to Team Member
{!objectiveUrl} The URL to the Objective revealed or closed. Enhanced Objective: Closed Send to Manager
Enhanced Objective: Closed Send to Team Member
Enhanced Objective: Revealed Send to Manager
Enhanced Objective: Revealed Send to Team Member
{!questionCount} The number of questions in a feedback request. Feedback Request: Incoming {!requester} The creator of the feedback request.
Equivalent to {!spperfmgmt__Feedback_Request__c.spperfmgmt__Requester__c}
Feedback Request: Incoming {!subject} The Team Member to give feedback about.
Equivalent to {!spperfmgmt__Feedback_Request__c.spperfmgmt__Subject__c}
Feedback Request: Incoming
{!subjectName} The Team Member about whom feedback was received.
Equivalent to {!spperfmgmt__Feedback_Request__c.spperfmgmt__Subject__c}
Feedback: Received Send to Manager {!title} The title given to the feedback request by its creator.
Equivalent to {!spperfmgmt__Feedback_Request__c.spperfmgmt__Title__c}
Feedback Request: Incoming
{!url} The URL to the feedback request for an external recipient.
Feedback Request: Incoming
-
-
Select:
-
Preview
To display a preview of the Template in a new browser window. The preview includes any Merge Field names as you inserted them and not substituted values. Use the preview to check the overall layout of the Template. If you make changes to the Template you must close the existing Preview window and select Preview again to include your changes in a new Preview.
-
Previous
To redisplay Step 2 of the New Template Wizard.
-
Next
To display Step 4 of the New Template Wizard.
Sage People displays your chosen option.
-
-
Step 4 of the New Template Wizard enables you to create a customized text only version of the email template for display by recipients who cannot view the HTML version.
-
If you leave the text only version blank, Sage People automatically creates a text only version derived from the HTML version. Any changes you make to the HTML version are included in the automatically created text only version.
-
If you create your own text only version it will not be modified to include any changes you make to the HTML version.
-
To base your text only version on the HTML version, select Copy text from HTML version.
Sage People asks you to confirm:
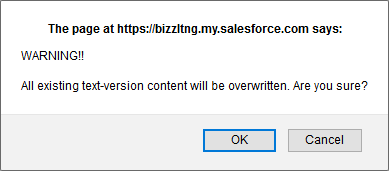
Select OK.
All text content from the HTML version is copied, including any Merge Fields.
You can also add Merge Fields to your text only template using the Select Field Type, Select Field, and Copy Merge Field Value fields at the top of the page in the same way as the HTML version.
-
-
Select Save.
Sage People displays the Email Template Detail page for the Template you have created.
-
Check the template is as you want it. To test the template and validate the merge fields, select Send Test and Verify Merge Fields.
-
When the Template is complete, return to the Classic Email Templates home page and select Edit for the template, or select Edit Properties from the Email Template Detail page.
Sage People displays the Email Template Edit page.
-
Select the Available For Use checkbox.
-
Select Save.
Your Email Template is now ready for use.