Custom action events let you receive email notifications when you create or update a record. They let you do this when no standard action events exist. You can do this in Sage People using Salesforce Flows.
Create a custom action event
-
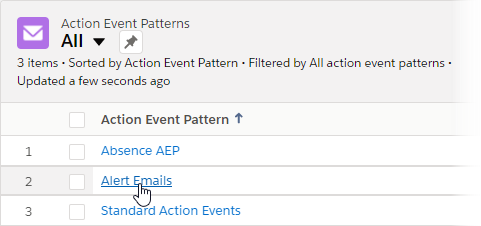
Select the Action Event Patterns tab then select a view showing the action event pattern you want.
-
Select the Action Event Pattern name:
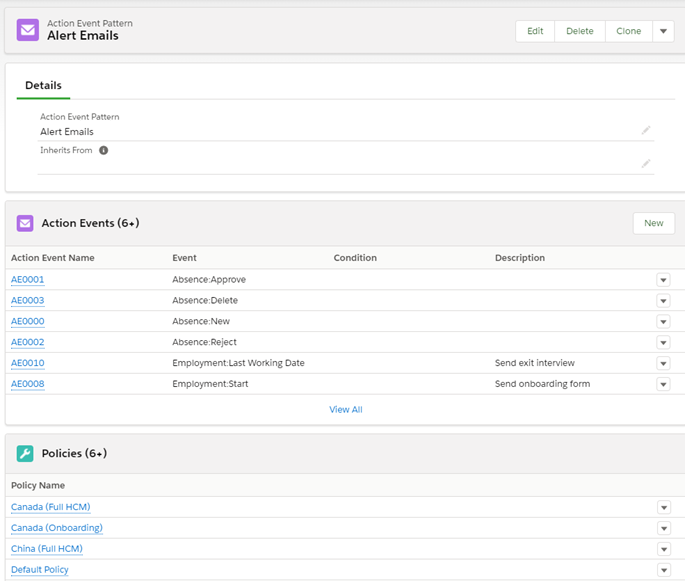
Sage People displays the Action Event Pattern Detail page:
-
In the Action Events section, select New:
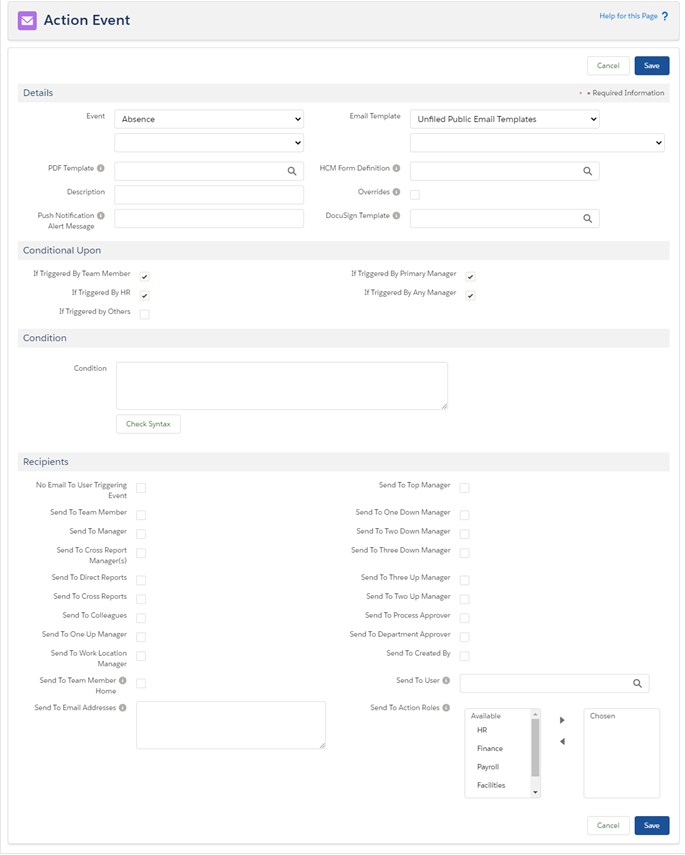
Sage People displays the Action Event page:
This page enables you to define for each action event:
-
The trigger event.
-
The conditions to meet for the event to send.
-
Who is to receive it.
-
-
Complete the Event field as follows:
-
Select the Event picklist and choose Custom
-
Select the second picklist and choose ?
-
Sage People displays a new text field below the picklist
-
Enter a name for the event. The Flow uses this name
-
-
Select the Email Template to use when sending the email. If you need a new email template for this action event, first create it, and then select it.
-
Scroll to the Recipients section and select the recipients you want to notify.
-
Select Save.
Example: Create a Flow for email notification when an HR request is approved
For more information about Flows, see the overview.
-
From Platform Tools, select Process Automation then select Flows.
-
Select New Flow.
Sage People displays the New Flow dialog.
-
Select Record-Triggered Flow and then select Create.
-
On the Configure Start screen:
-
Select Object and start typing the name of the object—in this example, HR Request. Select HR Request.
-
For Configure Trigger, select A record is created or updated.
-
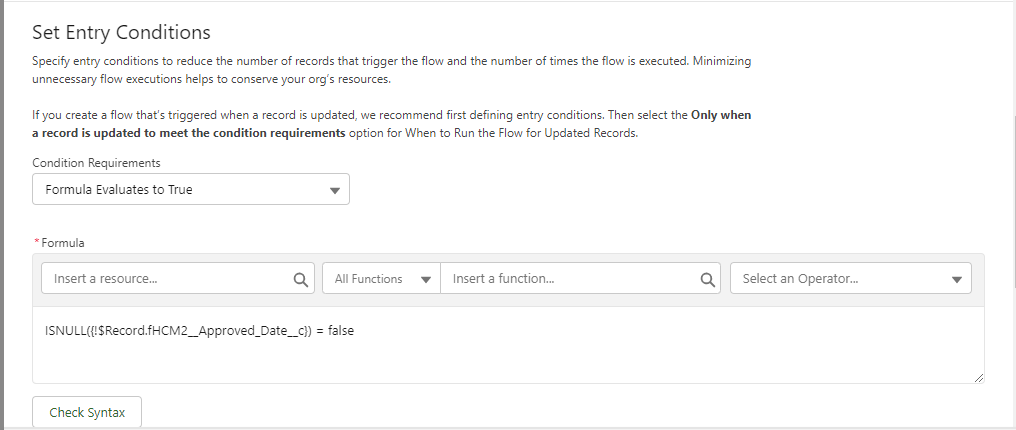
For Set Entry Conditions, consider if you need an entry condition for the Flow. Then select Condition Requirements and choose the most appropriate option. Use the picklists, text area, and the Check Syntax button to enter a valid entry condition.
For example, you can define only HR Requests with an Approval Date entered can enter the Flow. This screenshot shows this option:
-
For When to Run the Flow for Updated Records, select Every time a record is updated and meets the condition requirements.
-
For Optimize the Flow for: select Actions and Related Records.
-
-
Select Done.
Sage People displays the Flow Builder canvas.
-
On the canvas, select + between the Start and End elements to add an element.
-
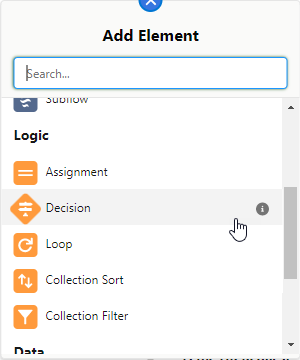
Select Decision:
-
On the New Decision dialog, enter a Label and an optional Description. The system completes the API Name based on the Label.
For example:
Label: Is the HR Request approved?
Description: Determines if the HR Request is approved
-
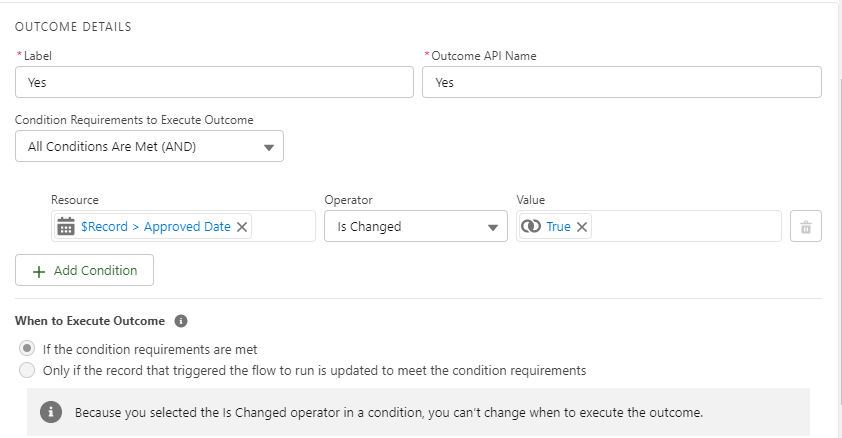
In the Outcomes section, enter a Label for Outcome Details. The system completes the Outcome API Name based on the Label.
For example: Yes
-
Complete the other details as follows:
-
For Condition Requirements to Execute Outcome, select All Conditions Are Met.
-
Use the Resource, Operator, and Value fields to enter conditions. Use Add Condition to add more conditions if required.
For example:
Resource Operator Value {!$Record.fHCM2__Approved_Date__c} Is Changed {!$GlobalConstant.True} -
For When to Execute Outcome, the system selects the option If the condition requirements are met if you use the Is Changed operator.
-
-
On the sidebar, select Default Outcome.
-
Change the Label of the default outcome to something more meaningful for this Flow, such as Not approved.
-
Select Done.
-
On the Flow Builder canvas, in the Yes decision branch, select + to add an element.
-
Select Action.
-
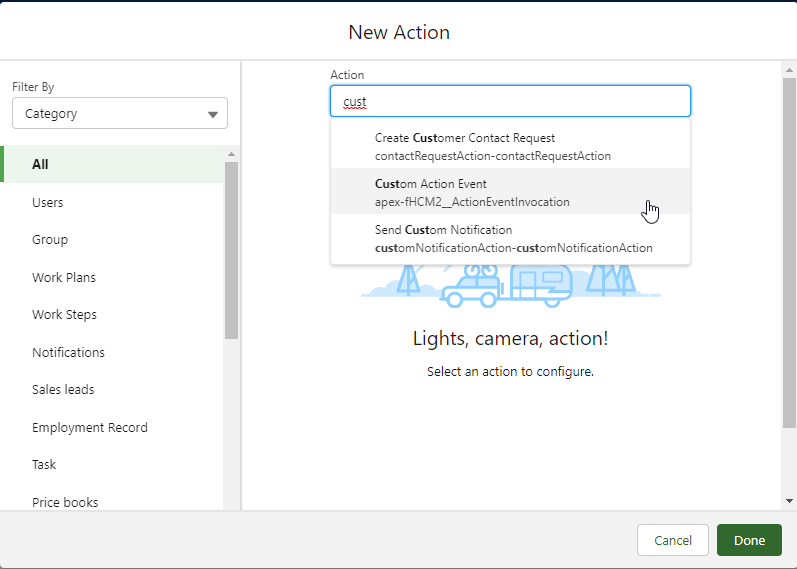
On the New Action dialog, select Action and start entering "custom":
-
Select Custom Action Event.
-
Enter a Label and an optional Description for the action. The system automatically completes the API Name based on the Label.
For example:
-
Label: Custom HR Request action event
-
Description: Sends an email notification when an HR Request is approved
-
-
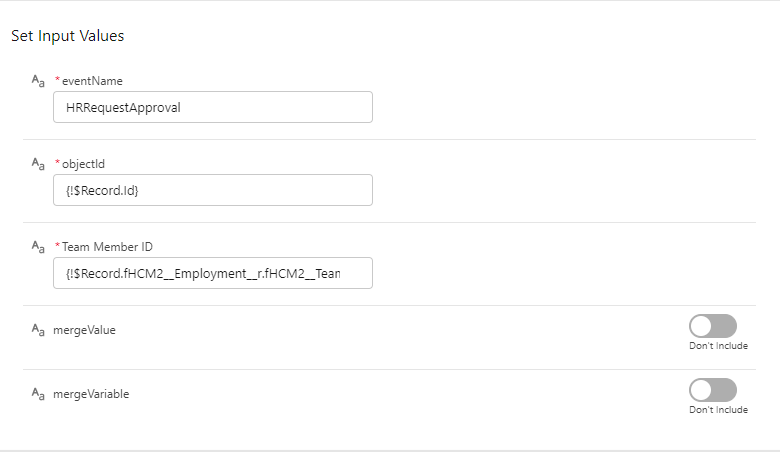
Complete the fields in the Set Input Values section as follows:
Field What to enter eventName The name of the event you entered when you created the custom Action Event. objectId {!$Record.Id} Team Member ID {!$Record.fHCM2__Employment__r.fHCM2__Team_Member__r.Id} Leave other fields at default values:
-
Select Done.
-
On the Flow Builder canvas, select Save to give the Flow a name and save it.
-
Select Activate to make the Flow active. You can use the debug option for checking the Flow before you activate.
