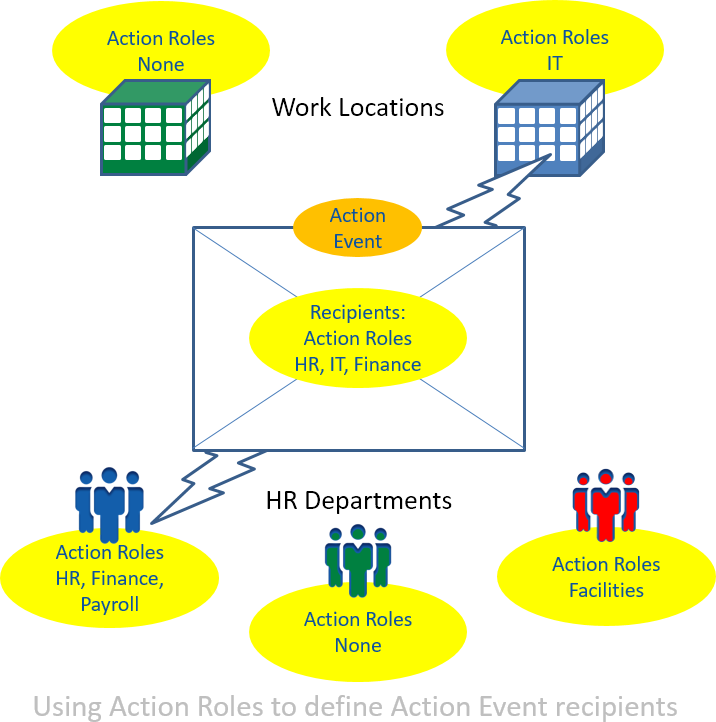
An action role is a type of recipient for an action event. Action roles extend the range of recipients, enabling you to add individuals or groups associated with HR departments and work locations. Action roles map to users or email addresses.
By assigning action roles to HR departments and work locations, you can ensure a triggered action event is sent to all HR departments and work locations with action roles matching those defined for the action event.
Follow this sequence:
-
Make sure an appropriate set of action roles is defined for your organization.
-
Assign action roles to HR departments and work locations.
-
Add action roles to the list of recipients for the action events you want to use.
Editing available action roles
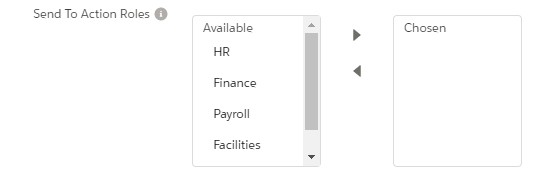
The Action Event Details page includes a list of action roles you can set as recipients:
To change the names of the action roles, remove roles, or extend the list with your own roles, modify the two picklists:
-
The Role picklist on the Action Role object.
-
The Send To Action Roles picklist on the Action Event object.
Ensure the two picklists have identical entries; spelling must be identical for each role to enable the action events to be sent.
-
Go to Setup > Object Manager, and select the Action Role object.
Sage People displays the Custom Object Definition Detail page for Action Role.
-
From the sidebar, select Fields & Relationships, and then select the Role field.
Sage People displays the Custom Field detail page for Role.
-
Scroll down to the picklist Values section.
-
Select:
-
Edit to change the name of an existing value and to set one value as the default for the picklist
-
Del to delete a value. You are asked to confirm.
-
New to add one or more values to the picklist.
Sage People displays the Add Picklist Values page. Add the values you want, one per line, and select Save.
-
-
Return to Object Manager and select Action Event object.
Sage People displays the Custom Object Definition Detail page for Action Event.
-
From the sidebar, select Fields & Relationships, and then select the Send To Action Roles field:
Sage People displays the Custom Field detail page for Send To Action Roles.
-
Scroll down to the picklist Values section.
-
Select:
-
Edit to change the name of an existing value and to set one value as the default for the picklist
-
Del to delete a value. You are asked to confirm.
-
New to add one or more values to the picklist.
Sage People displays the Add Picklist Values page. Add the value(s) you want, one per line, and select Save.
-
Assigning action roles to HR departments and work locations
You can assign action roles to one or more HR departments and work locations.
Action roles are displayed as related lists on the detail pages for each HR department and work location:

If the Action Roles related list is not displayed, add it to the page layout:
-
On the HR department or work location detail page, select Setup, then select Edit Object.
-
On the object detail page, select Page Layouts from the sidebar and choose the layout you want to edit.
-
Select Related Lists in the list at the left to display all related lists available for the page.
-
Drag and drop Action Roles from the available list to the related lists section on the page layout.
-
Select Save.
To add a new action role to the HR department or work location:
-
From the Action Roles related list, select New.
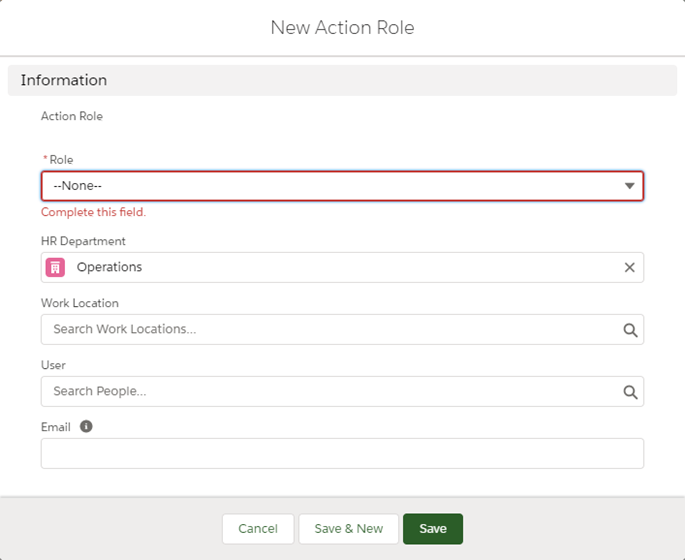
Sage People displays the New Action Role page:

-
Complete the fields as follows:
Field Description Role The action role you want to assign to this HR department or work location.
Select the picklist and the choose the one you want.
HR Department If you are adding an action role for an HR Department, automatically completed for you with the name of the HR Department from which you selected New.
To change to another HR department, select HR Department lookup
 , find and select the HR department.
If you are adding an action role for a work location, leave blank.
, find and select the HR department.
If you are adding an action role for a work location, leave blank.Work Location If you are adding an action role for a work location, automatically completed for you with the name of the work location from which you selected New.
To change to another work location, select Work Location lookup
 , find and select the work location.
If you are adding an action role for an HR department, leave blank.
, find and select the work location.
If you are adding an action role for an HR department, leave blank.User The name of the user you want to receive action events for this action role, for this HR department or work location.
Select User lookup
 , find and select the user.
Email The full email address you want to receive action events for this action role, for this HR department or work location. Be aware: all action events sent to this address count towards your organization's daily email limit; if possible, use User. - Select Save.
The role is added to the list of action roles for this HR department or work location. Action events with this action role defined as a recipient are now sent to the user or email address you have given.

