You can translate individual picklist values using the Translate functionality in Translation Workbench. For example, if you have created custom absence reasons in your org and want to make them available in your organization's other languages, Translate enables you to add the translations.
To translate a picklist value:
-
Go to Setup, and in Quick Find enter translate and select Translate from the search results.
-
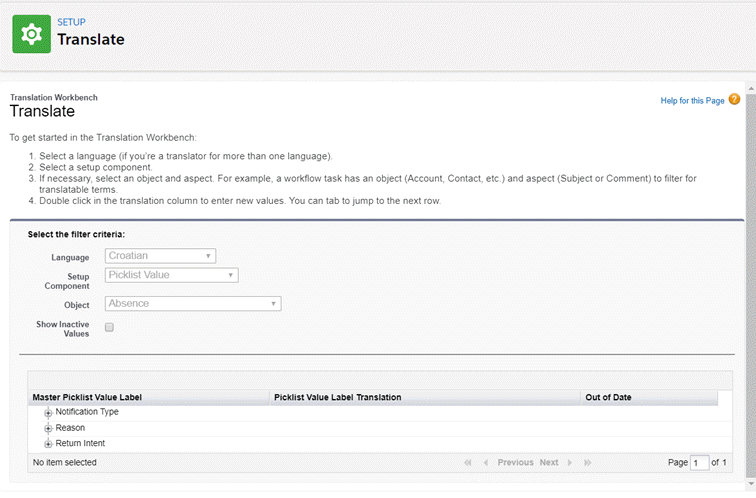
On the Translate page, filter to go to the picklist values:
Field Description Language Select the language to translate to. Setup Component Select Picklist Value. Object Select the Object where you want to translate picklist values. For example, if you want to translate your custom absence reasons, select Absence. Sage People displays the picklists associated with the selected object in a table below the filters:

-
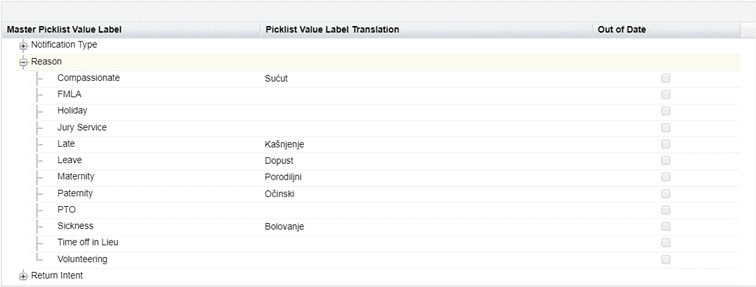
In the Master Picklist Value Label column, select the plus + icon next to a picklist to display all the picklist values:

Sage People displays all values in the picklist. Existing translations for each picklist value are displayed in the Picklist Value Translation column:

-
Select the Picklist Value Translation column for the value you want to translate and enter the translation. If you have multiple values to translate, repeat for the other values. When you have added all the translations for this picklist in this language, select Save.
Sage People now uses the translations you entered in the selected language.
Repeat these steps for any other languages where you need translations